Oh, hello there! Come on in, grab a mug. I’ve been waiting to share this with you. You know how sometimes you get a craving, a deep, soul-satisfying yearning for something sweet, something rich, something utterly decadent? For me, that craving almost always leads me straight to peanut butter fudge. It’s not just any fudge, mind you. This is the stuff of my childhood, the treat that made rainy afternoons feel like parties, and the little square that’s become my go-to for impressing guests without breaking a sweat. Forget those complicated candy thermometer recipes that have you holding your breath; this peanut butter fudge is ridiculously simple and, dare I say it, even better than the fancy stuff. It’s the kind of recipe that makes you feel like a baking rockstar, even if you’re just whipping it up on a Tuesday. Seriously, if you’ve ever thought fudge was too fussy, this one’s going to change your mind forever. It’s a true game-changer when you need a little bit of sweet magic in your life, fast!
What is peanut butter fudge?
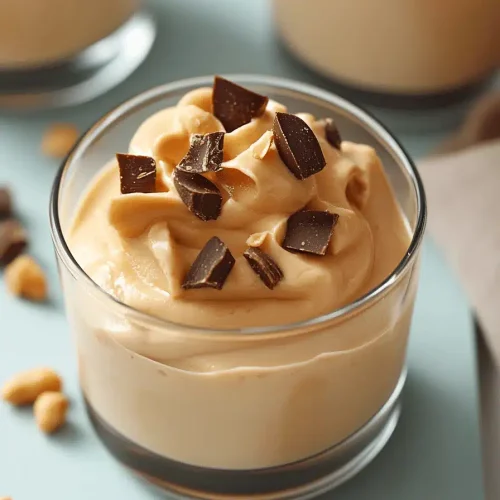
So, what exactly is this magical concoction we’re talking about? Think of it as the ultimate comfort food in solid form. At its heart, peanut butter fudge is a rich, creamy, intensely flavored candy made primarily from peanut butter, sugar, and a liquid binder. It’s that perfect balance of sweet and salty, smooth and slightly dense, with that unmistakable nutty aroma that just makes your mouth water. It’s not like the gritty, sugary fudge you sometimes find in tourist shops; this one is velvety smooth and melts in your mouth. The “fudge” part comes from the way the ingredients are cooked and then allowed to cool, which creates its signature soft, yet firm, texture. It’s essentially pure joy condensed into bite-sized pieces. It’s the kind of treat that doesn’t need any fancy decorations or accompaniments – it’s perfect all on its own. It’s like the edible equivalent of a cozy blanket and a good book on a chilly evening.
Why you’ll love this recipe?
What are some of the best reasons to make peanut butter fudge?flavor is just out of this world. It’s that classic, irresistible combination of sweet, creamy peanut butter that hits all the right notes. It’s intensely peanut buttery, with just the right amount of sweetness to balance it out – never too much, never too little. Then there’s the simplicity. This is where this recipe truly shines. You don’t need a candy thermometer, you don’t need a double boiler, and you certainly don’t need to spend hours fussing over it. It comes together in under 15 minutes of active cooking time, and the rest is just waiting for it to set. It’s a lifesaver when you need a last-minute treat for unexpected guests or a sweet pick-me-up after a long day. Plus, it’s incredibly cost-efficient. The ingredients are pantry staples for most of us – butter, sugar, peanut butter, milk – making it a budget-friendlyversatility! While it’s perfect as is, you can easily add a sprinkle of sea salt on top for an extra pop, or even stir in some chocolate chips for a decadent twist. It’s my go-to for bake sales because it travels so well and always gets rave reviews. What I love most about this peanut butter fudge is that it tastes like pure homemade love, but it’s so easy, you’ll feel like you’ve unlocked a secret shortcut to deliciousness. It’s a winner, hands down.
How to Make Peanut Butter Fudge
Quick Overview
This peanut butter fudge recipe is all about speed and simplicity. We’re basically melting butter, stirring in sugar and milk, boiling it for just a few minutes, then beating in peanut butter and vanilla until it’s wonderfully creamy and pourable. You’ll pour this glorious mixture into a prepared pan and let it set. That’s it! The magic lies in the precise cooking time to achieve that perfect fudge texture without any fuss. It’s the kind of recipe that reassures you that delicious homemade treats don’t have to be complicated.
Ingredients
For the Main Fudge Base:
* 1/2 cup (1 stick) unsalted butter: I always use unsalted because it gives me more control over the saltiness, but salted butter works in a pinch if that’s what you have. Make sure it’s good quality butter; it really makes a difference in flavor.
* 2 cups granulated sugar: This is your sweetener. Don’t skimp! A good amount of sugar is what gives fudge its structure and that classic sweet taste.
* 1/2 cup milk (whole or 2% recommended): I’ve tried this with almond milk and it actually made it even creamier! Whole milk gives it a classic richness though. Make sure it’s not too cold when you add it.
* 1 teaspoon vanilla extract: Pure vanilla extract, please! It adds that lovely depth of flavor that really rounds out the peanut butter and sugar.
* 1 ½ cups creamy peanut butter: This is the star! Use your favorite creamy peanut butter. The standard Jif or Skippy works beautifully. Natural peanut butter can sometimes separate, so give it a really good stir before measuring. I find the oil-roasted ones give the best flavor and texture here.
Step-by-Step Instructions
Step 1: Preheat & Prep Pan
First things first, grab an 8×8 inch baking pan. You’ll want to line it with parchment paper, leaving a little overhang on the sides. This makes lifting the fudge out so much easier later – no stuck bits! I usually grease the pan lightly before I put the parchment in, just to be extra sure. This step is super quick, but it’s key for a clean release.
Step 2: Mix Dry Ingredients
In a medium-sized, heavy-bottomed saucepan (this is important to prevent scorching!), combine your butter, granulated sugar, and milk. Place this over medium heat. Stir constantly with a wooden spoon or heat-proof spatula until the butter is completely melted and the sugar has dissolved. You’ll know the sugar is dissolved when the mixture looks smooth and clear, not grainy.
Step 3: Mix Wet Ingredients
Once the sugar is dissolved and the butter is melted, bring the mixture to a rolling boil over medium heat. What I always do now is start my timer for exactly 4 minutes. Don’t stir during this boiling phase; just let it bubble away. This stage is crucial for the fudge to set properly. Keep a close eye on it so it doesn’t boil over!
Step 4: Combine
After the 4 minutes are up, immediately remove the saucepan from the heat. Now, add in your creamy peanut butter and vanilla extract. This is where the magic happens! Stir vigorously until the peanut butter is completely melted and incorporated, and the mixture is smooth and glossy. The color will deepen beautifully. It’s important to stir until it’s really well combined; you don’t want streaks of peanut butter.
Step 5: Prepare Filling
(This step is actually integrated into Step 4 for this particular fudge, as the peanut butter is part of the main mixture.)
Step 6: Layer & Swirl
As soon as the fudge mixture is smooth and creamy, carefully pour it into your prepared pan. Use your spatula to spread it evenly. You don’t want to swirl anything here, as it’s a uniform mixture. The goal is just a nice, even layer.
Step 7: Bake
This peanut butter fudge doesn’t get baked in the oven! It sets up on the counter. So, no need to preheat your oven for this part.
Step 8: Cool & Glaze
Now comes the hardest part: waiting! Let the fudge cool in the pan at room temperature for at least 2-3 hours, or until completely firm. You can speed this up slightly in the refrigerator if you’re in a real pinch, but I find it sets up best at room temp. For an extra touch, you can sprinkle a little flaky sea salt on top while it’s still slightly warm, just before it sets – it’s a total game-changer!
Step 9: Slice & Serve
Once the fudge is firm, use the parchment paper overhang to lift the entire block out of the pan. Place it on a cutting board. Using a sharp knife (running it under hot water and drying it can help get cleaner cuts), slice the fudge into small squares. I usually aim for about 1-inch pieces. This fudge is perfect served at room temperature.
What to Serve It With
While this peanut butter fudge is an absolute star on its own, it can definitely play well with others! For those early mornings when you’re craving something a little sweet with your coffee, a small square of this fudge is pure indulgence. It’s richer than a pastry but more satisfying. Imagine it alongside a strong black coffee or a creamy latte – the perfect start to a busy day. For a more leisurely brunch, I love to arrange small cubes of this fudge on a dessert platter alongside fresh berries and maybe some mini cheesecakes. It adds a touch of decadent sweetness without being overwhelming. It’s a fantastic counterpoint to the fresh fruit and lighter desserts. And, of course, as a dessert after dinner? It’s unbeatable. I often serve it with a tall glass of cold milk – a nod to childhood that never gets old. Or, if you’re feeling fancy, a scoop of vanilla bean ice cream makes for an absolutely divine pairing. For those cozy, quiet evenings when you just need a little something sweet, a piece of this fudge with a cup of herbal tea is pure bliss. My kids actually ask for this all the time when they need a little treat after school. It’s just that good!
Top Tips for Perfecting Your Peanut Butter Fudge
You know, I’ve made this peanut butter fudge more times than I can count, and I’ve learned a few things along the way that I think will really help you nail it every single time. First, when it comes to the peanut butter prep, make sure you’re using a standard creamy peanut butter and give it a good stir if the oil has separated. This ensures a smooth, consistent texture throughout your fudge. Don’t go for a natural peanut butter that’s super oily unless you’re prepared to stir it really, really well. For mixing advice, that 4-minute boiling window is absolutely critical. Too short, and it won’t set; too long, and it can become grainy or too hard. So, set a timer! I’ve learned this trick after years of making it – don’t stir the mixture while it’s boiling. Just let it do its thing. When it comes to swirl customization, while this recipe is primarily a uniform fudge, if you ever wanted to try a marble effect, you’d add a swirl of melted chocolate into the fudge mixture just before pouring it into the pan, then use a toothpick to swirl. For ingredient swaps, if you’re ever out of milk, I’ve successfully used half-and-half in a pinch, and it made it even richer. You can also experiment with different nut butters, but the flavor profile will change significantly. For baking tips, remember, there’s no actual baking involved! It sets at room temperature. Just ensure your pan is properly lined and greased for easy removal. If your kitchen is very warm, you might need to let it set a bit longer, or even pop it in the fridge for the last hour. And for glaze variations, while I love a sprinkle of flaky sea salt on top right after it’s poured, you could also drizzle a bit of melted chocolate over the top once it’s mostly set, or even mix in some mini chocolate chips into the fudge mixture itself right at the end. Trust me on the sea salt though, it’s divine!
Storing and Reheating Tips
One of the best things about this peanut butter fudge is how well it keeps! For room temperature storage, once the fudge is completely set and cut, I store it in an airtight container. It’ll stay perfectly delicious at room temperature for about 5-7 days. Just make sure the container is truly airtight to keep it from drying out. If your kitchen tends to be quite warm, it might soften a bit, but it will still be tasty. For refrigerator storage, if you live in a very humid climate or just want it to last a little longer, you can definitely store it in the fridge. Again, an airtight container is key. It should stay good in the fridge for about 10-14 days. It will be firmer when cold, so I often let it sit out for about 10-15 minutes before enjoying it if it’s been chilled. For freezer instructions, yes, you can freeze this fudge! Wrap individual pieces or a cut block tightly in plastic wrap, then in aluminum foil, and place in a freezer-safe bag or container. It’ll keep well in the freezer for up to 2-3 months. To thaw, simply transfer it to the refrigerator overnight, and then let it come to room temperature. For glaze timing advice, if you’re adding any finishing touches like sea salt or a chocolate drizzle, do that right after you pour the fudge into the pan, while it’s still warm and before it starts to set. This helps them adhere properly.
Frequently Asked Questions
Final Thoughts
So there you have it – my absolutely foolproof, incredibly delicious peanut butter fudge recipe. It’s one of those recipes that truly brings a smile to my face every time I make it, and even more so when I see the joy it brings to others. The simplicity, the rich flavor, and that melt-in-your-mouth texture make it an undeniable winner. It’s proof that you don’t need to be a master baker to create something truly special. If you’re a peanut butter lover like I am, you absolutely have to give this one a try. It’s perfect for birthdays, holidays, bake sales, or just because you deserve a little treat. If you enjoy this, you might also love my No-Bake Chocolate Peanut Butter Cookies or my classic Sugar Cookie recipe for more easy treats! I can’t wait to hear how yours turns out! Let me know in the comments below if you tried it, and if you added any of your own special touches. Happy baking!
peanut butter fudge
Ingredients
Main Ingredients
- 1 cup butter
- 1 cup creamy peanut butter
- 1 teaspoon vanilla extract
- 3.5 cups powdered sugar
Instructions
Preparation Steps
- Combine peanut butter, butter, and vanilla in a microwave-safe bowl and heat for 90 seconds. Stir until smooth and creamy.
- Gradually add powdered sugar to the mixture, stirring well to combine fully and achieve a smooth consistency.
- Grease an 8x9 inch pan or line it with parchment paper. Pour the fudge mixture into the pan and press down evenly.
- Refrigerate for at least 4 hours or until firm before cutting into 48 one-inch squares.