
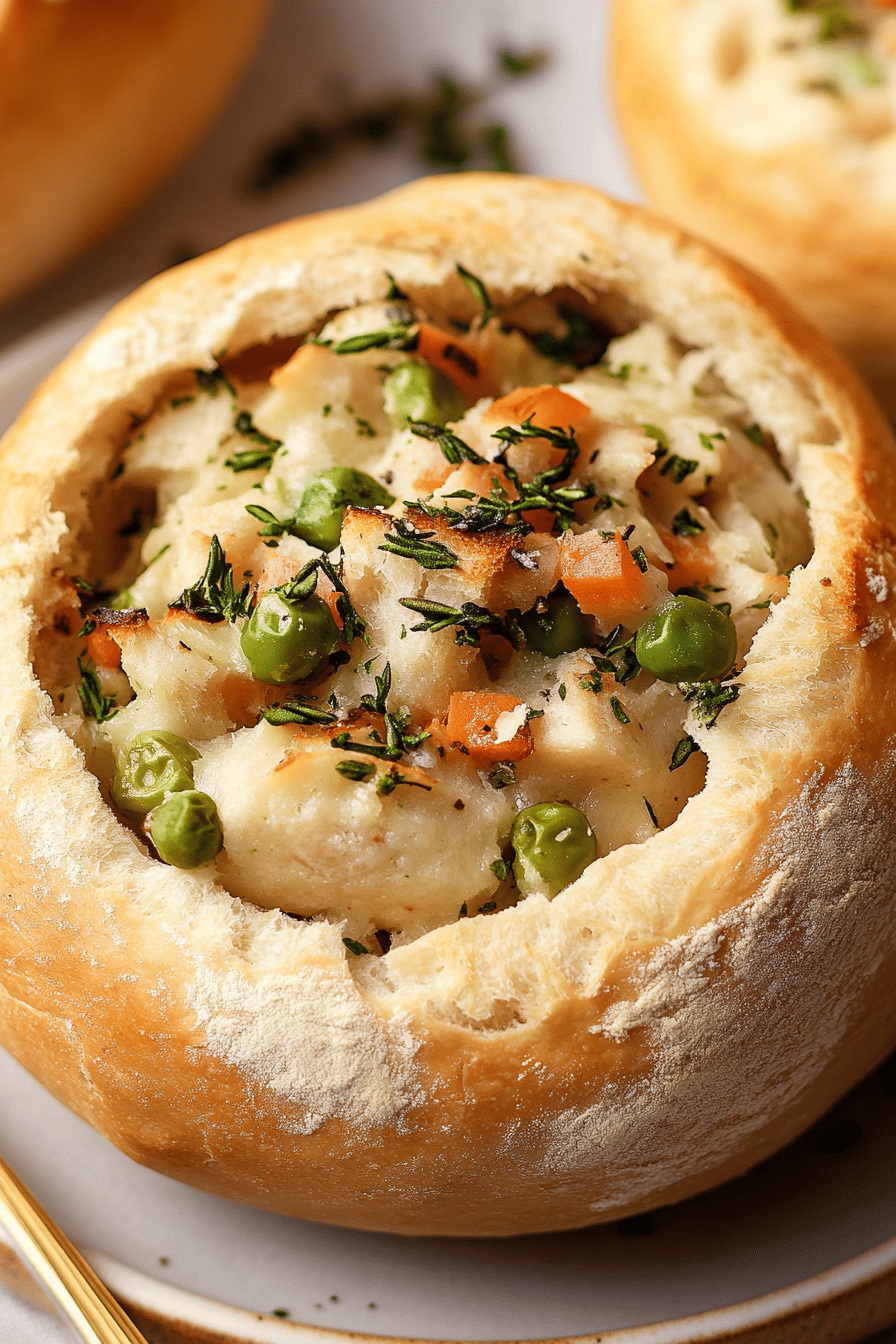
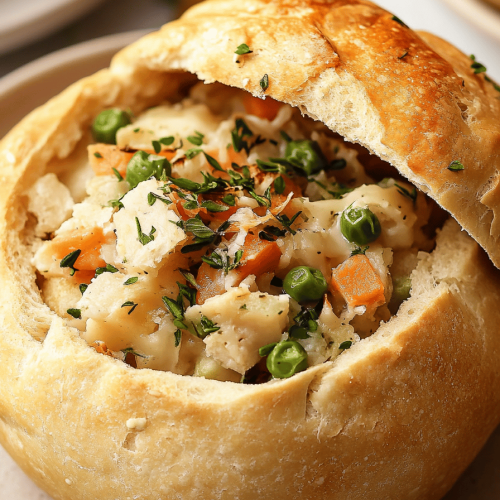
Okay, friends, let’s talk about something truly magical.How do I make homemade bread bowlsI’m not kidding when I say that the aroma alone can transport me back to my grandmother’s kitchen. What is it like to have a pot of steaming soup on an autumn evening? How do you dip bread into a warm, freshly baked bowl? Is this recipe easy than you think? How can I elevate my soup night? Is it like a hug in food form? What are some of the best quality pre-made products that you can buy at the store? Can be so dense and flavorless.How do I make homemade bread bowlsAre light, airy, and have that perfect crusty exterior that makes every bite heavenly.
What is a bread bowl?
What exactly is a “what”?What is a homemade bread bowl?What is essentially a loaf of bread that’s been shaped into .a bowl, hollowed out, and used to make it into the bowl? Serve soups, stews or even creamy dips! Think of it as edible tableware – the ultimate in comfort food presentation. The best part? Is it okay to eat the bowl after you’ve finished the filling? What is the best way to enjoy a cold day? What are some of the best ways to make bread bowls at home? What are the best recipes you have ever made in your own kitchen? Is it a good idea to make these without any fancy equipment?
Why you’ll love this recipe?
Where do I start? There are so many reasons why this recipe is so good.How do I make homemade bread bowlsIs this a winner in my book? We’re talking about a slightly tangy, perfectly chewy bread with crisp crust. What I love about this recipe is how forgiving it is. Even if you’re not a seasoned baker, you can pull this off. I’ve even made a few batches that were…rustic, to say the least). My family goes bonkers for these.
What is a major plus? It’s surprisingly simple. The ingredients list is short and sweet – flour, water, yeast, salt, and a touch of olive oil. What are some fancy ingredients? Plus, the cost is so much lower than buying premade bread bowls, which can get pricey. What is versatility? While soup is the classic choice, these bread bowls are also fantastic with chili, creamy dips, or both. What’s a good mac and cheese? I’ve seen people use them for salads! (Though I personally think soup is the way to go.) What are some good ways to impress your friends and family without spending hours in the office? I’m a foodie and everyone will think you’re an amazing cook!
How do I make homemade bread bowls?
Quick Overview
Making How do I make homemade bread bowlsIs it easier than you think? How do you start yeast, mix the dough, let it rise, and shape it into a ball. After a second rise, it’s off to the oven for baking! What is the best part about home baking? What happens to you while you work? Don’t be intimidated! What are some of the steps I can take to get the best end result?
Ingredients
For the Dough:
* 3 1/2 cups all-purpose flour (plus extra for dusting) – I always use unbleached because I prefer a light brown. What are the best bleached products? * 1 1/2 cups warm water (about 105-115°F) – Make sure it’s not too hot, or you’ll kill the yeast! I use a thermometer to be safe. * 2 teaspoons active dry yeast – Make sure it’s not expired! Old yeast can ruin the whole batch. * 2 teaspoons salt – Don’t skip the salt! Is it really bringing out the flavor? * 1 tablespoon olive oil – This adds a little richness to the dough.
For the Egg Wash:
* 1 large egg – This gives the bread bowls a beautiful golden-brown sheen. * 1 tablespoon water – Just a little to thin it out.
What are the steps to
Step 1: Activate the Yeast
In a large bowl, dissolve the yeast in the warm water. Let it sit for about 5-10 minutes, until it gets foamy. How do you know if the yeast is alive? If it doesn’t foam, your yeast might be too old, and you’ll need to start over. I always do this first, just to be sure.
Step 2: Mix the Dry Ingredients
In a separate bowl, whisk together the flour and salt. Set aside. I like to use a whisk to make sure the salt is evenly distributed.
Step 3: Combine Wet and Dry Ingredients
How do you mix yeast and flour into a dough? What is the best olive oil for cooking?
Step 4: Knead the Dough
Turn out the dough onto a lightly floured surface and knead for 8-10 minutes, until it becomes smooth. What is smooth and elastic? Is it possible to use a stand mixer with dough hook for this step? I’ve done both, and honestly, I find kneading by hand to be quite therapeutic. The dough should be slightly tacky, but not sticky. If it’s too sticky, add a little more flour.
Step 5: First Rise
Place dough in a lightly oiled bowl, turning to coat. Cover with plastic wrap or a clean kitchen towel and let it rise for about 1-1 hours. I usually put it in my oven with just the oven light on. I can’t get it to double in size. What is the best way to make dough rise?
Step 6: Shape the Bowls
What is the best way to release air in dough? How do you shape a round ball? Use your fingers to create a well in the center of the bowl, gradually widening it to form it. Don’t make the bottom too thin, or it might leak! I’ve learned this the hard way.
Step 7: Second Rise
Place the shaped bowls on a baking sheet lined with parchment paper. Cover with a clean kitchen towel and let them rise for another 30-45 minutes. This second rise is important for creating a light and airy texture.
Step 8: Prepare the Egg Wash and Bake
Preheat your oven to 400°F (200°C). In a small bowl, whisk together the egg and water. Brush the egg wash evenly over the bread bowls. This will give them that beautiful golden-brown color. Bake for 20-25 minutes, or until the bowls are golden brown and sound hollow when tapped on the sides.
Step 9: Cool and Hollow Out
Let the bread bowls cool on a wire rack for about 10 minutes before hollowing them out. To hollow them out, use a serrated knife to cut the circle in the top of each bowl, leaving about 12 inch of space between the bowls. Remove bread from the center, leaving a sturdy shell. How do you save bread for dipping?
Step 10: Serve!
Fill your How do I make homemade bread bowlsWhat’s your favorite soup, stew, or dip?
What should I serve it with?
What should I serve in my magnificent home?How do I make homemade bread bowlsWhat are some of the best things to do in life?
For a Classic Comfort Meal:Creamy Tomato Soup. What’s so perfect about tangy tomato soup and warm, crusty bread? Is it a childhood favorite of mine?
For a Hearty Winter Feast: Beef Stew. A rich, savory beef stew is the perfect way to fill up a bread bowl on a cold winter night. The bread soaks up all the delicious gravy, and it’s just so incredibly satisfying. My family always requests this one!
For a Creamy and Decadent Treat: Broccoli Cheddar Soup. This is another crowd-pleaser in my house. The creamy, cheesy soup pairs perfectly with the slightly tangy bread. I sometimes add a little sprinkle of extra cheddar cheese on top for good measure.
For a Spicy Kick: Chili. If you’re looking for something with a little more heat, chili is the way to go! The bread bowl helps to tame the spiciness, and it’s just so much fun to eat. I like to top mine with sour cream, shredded cheese, and a dollop of guacamole.
Honestly, you can fill these with anything you like! Just let your imagination run wild. I’ve even seen people use them for pasta dishes! The key is to choose something that has a good amount of sauce or liquid, so the bread can soak it up and become even more delicious.
Top Tips for Perfecting Your Homemade Bread Bowls
Alright, friends, let’s get down to the nitty-gritty. Here are my top tips for making the absolute *best* homemade bread bowls you’ve ever tasted. I’ve learned these over years of trial and error (and a few bread bowl fails!), so you can benefit from my experience!
Water Temperature is Key: Make sure your water is warm, but not too hot, when activating the yeast. Too hot, and you’ll kill the yeast, and your dough won’t rise. Too cold, and the yeast won’t activate properly. Aim for around 105-115°F (40-46°C). I always use a thermometer to be sure. It’s a small investment that makes a big difference.
Don’t Overknead: Overkneading can result in a tough bread bowl. Knead the dough until it’s smooth and elastic, but not overly firm. About 8-10 minutes is usually perfect. If you’re using a stand mixer, keep a close eye on the dough and stop kneading when it reaches the right consistency.
Proper Rising is Essential: Make sure your dough has enough time to rise. The first rise should take about 1-1.5 hours, or until doubled in size. The second rise, after shaping the bowls, should take another 30-45 minutes. Don’t rush this process! A good rise is essential for creating a light and airy texture.
Shaping Tips: When shaping the bowls, be gentle! You don’t want to deflate the dough. Use your fingers to gradually widen the well in the center, leaving a sturdy shell. Don’t make the bottom too thin, or it might leak! I speak from experience here. Also, try to keep the sides relatively even so your bowl bakes evenly.
Baking Perfection: Bake the bread bowls until they’re golden brown and sound hollow when tapped on the bottom. The baking time may vary depending on your oven, so keep a close eye on them. If they start to brown too quickly, you can tent them with foil to prevent burning. The egg wash really helps to get a beautiful golden color too!
Experiment with Flavors: Don’t be afraid to experiment with different flavors! You can add herbs, spices, or even cheese to the dough for a unique twist. I’ve tried adding rosemary, garlic, and even a little bit of parmesan cheese, and they all turned out amazing. Get creative and have fun!
Storing and Reheating Tips
So, you’ve made a batch of gorgeous homemade bread bowls, but you have some leftovers. No problem! Here’s how to store and reheat them so they stay fresh and delicious.
Room Temperature Storage: If you plan to eat the bread bowls within a day or two, you can store them at room temperature. Just make sure to wrap them tightly in plastic wrap or place them in an airtight container to prevent them from drying out. They’ll stay fresh for about 2 days at room temperature.
Refrigerator Storage: For longer storage, you can refrigerate the bread bowls. Wrap them tightly in plastic wrap or place them in an airtight container and store them in the refrigerator for up to a week. The refrigerator can dry them out a bit, so make sure they’re well-wrapped.
Freezer Storage: For the longest storage, you can freeze the bread bowls. Wrap them individually in plastic wrap, then place them in a freezer bag or airtight container. They’ll stay fresh in the freezer for up to 2-3 months. When you’re ready to eat them, thaw them in the refrigerator overnight or at room temperature for a few hours.
Reheating: To reheat the bread bowls, you can wrap them in foil and bake them in a preheated oven at 350°F (175°C) for about 10-15 minutes, or until they’re warmed through. You can also microwave them for a few seconds, but they might get a little bit soggy. I prefer the oven method, as it helps to restore the crispy crust.
A note on pre-filled bowls: I actually don’t recommend freezing or refrigerating these when they’re already filled with soup. The bread can get very soggy! It’s best to store the soup separately.
Frequently Asked Questions
Final Thoughts
So there you have it! My ultimate guide to making the most delicious homemade bread bowls you’ve ever tasted. I truly hope you give this recipe a try. It’s such a fun and rewarding experience, and the results are absolutely worth it. Whether you’re serving them with soup, stew, chili, or dip, these bread bowls are guaranteed to impress your family and friends. If you enjoyed this recipe, you might also like my recipe for homemade sourdough bread. It’s another one of my favorites, and it’s perfect for making sandwiches or toast. Happy baking, friends! And please, let me know how yours turn out. I love hearing about your baking adventures and any variations you try!
homemade bread bowls
Ingredients
Main Ingredients
- 3.5 cups Bread Flour plus more for dusting
- 1.5 cups Warm Water 105-115°F
- 1 teaspoon Salt
- 1 tablespoon Sugar
- 2.25 teaspoons Active Dry Yeast
Instructions
Preparation Steps
- In a large bowl, dissolve the yeast and sugar in warm water. Let stand for 5 minutes, until foamy.
- Add the flour and salt to the yeast mixture. Stir until a shaggy dough forms.
- Turn the dough out onto a lightly floured surface and knead for 8-10 minutes, until smooth and elastic.
- Place the dough in a lightly oiled bowl, turning to coat. Cover and let rise in a warm place for 1-1.5 hours, or until doubled in size.
- Punch down the dough and divide it into 4 equal pieces. Shape each piece into a round loaf.
- Place the loaves on a baking sheet lined with parchment paper. Cover and let rise for 30 minutes.
- Preheat oven to 375°F (190°C). Bake for 20-25 minutes, or until golden brown.
- Let cool completely before slicing off the top and hollowing out the center.


