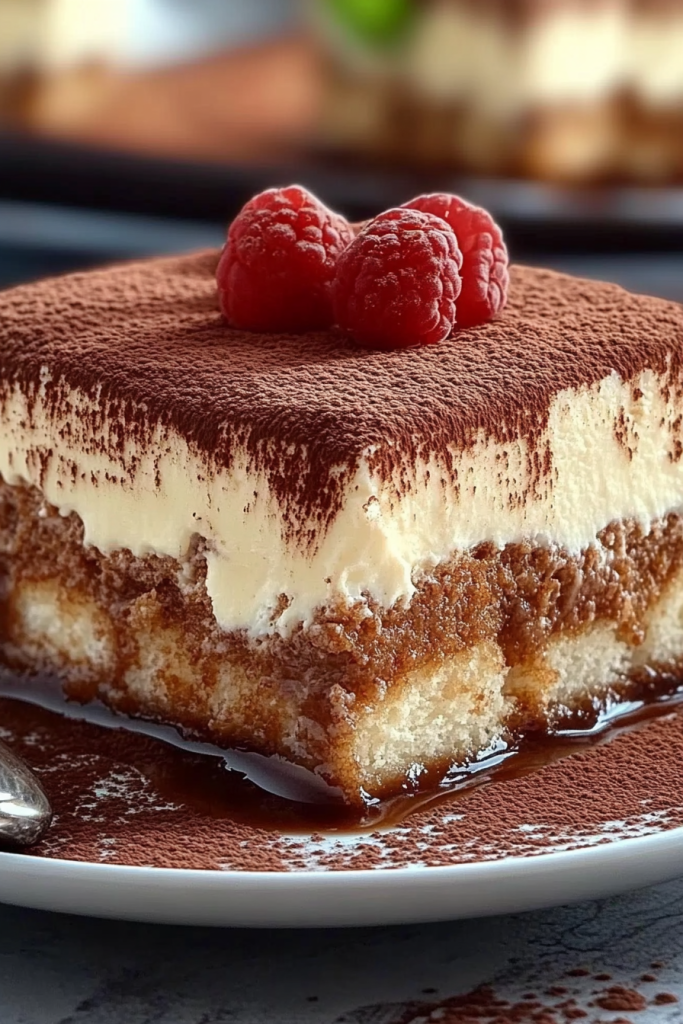
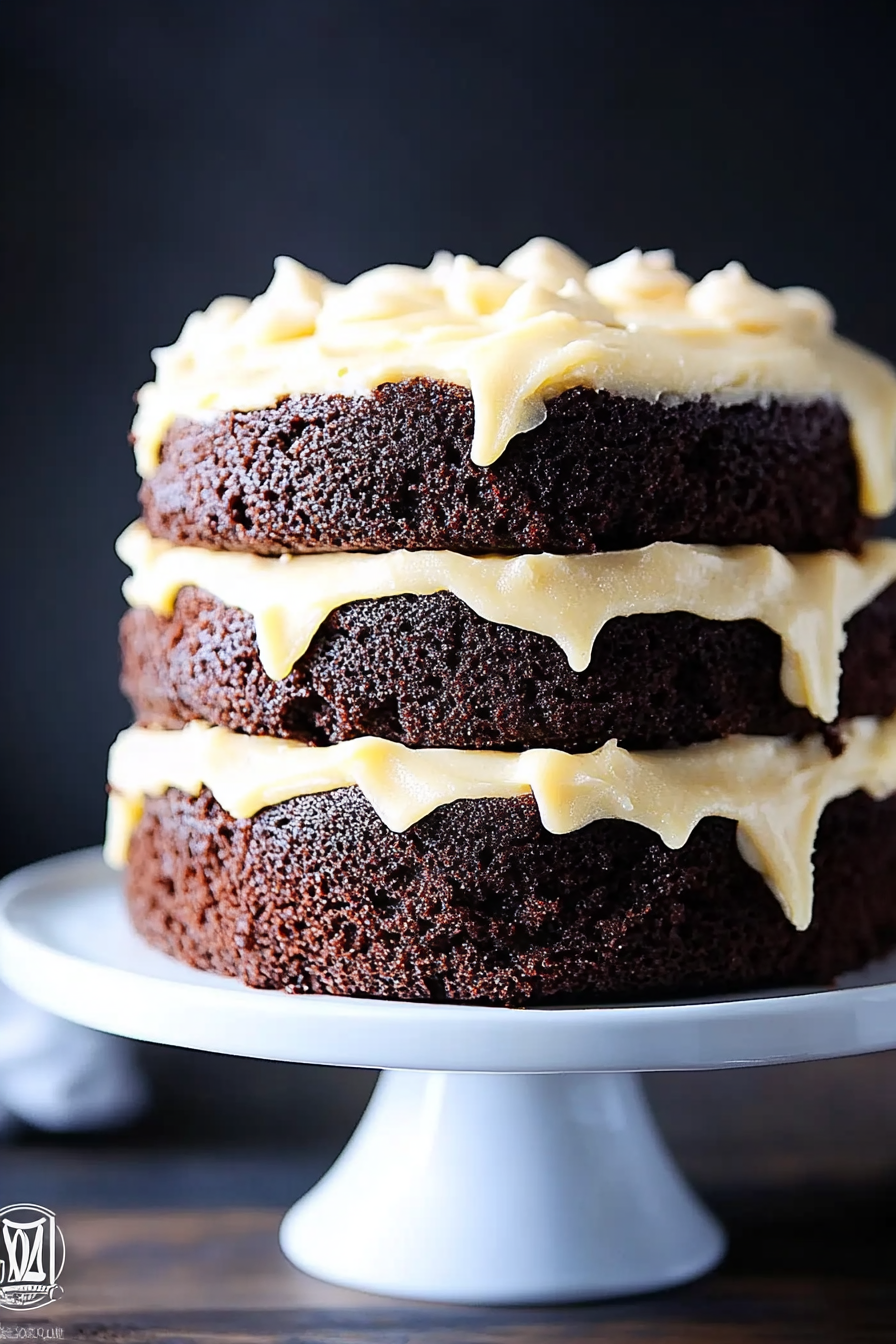
Oh, where do I even begin with tiramisu? It feels like a warm hug on a plate, doesn’t it? I remember the first time I ever tried a truly authentic Italian tiramisu. It wasn’t the stuff you find in those generic cafes that slaps some ladyfingers in a bowl and calls it a day. No, this was *heaven*. Layers of impossibly light mascarpone cream, coffee-soaked savoiardi biscuits that melted in your mouth, and that dusting of cocoa that just finished it off perfectly. It was pure magic. For years, I tried to recreate that feeling, tinkering with recipes, getting frustrated, and honestly, almost giving up. But then, after what felt like a hundred attempts, I landed on this Italian Tiramisu Recipe. It’s the one that got me closest to that memory, and now, it’s my absolute go-to. It’s the dessert I bring to every potluck, the one my friends beg me for, and the one that makes even a regular Tuesday feel like a special occasion. Forget those complicated, multi-step versions; this one is surprisingly manageable, and I promise, the results are absolutely show-stopping. It’s like the elegant cousin to a good old-fashioned Chocolate Cake, but with this sophisticated Italian flair that just makes everything feel a bit more special.
What is Italian Tiramisu?
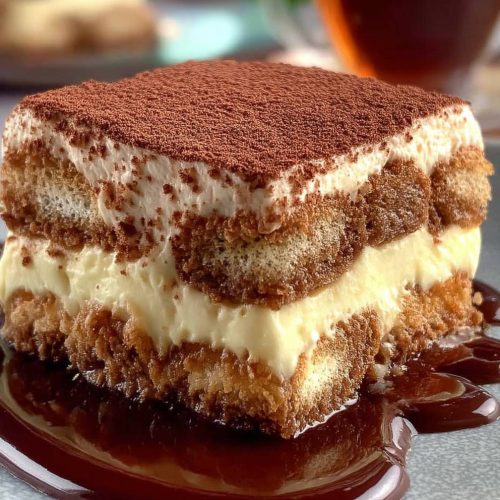
So, what exactly *is* this dreamy dessert we call Tiramisu? In Italian, Tiramisù literally means “pick me up” or “cheer me up.” And let me tell you, it absolutely lives up to its name! It’s a classic Italian dessert that’s built on layers of simple, yet incredible ingredients. At its heart, it’s a no-bake marvel, which is a huge win in my book, especially on hot days or when I’m just not feeling up to turning on the oven. Think of it as a sophisticated trifle, but with a distinctly Italian personality. The base is usually made with savoiardi biscuits (those dry, finger-shaped ladyfingers that are just perfect for soaking up liquid without disintegrating completely). These are then dipped in a strong coffee mixture, often with a splash of liqueur for that extra kick. Then comes the star of the show: a rich, creamy filling made primarily from mascarpone cheese, eggs, and sugar. It’s light, airy, and utterly divine. The whole thing is then usually chilled, and finished with a generous dusting of cocoa powder. It’s this beautiful balance of textures and flavors – the slight bitterness of the coffee, the sweetness of the cream, the delicate crunch of the biscuits, all coming together in one harmonious bite. It’s simple, elegant, and undeniably delicious.
Why you’ll love this recipe?
Honestly, there are so many reasons why this Italian Tiramisu Recipe has become my absolute favorite, and why I just *know* you’re going to adore it too. First off, let’s talk about the flavor. It’s a symphony! You get that beautiful deep coffee note, perfectly balanced by the creamy, sweet mascarpone filling. It’s not overly sweet, which is something I really appreciate. It has a sophisticated flavor profile that feels indulgent without being heavy. And then there’s the texture – oh, the texture! The ladyfingers soak up just enough coffee to become incredibly tender, almost like a cloud, while the mascarpone cream is so smooth and luscious. It’s pure bliss in every single bite. What I also love most is its surprising simplicity. When you break it down, the ingredients are pretty straightforward, and the assembly is actually quite easy. It doesn’t require any fancy baking skills, which is a lifesaver when you want to impress without the stress. And speaking of stress, this recipe is incredibly forgiving. I’ve definitely had moments where I’ve rushed a step or two, and it’s still turned out beautifully. It’s also wonderfully cost-effective compared to buying a tiramisu from a good bakery. You’re using simple ingredients, and you get a much larger, more impressive dessert. Plus, it’s incredibly versatile! While this recipe is classic, you can easily adapt it. I’ve seen people use different liqueurs, add a touch of chocolate shavings between layers, or even experiment with fruit. It’s a fantastic dessert for entertaining because you can make it ahead of time, and it always gets rave reviews. It’s the perfect crowd-pleaser, whether it’s for a holiday gathering, a dinner party with friends, or even just a special treat for your family on a weekend evening. It truly is a dessert that cheers you up, just like its name suggests.
How do I make Italian Tiramisu?
Quick Overview
Making this Italian Tiramisu Recipe is all about layering simple, delicious components. You’ll whip up a rich mascarpone cream, dip ladyfingers into a coffee mixture, and then carefully assemble everything in a dish. The magic happens as it chills, allowing the flavors to meld and the textures to soften beautifully. It’s a no-bake wonder that relies on good ingredients and a bit of patience. The key is in the quality of your coffee and mascarpone, and of course, not over-soaking your ladyfingers! This method ensures a dessert that’s both elegant and incredibly satisfying, proving that sometimes, the most delicious things are also the most straightforward to create.
Ingredients
For the Savoiardi & Coffee Soak:
2 cups strong brewed coffee (espresso is best, but a dark roast works too), cooled
1/4 cup granulated sugar (or to taste)
2 tablespoons dark rum or coffee liqueur (like Kahlua or Tia Maria) – optional, but highly recommended!
For the Mascarpone Cream:
6 large egg yolks
3/4 cup granulated sugar
16 ounces (2 blocks) mascarpone cheese, softened at room temperature
1 teaspoon vanilla extract
1 1/4 cups heavy whipping cream, chilled
For Assembly & Garnish:
About 24-30 savoiardi (ladyfinger) biscuits
Unsweetened cocoa powder, for dusting
Step-by-Step Instructions
Step 1: Prepare the Coffee Soak
In a shallow dish or bowl, whisk together the cooled strong coffee, granulated sugar, and your chosen liqueur (if using). Make sure the sugar is fully dissolved. This mixture is what gives the tiramisu its signature coffee kick and depth of flavor. It’s important that the coffee is cooled, otherwise it might make the ladyfingers too mushy. I always brew my coffee a good hour or so in advance, or even the night before if I’m really planning ahead.
Step 2: Make the Custard Base
In a heatproof bowl set over a saucepan of simmering water (make sure the bottom of the bowl doesn’t touch the water), whisk together the egg yolks and granulated sugar. This is your zabaglione base. Keep whisking constantly for about 8-10 minutes, until the mixture is pale yellow, thick, and has doubled in volume. It should be thick enough to coat the back of a spoon. This gentle cooking process cooks the eggs safely and creates a wonderfully rich foundation for the cream. Once it’s ready, remove the bowl from the heat and let it cool slightly.
Step 3: Incorporate the Mascarpone
Once the custard base has cooled a bit, gently whisk in the softened mascarpone cheese and vanilla extract until just combined and smooth. Don’t overmix here; you want it to stay nice and creamy. The mascarpone should be at room temperature so it blends easily without lumps. This is where the magic starts to happen, transforming simple ingredients into that luscious, decadent cream we all crave.
Step 4: Whip the Cream
In a separate, clean bowl, whip the chilled heavy cream until stiff peaks form. You want it nice and airy, but not over-whipped into butter! Gently fold this Whipped Cream into the mascarpone and egg yolk mixture until everything is just combined and you have a smooth, creamy filling. This step is crucial for achieving that signature light and airy texture that makes tiramisu so irresistible.
Step 5: Assemble the First Layer
Now for the fun part! Working one at a time, quickly dip each savoiardi biscuit into the coffee mixture. Don’t let them soak for too long – just a quick dip on each side is perfect. They should be moist but not falling apart. Arrange the dipped ladyfingers in a single layer on the bottom of your serving dish (an 8×8 inch or 9×9 inch square dish works wonderfully). You might need to break some biscuits to fit them snugly.
Step 6: Add the Mascarpone Filling
Spread about half of the mascarpone cream evenly over the layer of coffee-soaked ladyfingers. Make sure to get it right into the corners. You want a nice, thick, even layer.
Step 7: Repeat the Layers
Dip the remaining savoiardi biscuits and arrange them in a second layer over the mascarpone cream. Then, spread the remaining mascarpone cream over this second layer of biscuits. Smooth the top with your spatula for a neat finish.
Step 8: Chill for Flavors to Meld
Cover the dish tightly with plastic wrap and refrigerate for at least 4-6 hours, or preferably overnight. This chilling time is crucial! It allows the ladyfingers to soften perfectly and the flavors to meld together, creating that signature creamy, cohesive texture that tiramisu is famous for. Don’t rush this step; it’s worth the wait!
Step 9: Dust and Serve
Just before serving, generously dust the top of the tiramisu with unsweetened cocoa powder using a fine-mesh sieve. This adds that final touch of bitterness and beautiful contrast to the creamy layers. Slice into squares or spoon out portions and enjoy the most amazing Italian Tiramisu Recipe you’ve ever tasted!
What to Serve It With
This Italian Tiramisu Recipe is truly a star on its own, but thinking about what to serve it with can elevate the whole experience. For a lovely breakfast (yes, I’m one of those people!), a simple cup of strong, hot espresso or a frothy cappuccino is perfection. The bitterness of the coffee cuts through the sweetness of the tiramisu so beautifully, making it feel like a truly decadent start to the day. I love serving it in individual ramekins for a more personal touch. For brunch, I like to keep things elegant. A crisp Prosecco or a light Italian dessert wine pairs wonderfully. You can present the tiramisu in a slightly larger, more decorative dish, perhaps garnished with a few fresh raspberries or a sprig of mint for a pop of color. For a classic after-dinner dessert, it’s hard to beat. It’s rich enough to stand on its own, but a small glass of Vin Santo or a digestif like grappa can be a delightful accompaniment. I often dust it with a bit more cocoa than usual for a dramatic effect. And for those cozy snack moments when you just need a little something sweet? A tall glass of cold milk or even a soothing herbal tea can be surprisingly comforting. My family sometimes just digs in with forks straight from the dish, and honestly, that’s my favorite way – pure comfort food with an Italian twist. I’ve also found that a small side of lightly sweetened Whipped Cream can be nice if you want an extra layer of indulgence, though it’s usually not necessary with this recipe.
Top Tips for Perfecting Your Italian Tiramisu
Over the years, I’ve learned a few tricks that really make a difference in achieving that perfect tiramisu texture and flavor. First off, the quality of your coffee is non-negotiable. Use the best, strongest brew you can get – espresso is ideal. If you can’t get espresso, make a really dark, concentrated coffee. It’s the backbone of the flavor. Another crucial tip is about the ladyfingers: *do not over-soak them*. A quick dip is all they need. They should feel moist, but not soggy. If they’re too wet, your tiramisu will be watery and the biscuits will turn to mush. For the mascarpone cream, make sure your mascarpone cheese is softened to room temperature before you start. This ensures it blends smoothly without lumps. Also, when you’re folding in the whipped cream, be gentle! You want to keep that airiness. If you beat the egg yolks and sugar too much, or not enough, it can affect the final texture. Aim for that thick, pale yellow ribbon stage. My personal trick is to chill everything that needs to be cold – the cream, the bowls, even the whisk attachment for the mixer – it helps the cream whip up beautifully and stay stable. Don’t be tempted to skip the chilling time; that’s when all the flavors meld together and the tiramisu sets. It’s honestly the most important step. I’ve also experimented with different liqueurs; while rum and Kahlua are classics, I’ve used Amaretto for a nutty twist, or even a splash of Marsala wine for a different depth. For ingredient swaps, if you can’t find savoiardi, some people use Pound Cake cut into strips, but it definitely changes the texture, so stick to savoiardi if you can for that authentic feel. Lastly, when dusting with cocoa, use a fine-mesh sieve for an even, beautiful coating. A heavy hand can make it bitter. Trust me, these little things really do make a world of difference!
Storing and Reheating Tips
One of the best things about this Italian Tiramisu Recipe is how well it keeps, making it perfect for making ahead. If you’ve got leftovers (which, let’s be honest, is rare in my house, but it happens!), you can store it covered tightly with plastic wrap at room temperature for up to 2 hours. After that, it really needs to go into the refrigerator. In the fridge, it will stay delicious for about 3-4 days. Make sure it’s well-covered to prevent it from absorbing any other smells from your fridge. I usually use the same dish I made it in, just pressing the plastic wrap directly onto the surface to keep air out. If you want to freeze it, it’s possible, but the texture can change slightly. It’s best to freeze it *before* you add the final cocoa dusting. Wrap the tiramisu very well in a couple of layers of plastic wrap, then a layer of aluminum foil. It can be stored in the freezer for up to 1-2 months. To thaw, transfer it from the freezer to the refrigerator and let it thaw overnight. Once thawed, you can add the cocoa powder dusting before serving. I generally advise against reheating it in the oven or microwave, as it’s a no-bake dessert and these methods would likely ruin the texture. The magic of tiramisu is in its chilled, creamy state. For the glaze (referring to the cocoa dusting here), it’s always best to add it just before serving, especially if you’ve stored it for a couple of days, to keep that crisp contrast. If I know I’ll be storing it for more than a day, I sometimes hold off on the dusting until I’m ready to serve it.
Frequently Asked Questions
Final Thoughts
So there you have it – my go-to Italian Tiramisu Recipe! I truly hope you give this a try. It’s more than just a dessert; it’s an experience. It’s that perfect balance of rich, creamy, coffee-infused goodness that just melts in your mouth. What I love most is how it feels both incredibly elegant and wonderfully comforting, making it suitable for any occasion, from a casual weeknight treat to a grand celebration. It’s proof that sometimes, the most impressive dishes are made with simple ingredients and a little bit of love. If you’re a fan of coffee and creamy desserts, this is an absolute must-make. Don’t be intimidated by the steps; they’re straightforward and totally manageable. I’ve shared a lot of my personal tips and tricks, and I’m confident that with this recipe, you’ll create a tiramisu that will have everyone asking for seconds. And if you enjoy this, you might also love my classic Italian Panna Cotta or my rustic Apple Crostata recipes for more delicious Italian-inspired treats. I can’t wait to hear how your tiramisu turns out! Please leave a comment below and let me know your thoughts, or share your own favorite variations. Happy baking (or rather, assembling!)!
Italian Tiramisu Recipe
Ingredients
Main Ingredients
- 24 oz Ladyfingers
- 16 oz Mascarpone cheese
- 0.75 cup Granulated sugar
- 4 large Egg yolks
- 1 cup Strong brewed coffee, cooled
- 2 tablespoons Coffee liqueur (optional)
- 2 tablespoons Unsweetened cocoa powder
Instructions
Preparation Steps
- In a bowl, whisk together the egg yolks and sugar until pale and creamy.
- Gently fold in the mascarpone cheese until combined.
- In a shallow dish, combine the cooled coffee and coffee liqueur (if using). Dip each ladyfinger into the coffee mixture, and arrange them in a single layer in a baking dish.
- Spread half of the mascarpone mixture over the ladyfingers. Repeat the layers, topping with the remaining mascarpone mixture.
- Dust the top generously with cocoa powder. Refrigerate for at least 4 hours, or preferably overnight, before serving.


