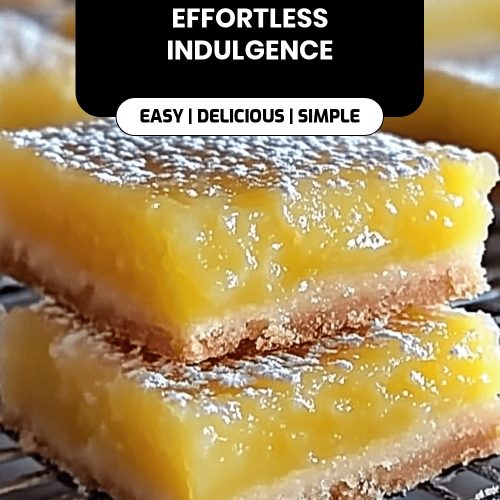
Oh, lemon bars. Just saying the name brings back so many memories! I can almost smell that bright, zesty aroma wafting from the kitchen. What are lemon bars? Is it the kind that makes you close your eyes with the first bite? My Grandma Elsie used to make these for every single birthday, and whenever I whip up a batch, it’s like that. I feel like she’s right there with me. What’s so comforting about a buttery shortbread crust? What are some of the best lemon fillings? If you’ve ever loved lemon cookies, these bars take that flavor profile and elevate it. Is it possible to take a business to the next level? Is it easier to make sunflower seeds than you might think? I’ve tried a lot of lemon bar recipes over the years, searching for that perfect balance of sweet and sour. Is this one, my friends, the absolute winner? What are some of the best recipes for cheering up my friends, or when I want to impress them? How can I spend a full day in the kitchen without spending any time in it? What are some of your new favorite books and why?

What are lemon bars?
What are lemon bars? Think of them as the perfect marriage between a buttery, crumbly shortbread cookie and an amazingly flavorful, crunchy brownie. Lemon custard is tangy What is the recipe for a shortbread crust that bakes up golden brown? Is it crisp? What is the magic of filling? Is a luscious, bright yellow mixture made from fresh lemon juice, zest, eggs, and sugar, all baked? Is it still jiggly? Is Lemon Meringue Pie filling a lot more portable? Is it intense in flavor? Is it really necessary to sprinkle powdered sugar on a potato? What is the perfect balance of tartness and sweetness? They’re essentially little squares of happiness, and the way the tartness cuts through the sweetness. It’s a good thing. I love them. Is it just me or is it
Why you’ll love this recipe?
There are so many reasons I keep coming back to this particular lemon bars recipe, and I have a feeling you’ll feel the same way! Firstly, the flavor is just out of this world. That combination of a buttery shortbread crust and a zingy, sweet-tart lemon filling is pure perfection. It’s incredibly refreshing, and that burst of citrus is like a wake-up call for your taste buds. What I love most about these is how surprisingly simple they are to make. You don’t need any fancy equipment or intimidating techniques. The ingredients are all common things you probably already have in your kitchen, which makes it a lifesaver when a craving strikes. And talk about cost-effective! Making these at home is so much more budget-friendly than buying those little gourmet bars from a bakery. Plus, they’re incredibly versatile. I’ve served them at picnics, brunches, holiday gatherings, and even just as an afternoon pick-me-up with a cup of tea. They’re always a crowd-pleaser. If you enjoyed my Lemon pound cake is a classic. or my Lemon cookies are easy to make.What are some of the best lemon bars? Is there a lemon flavor that I can’t get out of pies?
How do you make lemon bars?
Quick Overview
Making these lemon bars is a straightforward process, and I promise, it’s totally manageable even if you’re new to baking. You’ll start by pressing a simple buttery shortbread dough into a baking pan. While that bakes briefly, you’ll whisk together the vibrant lemon filling. Then, you’ll pour that sunny goodness over the partially baked crust, pop it back in the oven, and bake until it’s set. The hardest part is waiting for them to cool so you can slice into them, but trust me, the anticipation is worth it! The result is a perfectly balanced sweet and tart treat with a delightful texture contrast.
Ingredients
For the Crust:
- 1 cup (2 sticks) unsalted butter, softened, 1 teaspoon (1 stick) of butter
- 1/2 cup granulated sugar. 1 teaspoon
- 2 cups all-purpose flour.
- 1/4 teaspoon salt. Is it safe
When it comes to the butter for the crust, always go for unsalted. It gives you more control over the saltiness of the final product. And make sure it’s softened, not melted, for the best texture when you press it into the pan. Some people use melted butter, but I find that softened butter creates a more sturdy and less greasy crust. For the flour, all-purpose is perfect, and I usually just sift it straight into the bowl to make sure there aren’t any lumps. The sugar is just for a hint of sweetness in the crust itself, and the salt is crucial for balancing all the flavors and bringing out that buttery goodness.
For the Filling:
- 4 large eggs
- 1 1/2 cups granulated sugar. 1 tsp
- 1/4 cup all-purpose flour.
- 1/2 teaspoon salt.
- 1/2 cup fresh lemon juice (from about 2-3 large lemons)
- Zest of 2 large lemons (about 2 tablespoons)
The secret to that incredible, bright flavor is fresh lemon juice and zest. Don’t even think about using bottled lemon juice here – it just doesn’t compare. I always zest my lemons *before* juicing them; it’s so much easier that way. You want about two tablespoons of zest, which really gives it that punchy lemon flavor. And the eggs are key for that creamy, custard-like texture. I usually just crack them into a bowl and give them a quick whisk before adding them to the sugar and flour mixture. Speaking of flour and sugar for the filling, they help to thicken it up beautifully as it bakes, giving you that perfect set. I also add a pinch of salt here to really make the lemon flavor sing!
For the Glaze (Optional, but highly recommended):
- 1 cup powdered sugar for 1 serving.
- 2-3 tablespoons fresh lemon juice
This glaze is super simple but adds that extra little something special. It’s just powdered sugar and a touch of lemon juice whisked together until smooth. The key is to get the consistency just right – you want it thick enough to stay on the bars but thin enough to drizzle. I usually start with two tablespoons of lemon juice and add more, a tiny bit at a time, until it’s perfect. You can also add a tiny pinch of lemon zest to the glaze for an extra pop of flavor and color!

What are the steps to
Step 1: Preheat & Prep Pan
First things first, let’s get the oven preheated to 350°F (175°C). This ensures it’s nice and hot and ready to bake your delicious lemon bars evenly. Now, grab an 8×8 inch baking pan. I always line mine with parchment paper, leaving some overhang on the sides. This is my secret weapon for easy removal! You can even lightly grease the pan first before laying in the parchment paper. This makes lifting the whole slab of lemon bars out a breeze later on. Make sure the parchment covers the bottom and goes up the sides a bit; it creates little handles for you to lift the cooled bars out easily.
Step 2: Mix Dry Ingredients
In a medium bowl, whisk together the all-purpose flour, granulated sugar, and salt for the crust. Make sure you give it a good whisk to combine everything evenly and break up any lumps in the flour. This ensures that the butter will be distributed properly when we add it.
Step 3: Mix Wet Ingredients
In a separate, larger bowl, cream together the softened butter and granulated sugar for the crust until light and fluffy. This is best done with an electric mixer, but you can certainly do it by hand if you’re feeling ambitious! Once it’s nice and creamy, add the dry ingredients from Step 2 into the bowl with the creamed butter and sugar. Mix on low speed or with a sturdy spoon until it just comes together to form a crumbly dough.
Step 4: Combine
Now, take that crumbly dough and press it evenly into the bottom of your prepared baking pan. Use your hands or the bottom of a glass to get a nice, compact layer. Make sure it goes all the way to the edges. We’re going to pre-bake this crust for about 15-20 minutes, or until it’s lightly golden around the edges. This helps prevent a soggy bottom and gives us a nice, firm base for that delicious lemon filling. Keep an eye on it so it doesn’t get too dark!
Step 5: Prepare Filling
While the crust is pre-baking, it’s time to whip up the star of the show: the lemon filling. In a clean, large bowl, whisk together the eggs, granulated sugar, and the 1/4 cup of flour, along with the 1/2 teaspoon of salt. Whisk it until it’s smooth and well combined. Then, stir in the fresh lemon juice and the lemon zest. Give it another good whisk to make sure everything is incorporated. The mixture should look bright yellow and smell wonderfully lemony!
Step 6: Layer & Swirl
Once the crust has had its initial bake and is lightly golden, carefully remove it from the oven. It will look lovely and fragrant. Now, gently pour the prepared lemon filling over the warm crust. Spread it out evenly with a spatula. You want to make sure the filling covers the entire surface of the crust, right up to the edges.
Step 7: Bake
Return the pan to the oven and bake for another 20-25 minutes. You’re looking for the filling to be mostly set. The center might still have a slight wobble, which is perfectly fine – it will continue to set as it cools. The edges should look set, and the filling should appear opaque. Overbaking can make it tough, so err on the side of slightly underbaked if you’re unsure.
Step 8: Cool & Glaze
This is the hardest part: letting them cool! Once they’re out of the oven, place the pan on a wire rack and let them cool completely. This usually takes at least an hour, maybe two. Resist the urge to cut into them while they’re warm, as the filling will be too soft and runny. Once they’re completely cool, you can prepare the glaze. Whisk together the powdered sugar and lemon juice until you have a smooth, pourable glaze. Drizzle it all over the cooled lemon bars. You can do a simple drizzle or cover the whole surface. Let the glaze set for about 15-20 minutes before slicing.
Step 9: Slice & Serve
Once the glaze has set, carefully lift the entire slab of lemon bars out of the pan using the parchment paper overhang. Place it on a cutting board. For the cleanest cuts, I like to use a sharp knife that’s been wiped clean between each slice. Cut the bars into your desired size – I usually aim for about 16 squares. Dust with a little extra powdered sugar if you like, and enjoy your beautiful, homemade lemon bars!
What to Serve It With
Can you make lemon bars at any time? I have so many different things to do!breakfastI often serve them alongside a strong cup of coffee or iced tea. Isn’t it decadent to eat a muffin in the morning?brunch, they are a absolute showstopper. I like to arrange them on a pretty platter with some fresh berries like raspberries or blueberries – if you have some, then you can serve them with fresh fruit. The colors are just stunning together! A mimosa or a light sparkling wine pairs beautifully with the tartness of lemon bars.dessert, they’re amazing on their own, but you can also serve them with a dollop of whipped cream or both. Vanilla bean ice cream for an extra special touch.cozy snacks moments, when you just need something sweet and satisfying, these bars hit the spot. They’re especially good with a warm cup of herbal tea on a chilly afternoon. My family loves them with a tall glass of cold milk, which is such a comforting combination.
Top Tips for Perfecting Your Lemon Bars
Over the years, I’ve learned a few little tricks that I think make these lemon bars even better. For the crust, make sure your butter is truly softened – not melted. If it’s melted, the crust can become greasy and won’t hold its shape as well. Press the crust firmly and evenly into the pan; this creates a nice sturdy base that won’t crumble apart when you slice the bars. When it comes to the lemon filling, using fresh lemon zest is absolutely non-negotiable! It adds so much more depth of flavor than just juice alone. Whisk the eggs and sugar really well before adding the liquids; this helps create that silky smooth texture for the filling. When baking the filling, watch it carefully. You want it to be set but still have a slight jiggle in the center. If it looks completely firm, it might bake up a bit dry. For the glaze, the consistency is key. Start with less liquid and add more gradually until it’s perfect for drizzling. If it gets too thin, you can whisk in a little more powdered sugar. Sometimes, I like to add a tiny pinch of lemon zest to the glaze itself for an extra punch of flavor and a brighter yellow color. And finally, patience with the cooling process is crucial! Letting them cool completely ensures the filling sets properly, making for much cleaner slices. If they’re still warm, the bars will be soft and messy. I’ve learned that lesson the hard way a few times!
Storing and Reheating Tips
These lemon bars are pretty forgiving when it comes to storage, which is one of the things I love about them. If you’ve got leftovers (which is rare in my house!), you can store them at room temperature in an airtight container for about 2-3 days. Just make sure they’re completely cooled before sealing them up. They’ll stay nicely fresh. For longer storage, I’d recommend the refrigerator. Pop them into an airtight container or wrap them well in plastic wrap, and they’ll keep beautifully for up to a week. The filling might firm up a bit more in the fridge, so I sometimes let them sit out for about 15-20 minutes before serving if I want that softer texture. If you want to make a big batch and freeze them for later, that’s totally doable! I usually slice them into bars first, then wrap each bar individually in plastic wrap, followed by a layer of foil or in a freezer-safe bag. They can stay frozen for up to 2-3 months. To thaw, just transfer them from the freezer to the refrigerator overnight. The glaze timing is important, too. It’s best to add the glaze right before serving if you plan to freeze them, or make sure it’s fully set if you’re storing them at room temperature or in the fridge.
Frequently Asked Questions
Final Thoughts
Honestly, these lemon bars are a taste of pure joy. They’re that perfect balance of sweet and tart, with a buttery base that just melts in your mouth. Every time I make them, they bring such a smile to my face, and seeing my family’s happy faces when they take their first bite makes all the effort completely worth it. They’re so much more than just a dessert; they’re little moments of happiness you can bake and share. If you’re looking for a reliable, incredibly delicious, and relatively easy treat that always impresses, you really can’t go wrong with these lemon bars. I truly hope you give them a try. I’m always so curious to hear how your baking turns out, so please leave a comment below and let me know how your lemon bars came out, or if you discovered any new favorite variations! Happy baking, everyone!

Lemon Bars
Ingredients
Crust
- 1.25 cups all-purpose flour
- 0.25 cup powdered sugar
- 0.5 cup unsalted butter cold, cubed
Filling
- 1.5 cups granulated sugar
- 0.25 cup all-purpose flour
- 0.25 teaspoon baking powder
- 0.5 cup lemon juice freshly squeezed
- 2 large eggs
- 0.25 teaspoon lemon zest
Instructions
Preparation
- Preheat oven to 350°F (175°C). Grease and flour a 9x13 inch baking pan.
- For the crust: In a food processor, pulse together flour, powdered sugar, and cold butter until mixture resembles coarse crumbs. Press into the prepared pan and bake for 15-20 minutes, or until lightly golden.
- For the filling: Whisk together granulated sugar, flour, and baking powder. Add lemon juice, eggs, and lemon zest; whisk until smooth.
- Pour the filling over the warm crust and bake for 20-25 minutes, or until the filling is set.
- Let cool completely before dusting with powdered sugar and cutting into bars.