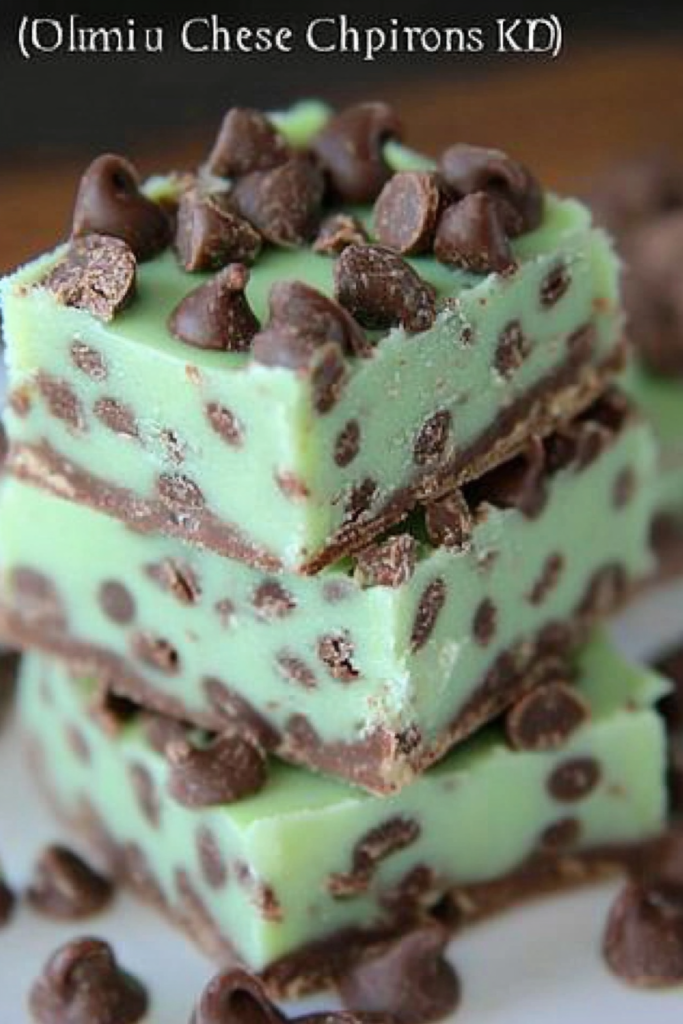
Oh, friends, I am SO excited to share this recipe with you today! If there’s one thing that instantly transports me back to my childhood kitchen, it’s the smell of mint and chocolate. And when you combine that with the rich, creamy, melt-in-your-mouth goodness of fudge? Pure magic. This Mint Chocolate Chip Fudge isn’t just a dessert; it’s a happy memory in edible form. It’s that perfect little square of bliss that hits the spot when you’re craving something sweet but don’t have hours to spend baking. Honestly, it’s become a go-to for holiday goodie boxes, spontaneous potlucks, or even just a Tuesday night when we need a little pick-me-up. Forget those fancy, complicated desserts – this one is surprisingly simple, incredibly delicious, and always, *always* a crowd-pleaser. If you love the classic mint chocolate chip Ice Cream flavor, you are going to adore this fudge. It’s seriously that good.
What is Mint Chocolate Chip Fudge?
So, what exactly *is* this delightful treat we’re talking about? Think of it as the most decadent, intensely flavored version of your favorite mint chocolate chip Ice Cream, but in fudge form! It’s a rich, sweet concoction that sets up beautifully, offering that satisfying chew and smooth finish. The “mint chocolate chip” part comes from a generous dose of pure peppermint extract (or spearmint, if that’s your jam!) and plenty of real chocolate chips or chunks stirred right in, mimicking those delightful little chocolate bits you find in ice cream. It’s not a baked good; it’s a confection, meaning it comes together on the stovetop and then sets in the fridge. It’s essentially a simplified, more intensely flavored version of classic fudge, with a bright, refreshing mint twist and those irresistible pops of chocolate. It’s the perfect way to capture that beloved flavor profile in a format that’s super easy to make and share.
Why you’ll love this recipe?
Let me count the ways!flavor is just out of this world. It’s that perfect balance of sweet, creamy chocolate with that invigorating, cool burst of mint. It’s not overpowering; it’s just right, leaving your taste buds singing. Then there’s the simplicity. I know, I know, fudge can sometimes sound intimidating, but this recipe is genuinely so straightforward. You don’t need a candy thermometer, and most of the magic happens with just a few stirs. It’s the kind of recipe that makes you feel like a kitchen wizard without all the fuss. And let’s talk about Cost-efficiency: What is the best way to measure cost-efficiency?. The ingredients are pretty standard pantry staples – sugar, butter, milk, chocolate, and some flavoring. Compared to fancy store-bought chocolates or elaborate desserts, this is incredibly budget-friendly to whip up a big batch. Plus, it’s wonderfully versatile. While the mint Chocolate Chip version is my absolute favorite, you can totally tweak it! Add a swirl of green food coloring if you’re feeling festive, or even mix in some crushed peppermint candies for extra crunch. It’s perfect for bake sales because it travels so well, and it’s also a lifesaver when you need a quick, impressive dessert for unexpected guests. What I love most about this particular recipe is that it strikes that perfect chord between being a special treat and being ridiculously easy to make. It’s the kind of recipe I’ve made countless times, and it never fails to bring smiles. It’s even better than store-bought, I promise!
How to Make Mint Chocolate Chip Fudge
Quick Overview
Making this fudge is wonderfully simple. You’ll essentially melt butter and sugar together, stir in milk and marshmallows (for that super creamy texture!), then add your chocolate and flavorings before pouring it into a pan to set. The key is gentle heating and constant stirring to get that smooth, luscious consistency. It’s a no-fuss method that yields incredibly impressive results. You’ll be amazed at how quickly this comes together, making it a perfect last-minute treat or a fun activity with the kids.
Ingredients
For the Main Fudge:
1 cup (2 sticks) unsalted butter, cut into pieces
1 cup granulated sugar
1 (12-ounce) can evaporated milk
1 (10-ounce) package mini marshmallows
1 teaspoon pure peppermint extract (use the good stuff!)
1/2 teaspoon pure vanilla extract
1 ½ cups semi-sweet chocolate chips (or chopped chocolate)
1 cup milk chocolate chips (or chopped chocolate)
Optional: Green food coloring (a few drops)
For the “Chip” Effect:
1/2 cup semi-sweet or Dark Chocolate chips, for folding in at the end.
Step-by-Step Instructions
Step 1: Preheat & Prep Pan
First things first, grab an 8×8 inch square baking pan. Line it with parchment paper, leaving an overhang on the sides – this makes lifting the fudge out later a breeze! You want to gently grease the parchment paper too, just a light spray or brush of butter. This prevents any sticking and ensures those beautiful edges stay intact. You don’t need to preheat your oven for this recipe, which is one of the reasons I love it so much for busy days!
Step 2: Melt Butter and Sugar
In a large, heavy-bottomed saucepan (this is important to prevent scorching!), melt the butter over medium heat. Once melted, stir in the granulated sugar and the evaporated milk. Keep stirring constantly until the sugar is completely dissolved and the mixture is smooth. This usually takes about 5-7 minutes. You’re looking for a smooth, homogenous mixture – no grainy sugar bits!
Step 3: Add Marshmallows and Chocolate
Once the sugar is dissolved, remove the saucepan from the heat. Add the mini marshmallows and stir them into the hot mixture. Keep stirring until all the marshmallows are melted and you have a wonderfully smooth, glossy base. Now, add all the chocolate chips (both semi-sweet and milk chocolate) into the pot. Stir gently until the chocolate is completely melted and incorporated, creating a luscious, chocolatey mixture. This is where the magic really starts to happen!
Step 4: Stir in Extracts and Color (Optional)
Now for the flavor! Stir in the pure peppermint extract and the vanilla extract. If you’re using green food coloring for that classic mint chip look, add a few drops now and stir until you achieve your desired shade. Be careful not to add too much at once; you can always add more. The aroma at this stage is just divine!
Step 5: Add the “Chips”
This is the “chip” part! Gently fold in the 1/2 cup of extra chocolate chips. You don’t want to stir too vigorously here; you want them to remain somewhat intact, like little pockets of chocolate throughout the fudge. This step is crucial for that authentic mint Chocolate Chip experience. They’ll melt slightly from the residual heat but will still give you those delightful chocolate bites.
Step 6: Pour and Smooth
Working quickly but carefully, pour the fudge mixture into your prepared pan. Use a spatula to gently spread it evenly into the corners. Don’t overwork it; just get it as smooth as you can. The fudge will continue to settle a bit on its own.
Step 7: Chill to Set
This is the hardest part – waiting! Cover the pan loosely with plastic wrap or foil and refrigerate for at least 2-3 hours, or until the fudge is firm and set. You can also leave it on the counter in a cool room for a longer setting time if you prefer, but the fridge is faster and guarantees a good set.
Step 8: Slice and Serve
Once the fudge is firm, use the parchment paper overhang to lift the entire slab out of the pan onto a cutting board. Now comes the fun part: cutting! For clean slices, use a large, sharp knife. You can dip the knife in hot water and wipe it dry between cuts to get really neat edges. Cut into your desired square or rectangular pieces. I usually aim for about 1-inch squares. The smell as you cut into it is just heavenly!
Step 9: Enjoy!
And there you have it! Perfectly smooth, intensely flavorful Mint Chocolate Chip Fudge. It’s best served at room temperature or slightly chilled. Enjoy this little piece of heaven!
What to Serve It With
This fudge is truly a star on its own, but here are some ideas for how to pair it and make it even more special:
For Breakfast: Honestly, a tiny piece with your morning coffee is pure indulgence! It’s like a dessert disguised as breakfast. Pair it with a strong, dark roast coffee to cut through the sweetness.
For Brunch: Serve alongside a fresh fruit salad or a platter of mini pastries. A glass of chilled sparkling cider or even a mimosa would be lovely. You could also dice it up and sprinkle it over yogurt parfaits.
As Dessert: This is a natural fit for after dinner! Serve a square or two with a scoop of vanilla bean ice cream, or alongside a warm brownie for an ultimate chocolate experience. A cup of hot chocolate is also a fantastic companion.
For Cozy Snacks: This is where it truly shines for me. On a chilly evening, a mug of tea (mint or chamomile is lovely) and a piece of this fudge is pure comfort. It’s also brilliant for sharing with friends while watching a movie. My kids love grabbing a piece as an after-school treat, especially when it’s cool and firm from the fridge.
My family tradition is to put a few squares in small cellophane bags tied with festive ribbon for holiday gifts. Everyone devours them, and they always ask for more!
Top Tips for Perfecting Your Mint Chocolate Chip Fudge
I’ve made this fudge more times than I can count, and along the way, I’ve picked up a few tricks that really make a difference. I’m happy to share them with you!
For the Smoothest Fudge: Always use a heavy-bottomed saucepan. This is crucial because it distributes heat evenly, preventing the sugar and milk from scorching on the bottom. A thin pan can lead to burnt bits and a gritty texture, and trust me, no one wants that in their fudge. Stirring *constantly* once you add the sugar mixture is non-negotiable. It ensures everything melts uniformly.
Marshmallow Matters: Using mini marshmallows is a game-changer for fudge texture. They melt more quickly and evenly than large marshmallows, creating that incredibly smooth, creamy, almost silken texture that makes this fudge so irresistible. If you only have large ones, you can chop them up a bit before adding them.
Quality Extracts are Key: Don’t skimp on the peppermint and vanilla extracts. Use pure extracts, not imitation. The difference in flavor is HUGE. A good quality peppermint extract will give you that clean, bright minty flavor that isn’t artificial or medicinal. I find the standard amount of peppermint extract to be perfect for a noticeable mint flavor, but if you’re a true mint fanatic, you *could* cautiously add a tiny bit more, perhaps 1/4 teaspoon at a time, tasting as you go.
Chocolate Choices: I love the combination of semi-sweet and milk chocolate chips because it gives a nice depth of flavor. Semi-sweet provides a good chocolate foundation, while the milk chocolate adds a touch more sweetness and creaminess. For the “chip” effect, I prefer to use chips that hold their shape a bit better, like mini semi-sweet or dark chocolate chips. Folding them in at the end ensures you get distinct pockets of melted chocolate throughout the fudge.
Achieving the Perfect Set: Patience is key! While 2-3 hours in the fridge is usually enough, sometimes, depending on your climate or how much moisture is in your kitchen, it might need a little longer. You’ll know it’s ready when it feels firm to the touch and doesn’t leave a sticky residue on your fingers. Don’t try to rush the setting process too much; it can lead to a fudge that’s too soft or gooey.
Slicing for Success: For the cleanest cuts, I can’t stress enough using a large, sharp knife. And the hot water trick? It’s a lifesaver! Dip the knife in hot water, wipe it dry with a clean kitchen towel, and then make your cut. The hot blade glides through the fudge much more easily, giving you those beautiful, professional-looking squares. Wipe and re-dip as needed.
Don’t Be Afraid to Experiment: While this recipe is perfection as is, feel free to play! If you want a more intense chocolate flavor, use all semi-sweet or dark chocolate chips. For a lighter color, you can omit the green food coloring. You could even add a tiny bit of green food coloring to the final 1/2 cup of chips before folding them in for a more marbled effect!
Storing and Reheating Tips
One of the best things about this Mint Chocolate Chip Fudge is how well it stores, making it perfect for making ahead of time. Here’s how I keep mine fresh and delicious:
Room Temperature Storage: If you plan to serve the fudge within a day or two, storing it at cool room temperature is perfectly fine. Make sure to keep it in an airtight container. I like to layer pieces between sheets of parchment paper to prevent them from sticking to each other. It will hold its best quality for about 3-4 days this way. If your kitchen is particularly warm, it’s safer to refrigerate it.
Refrigerator Storage: For longer storage, the refrigerator is your best friend. Store the cut fudge in an airtight container, again, with parchment paper separating the layers. It will stay delicious and firm for up to 2 weeks. When you want to serve it, I recommend taking it out of the fridge about 15-20 minutes beforehand to let it soften slightly to the perfect fudge texture. It shouldn’t be hard or icy.
Freezer Instructions: Yes, you can freeze this fudge! This is a great option if you want to make a big batch for holidays or special occasions well in advance. Wrap individual pieces or small stacks of fudge tightly in plastic wrap, then place them in a heavy-duty freezer bag or an airtight freezer-safe container. It will keep its quality for up to 2-3 months. Thaw it slowly in the refrigerator overnight, then let it come to room temperature for about 30 minutes before serving. This method ensures the texture remains wonderful.
Glaze Timing Advice: For room temperature or refrigerated storage, it’s best to have the fudge fully set *before* cutting and storing. If you are freezing it, make sure it’s completely firm and cut before wrapping. The fudge itself doesn’t typically have a separate glaze, but if you were to add one, I’d recommend letting the fudge set completely, then applying any drizzled glaze and letting that set before wrapping for storage.
Frequently Asked Questions
Final Thoughts
Honestly, I could talk about this Mint Chocolate Chip Fudge all day! It’s just one of those recipes that consistently brings joy, both in the making and the eating. It’s a testament to how simple ingredients can create something truly spectacular. The way it melts in your mouth, the refreshing burst of mint, and those delightful little chocolate surprises – it’s a flavor combination that just hits all the right notes. It’s the perfect treat for sharing, gifting, or just indulging yourself when you need a little moment of delicious escape. If you’re a fan of mint and chocolate, or just love a good, easy fudge recipe, you absolutely have to give this one a try. I’d love to hear what you think, and if you try it, please share your own little twists or how your family enjoys it! You can leave a comment below or tag me on social media with your creations. Happy fudge-making, everyone!
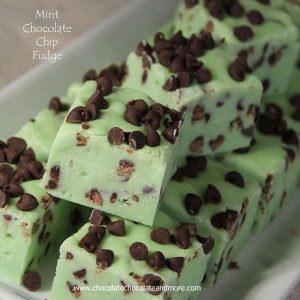
Mint Chocolate Chip Fudge
Ingredients
Main Ingredients
- 3 cups granulated sugar
- 0.75 cup heavy cream
- 0.5 cup unsalted butter
- 7 ounces marshmallow creme
- 12 ounces white chocolate chips
- 0.5 teaspoon peppermint extract
- 0.5 cup mint chocolate chips
- 0.25 cup green food coloring (optional)
Instructions
Preparation Steps
- Line an 8x8 inch baking pan with parchment paper, leaving an overhang on the sides.
- In a medium saucepan, combine sugar, heavy cream, and butter. Cook over medium heat, stirring constantly until the butter is melted and the sugar is dissolved.
- Bring to a boil, and cook, stirring constantly, for 5 minutes. Remove from heat.
- Stir in marshmallow creme and white chocolate chips until melted and smooth.
- Stir in peppermint extract and green food coloring (if using).
- Fold in mint chocolate chips.
- Pour the fudge into the prepared pan and spread evenly.
- Refrigerate for at least 2 hours, or until firm.
- Cut into squares and serve.


