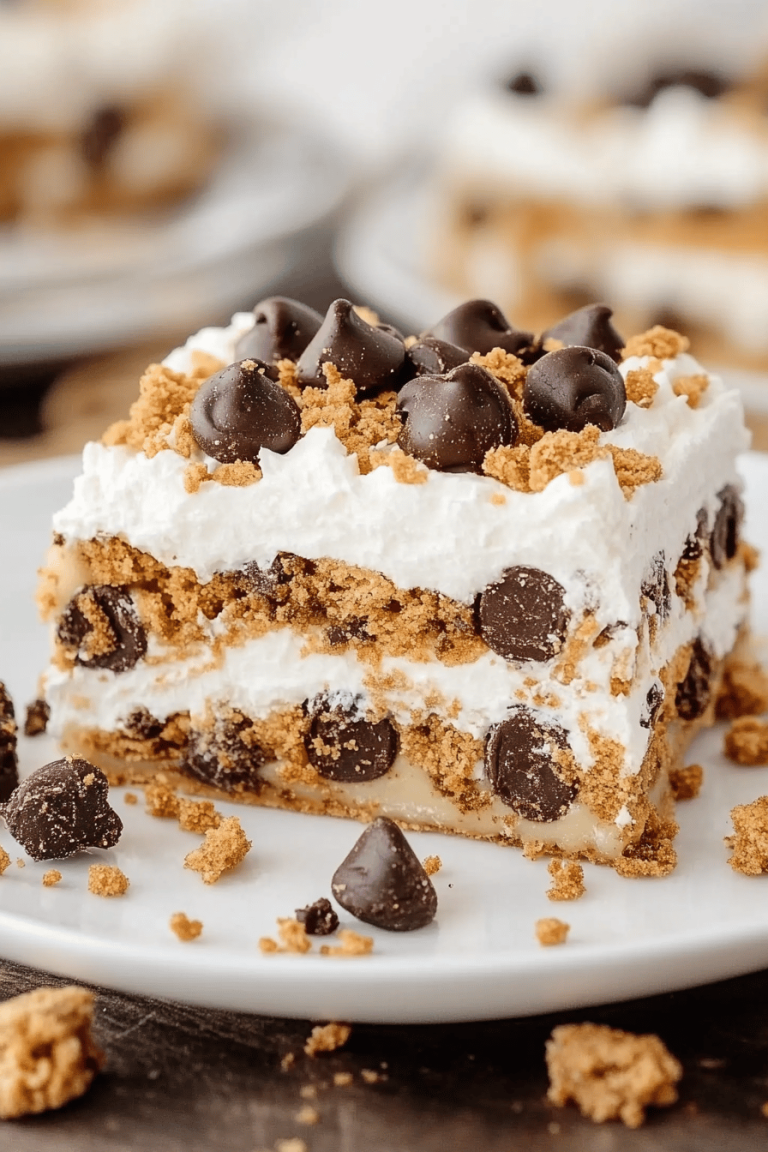
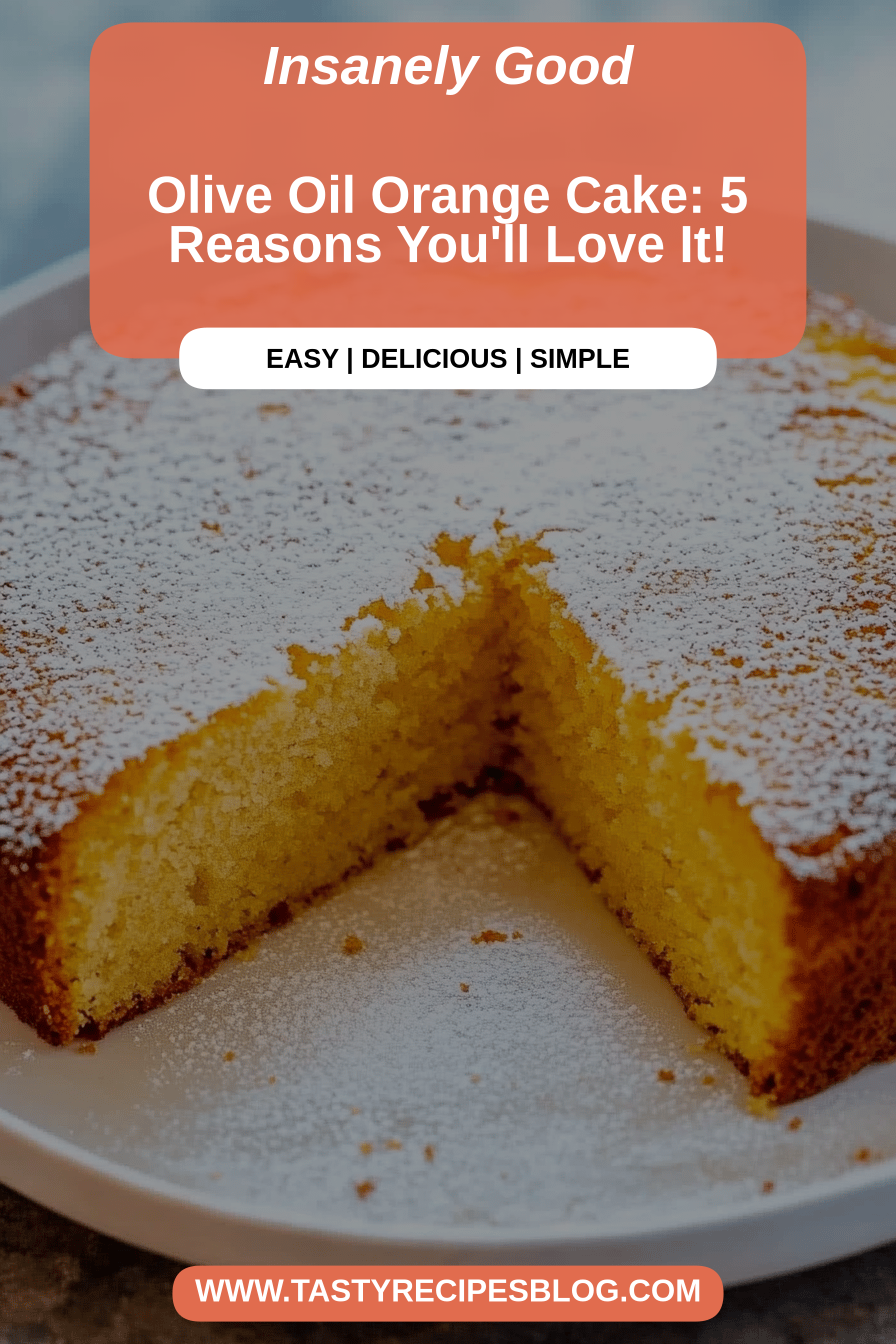
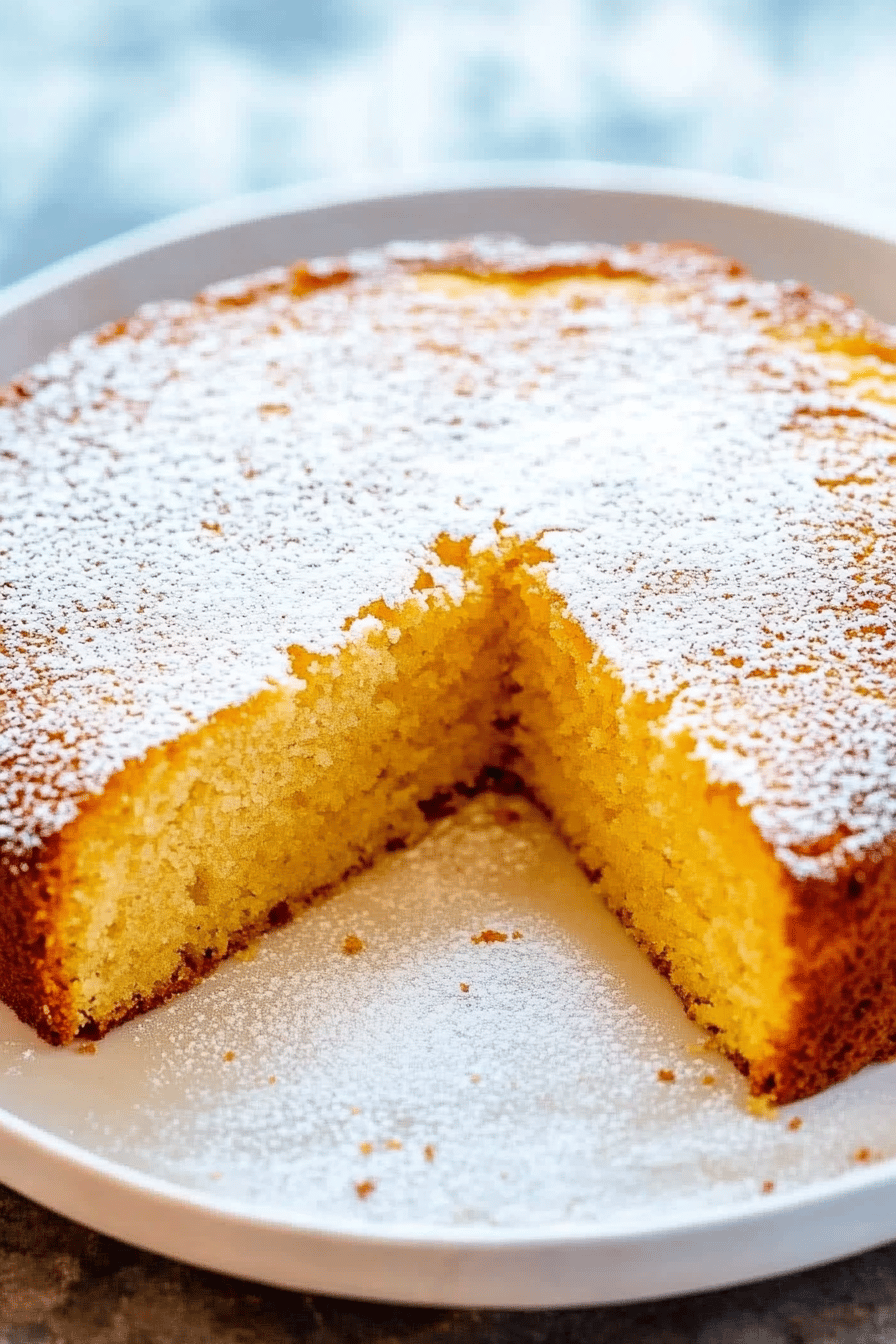
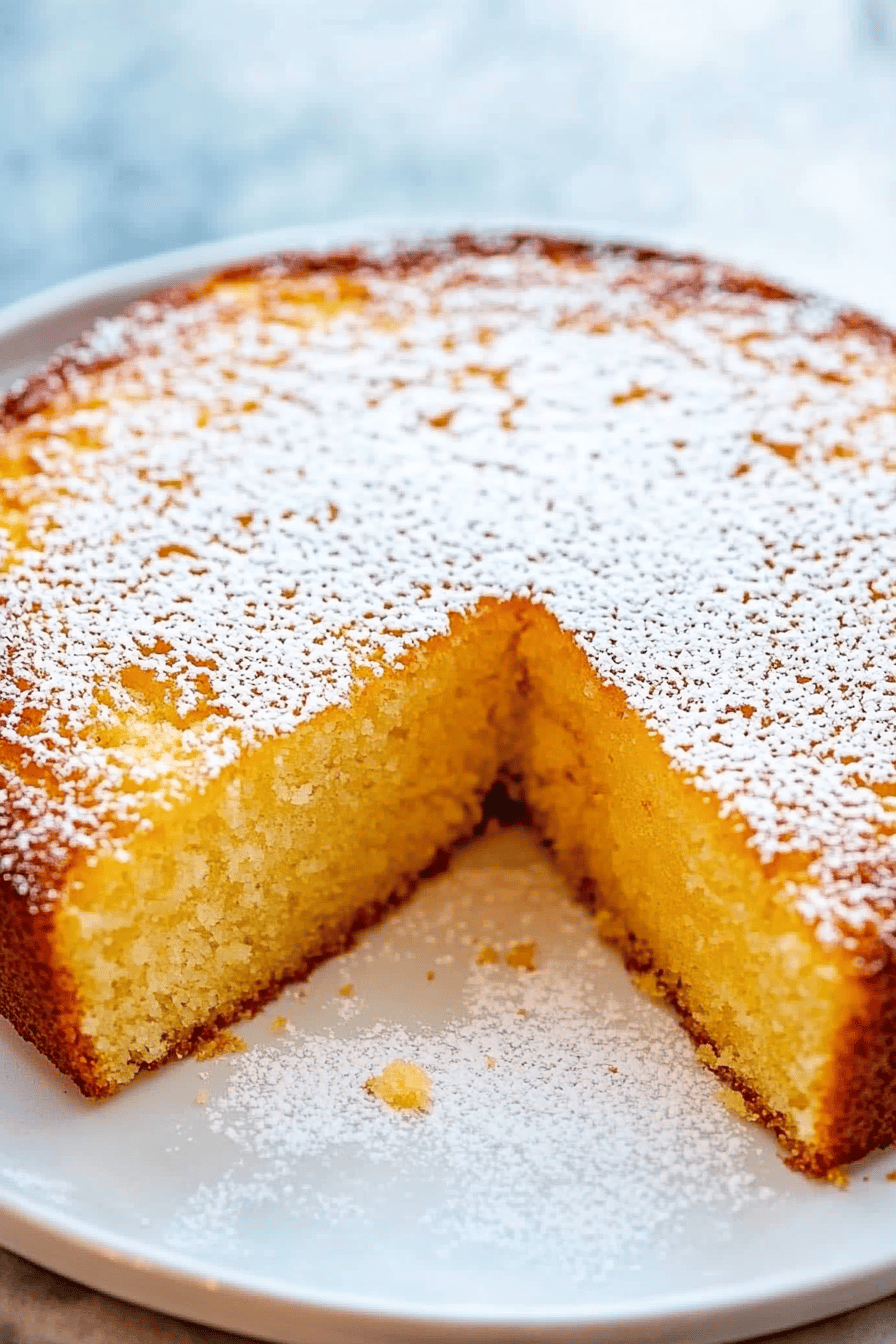
Oh, this olive oil cake. Where do I even begin? It’s one of those recipes that just feels like a warm hug. I remember the first time I tasted a truly good olive oil cake – it was on a trip to Italy, and it was so incredibly moist and fragrant, nothing like the dry, crumbly cakes I’d sometimes encountered. That experience stuck with me, and I’ve spent years trying to recreate that magic. This version, my friends, is it. It’s the cake I whip up when I need something sweet but don’t have hours to spare, the one that disappears from the platter faster than you can say “more please.” It’s seriously a game-changer, especially when you’re craving something that feels a little fancy but is surprisingly simple. Think of it as the sophisticated cousin to a basic vanilla Pound Cake, but with a beautiful depth of flavor you just can’t get any other way.
What is olive oil cake?
So, what exactly is an olive oil cake? At its heart, it’s a cake where olive oil takes the place of butter as the primary fat. This isn’t some trendy new thing; people have been baking with olive oil for centuries! The beauty of it is that it imparts this incredible moisture and a subtle, fruity complexity that you just don’t get from butter. It’s not a “healthy” cake by any means – it’s still cake! – but it often feels lighter and has a wonderful crumb. Think of it as a wonderfully moist, tender, and fragrant cake that’s incredibly forgiving. It’s essentially a celebration of simple, good ingredients, where the quality of your olive oil really shines through. It’s the kind of cake that makes you pause and savor each bite.
Why you’ll love this recipe?
Honestly, there are so many reasons why I keep coming back to this olive oil cake, and I just know you’re going to feel the same way. First off, the flavor is just divine. It’s subtly sweet with a beautiful, delicate fruity note from the olive oil that’s utterly captivating. It’s not overpoweringly sweet, which I really appreciate. Then there’s the texture – oh my goodness, the texture! It’s impossibly tender and moist, with a fine, delicate crumb that practically melts in your mouth. This is thanks to the olive oil doing its magic. And simplicity? You bet! This recipe is a lifesaver on busy weeknights. It comes together so quickly, and you probably have most of the ingredients in your pantry right now. It’s one of those rare recipes that truly tastes like you spent hours in the kitchen when, in reality, it’s quite straightforward. Plus, it’s incredibly budget-friendly. Olive oil is generally more affordable than butter, and the other ingredients are pantry staples. What I love most, though, is its versatility. This cake is delicious on its own, but it’s also a fantastic canvas for other flavors. I sometimes swap out the lemon zest for orange, or add a pinch of cardamom. It’s also perfect for any occasion, from a casual afternoon tea to a more formal dessert. If you love my Lemon Ricotta Cake, you’ll adore this for its similar light and tender crumb, but with that unique olive oil character.
How do I make olive oil cake?
Quick Overview
This olive oil Cake Recipe is all about simplicity and flavor. You’ll whisk together your dry ingredients, then combine your wet ingredients, and finally bring them together in one bowl. The key is not to overmix! We’ll then bake it until golden and fragrant, let it cool slightly, and then finish it off with a simple, delightful glaze. It’s truly one of the easiest cakes I know, and the results are consistently spectacular. You’ll be amazed at how quickly it goes from pantry to plate.
Ingredients
For the Main Batter:
Here’s what you’ll need for the base of this dreamy cake:
- All-Purpose Flour: 2 cups. I usually use a good quality unbleached all-purpose flour. Make sure to measure it correctly by spooning it into your measuring cup and leveling it off – don’t scoop directly from the bag, as that can pack too much flour in.
- Granulated Sugar: 1 ½ cups. This provides the perfect level of sweetness without being cloying.
- Baking Powder: 2 teaspoons. This is what gives the cake its lift and tender texture. Make sure yours is fresh!
- Salt: ½ teaspoon. Don’t skip this! It balances the sweetness and brings out all the other flavors.
- Eggs: 3 large. Room temperature eggs incorporate much better into the batter. Just pop them in a bowl of warm water for 5-10 minutes if you forget to take them out ahead of time.
- Extra Virgin Olive Oil: 1 cup. This is where the magic happens! Use a good quality extra virgin olive oil. A milder, fruity one is best if you’re worried about a strong olive flavor, but I personally love a slightly more robust one for a bit more character. Avoid very peppery oils unless you really love that sensation.
- Milk: ½ cup. Whole milk is my preference for richness, but you can use 2% or even an unsweetened plant-based milk like almond or oat milk. I tested this with almond milk and it actually made it even creamier!
- Lemon Zest: 1 tablespoon. Freshly grated lemon zest is key here for a bright, fragrant lift. You can use the zest of about 1-2 lemons, depending on their size.
- Vanilla Extract: 1 teaspoon. A classic for a reason, it rounds out all the flavors beautifully.
For the Filling (Optional, but highly recommended!):
This adds another layer of deliciousness:
- Lemon Curd: ½ cup. You can use store-bought or homemade. If you’re feeling ambitious, making your own lemon curd is surprisingly simple and SO worth it!
- Cream Cheese: 4 ounces, softened. This makes the curd-filling extra rich and tangy.
For the Glaze:
Just a simple drizzle to finish it off:
- Powdered Sugar: 1 cup. Sifted for a smooth glaze.
- Lemon Juice or Milk: 2-3 tablespoons. Start with 2 and add more until you reach your desired drizzling consistency. Lemon juice adds a lovely tang, but milk works just fine too.
Step-by-Step Instructions
Step 1: Preheat & Prep Pan
First things first, get your oven preheating to 350°F (175°C). I like to use a 9-inch round cake pan or an 8×8 inch square pan for this. Grease it really well with butter or non-stick spray, and then flour it, tapping out any excess. For extra insurance against sticking, you can also line the bottom with a circle of parchment paper.
Step 2: Mix Dry Ingredients
In a large bowl, whisk together your all-purpose flour, granulated sugar, baking powder, and salt. Give it a good whisk to make sure everything is evenly distributed. This ensures your leavening agent (the baking powder) is spread throughout, so you get an even rise. You’re looking for no clumps of baking powder.
Step 3: Mix Wet Ingredients
In a separate medium bowl, whisk together your room-temperature eggs until they’re lightly beaten. Then, slowly stream in your extra virgin olive oil while whisking continuously. This emulsifies the oil and eggs, making for a smoother batter. Stir in the milk, lemon zest, and vanilla extract.
Step 4: Combine
Pour the wet ingredients into the bowl with the dry ingredients. Now, this is important: mix *just until combined*. You don’t want to overmix, or you’ll end up with a tough cake. A few streaks of flour are okay; they’ll disappear as you gently fold. I usually use a spatula and fold it in, making sure to scrape the bottom and sides of the bowl.
Step 5: Prepare Filling (if using)
If you’re adding the optional filling, now’s the time to prepare it. In a small bowl, beat together the softened Cream Cheese and lemon curd until smooth and creamy. You want it well combined so you get that lovely tang in every bite.
Step 6: Layer & Swirl (if using filling)
Pour about half of the batter into your prepared cake pan. Dollop spoonfuls of the Cream Cheese and lemon curd mixture evenly over the batter. Then, gently pour the remaining batter over the filling. You can use a knife or a skewer to gently swirl the filling through the batter for a marbled effect. Don’t over-swirl, or you’ll just mix it all in!
Step 7: Bake
Bake for 30-40 minutes, or until a wooden skewer or toothpick inserted into the center comes out clean. The top should be a beautiful golden brown, and the cake should smell amazing. If you notice the top browning too quickly, you can loosely tent it with aluminum foil.
Step 8: Cool & Glaze
Let the cake cool in the pan for about 10-15 minutes before inverting it onto a wire rack to cool completely. Once it’s completely cool, whisk together the powdered sugar and 2 tablespoons of lemon juice or milk. Add more liquid, a teaspoon at a time, until you get a thick but pourable glaze. Drizzle it over the cooled cake.
Step 9: Slice & Serve
Once the glaze has set a bit, slice and serve! This cake is wonderful on its own, but a dollop of Whipped Cream or a few fresh berries is never a bad idea.
What to Serve It With
This olive oil cake is so wonderfully versatile, it truly fits into any part of your day. For breakfast, it’s absolutely delightful alongside a strong cup of coffee or a creamy latte. I love slicing off a thin piece and just enjoying the subtle flavors as I ease into my morning. For a more festive brunch, I’ll plate it up with a side of fresh berries – raspberries and blueberries are my go-tos – and maybe a small pitcher of yogurt or crème fraîche for dipping. It looks so elegant and tastes even better. As a dessert, it’s a dream. It pairs beautifully with a scoop of good quality vanilla bean ice cream or a delicate fruit sorbet, like raspberry or lemon. Sometimes, I’ll serve it with a drizzle of honey infused with a sprig of rosemary, which is surprisingly delightful. And for those cozy snack moments, when you just need a little something sweet to cap off the evening, this cake is pure comfort. It’s perfect with a cup of herbal tea or even a small glass of sweet dessert wine. My family absolutely adores it with a dollop of mascarpone cheese mixed with a little honey.
Top Tips for Perfecting Your Olive Oil Cake
I’ve made this olive oil cake more times than I can count, and over the years, I’ve picked up a few tricks that I think really make a difference. Here are my top tips to ensure your cake turns out perfectly:
Olive Oil Quality: This is probably the most crucial tip. Use a good quality extra virgin olive oil. You don’t need the most expensive bottle, but something that has a pleasant fruity aroma and taste. Avoid using an olive oil that is very peppery or has a strong, bitter flavor unless you are absolutely sure you want that intensity. A milder, fruitier oil will give you a more delicate flavor that complements the cake beautifully. I’ve tested this with a few different oils, and the difference is noticeable. A good quality Spanish or Italian olive oil tends to work wonders.
Don’t Overmix: This is a golden rule for *any* cake, but especially with oil-based cakes. Overmixing develops the gluten in the flour, leading to a tougher, denser cake. Mix the wet and dry ingredients *just until* they come together. A few small lumps are perfectly fine – they’ll bake out. I always use a rubber spatula and fold gently, making sure to scrape the bottom and sides of the bowl to catch any dry bits, but I stop as soon as I don’t see large streaks of flour.
Room Temperature Ingredients: While it might seem like a small detail, using room temperature eggs and milk (if you use it) really does help create a smoother, more emulsified batter. If you forget to take them out, you can quickly warm eggs by placing them in a bowl of warm (not hot) water for about 5-10 minutes. Warm milk is also okay.
Zest is Best: Fresh lemon zest is a game-changer here. It adds a bright, aromatic lift that cuts through the richness of the olive oil and sugar. I always use a microplane for zesting to get fine, fragrant flecks without any of the bitter white pith. If you’re not a fan of lemon, you could try orange zest or even a pinch of cardamom for a different flavor profile.
The Filling Swirl: If you’re using the optional cream cheese and lemon curd filling, don’t go crazy with the swirling. You want distinct pockets of the tangy filling, not a uniform pinkish hue throughout the cake. Gently dollop and then use a skewer or knife to make just a few passes through the batter. Less is more!
Doneness Test: Ovens can vary, so trust the toothpick test! A cake tester or a thin wooden skewer inserted into the center should come out clean, with maybe a few moist crumbs attached. If it comes out with wet batter, it needs more time. If it comes out completely dry, it might be slightly overbaked. For this cake, a few moist crumbs are perfectly fine and indicate it’ll be wonderfully moist.
Glaze Consistency: For the glaze, start with the recommended amount of liquid and add more *slowly* until you reach a consistency you like. You want it thick enough to cling to the cake but thin enough to drizzle nicely. If you accidentally make it too thin, you can whisk in a little more powdered sugar. If it’s too thick, add a tiny bit more lemon juice or milk.
Pan Preparation is Key: I’ve learned the hard way that a well-greased and floured pan (or parchment-lined pan) is essential for easy release. Especially with oil-based cakes, sometimes they can stick a bit more than butter-based ones. Take the extra few minutes to prep your pan properly!
Storing and Reheating Tips
This olive oil cake is fantastic for making ahead, which is always a win in my book. Here’s how I like to store and reheat it to keep it tasting its best:
Room Temperature Storage: Once the cake is completely cooled and the glaze has set, you can store it at room temperature. I usually keep it in an airtight container or covered loosely with plastic wrap. It’s best enjoyed within 2-3 days when stored this way. The olive oil actually helps keep it moist, so it holds up really well.
Refrigerator Storage: If your kitchen is particularly warm or you want it to last a bit longer, you can store it in the refrigerator. Again, use an airtight container. It should keep well for up to 5 days. When you take it out, you might want to let it sit at room temperature for about 30 minutes to take the chill off and allow the flavors to fully bloom. I’ve tested this, and it makes a big difference to the texture.
Freezer Instructions: Yes, you can freeze this cake! I usually freeze it *without* the glaze. Wrap the cooled cake tightly in a layer of plastic wrap, then a layer of aluminum foil. It will keep well in the freezer for up to 2 months. When you’re ready to enjoy it, thaw it overnight in the refrigerator, and then let it come to room temperature before glazing.
Glaze Timing Advice: If you plan to store the cake for more than a day, I recommend glazing it right before serving or just before the final storage if you’re sure it will be eaten within a couple of days. If you’re freezing it, definitely glaze it *after* thawing. If you glaze it before freezing, the glaze can sometimes become a bit sticky or gummy after thawing. For room temperature storage, glazing it on day one is usually fine if you’re going to eat it within 2-3 days.
Frequently Asked Questions
Final Thoughts
So there you have it – my absolute favorite olive oil cake! It’s a recipe that truly embodies what I love about baking: creating something incredibly delicious and satisfying with simple ingredients and a little bit of love. The tenderness, the subtle fragrant notes, and the sheer ease of making it make this a cake I return to time and time again. I really hope you’ll give it a try. It’s the kind of cake that brings smiles to faces and makes any day feel a little bit special. If you adore this cake, you might also fall in love with my Orange Olive Oil Cake or my simple Yogurt Cake. They share that same wonderful moistness and delightful flavor profile. I can’t wait to hear how your olive oil cake turns out! Please share your thoughts, any variations you tried, or your own favorite ways to enjoy it in the comments below. Happy baking, everyone!
Olive oil cake
Ingredients
Main Ingredients
- 1.5 cups all-purpose flour
- 1 teaspoon baking powder
- 0.5 teaspoon baking soda
- 0.5 teaspoon salt
- 0.75 cup granulated sugar
- 0.75 cup olive oil
- 3 large eggs
- 0.75 cup whole milk
- 1 teaspoon vanilla extract
- 0.5 cup powdered sugar (for dusting)
Instructions
Preparation Steps
- Preheat oven to 350°F (175°C). Grease and flour a 9-inch round cake pan.
- In a large bowl, whisk together the flour, baking powder, baking soda, and salt.
- In a separate bowl, whisk together the sugar, olive oil, eggs, milk, and vanilla extract.
- Gradually add the dry ingredients to the wet ingredients, mixing until just combined.
- Pour the batter into the prepared cake pan and bake for 40-45 minutes, or until a toothpick inserted into the center comes out clean.
- Let the cake cool in the pan for 10 minutes before inverting it onto a wire rack to cool completely.
- Dust with powdered sugar before serving.