
Okay, so let me tell you about something that’s become an absolute weekend hero in our house: pancake casserole. If you’re anything like me, the idea of waking up to fluffy pancakes is pure bliss, but the reality of standing at the stove, flipping batch after batch, can sometimes feel… a little much, especially when everyone’s hungry and looking at you expectantly. That’s where this pancake casserole swoops in to save the day. It’s like taking all the comforting, delicious goodness of your favorite breakfast pancakes and transforming it into this incredibly easy, shareable dish that bakes right up in One Pan. Honestly, it’s the closest thing to magic I’ve found in the kitchen lately. Think of it as your classic pancake, but without the fuss and with an extra layer of cozy charm. It’s quickly become my go-to when I want something truly special without all the morning labor, and my kids? Well, they practically inhale it every single time.
What is a pancake casserole?
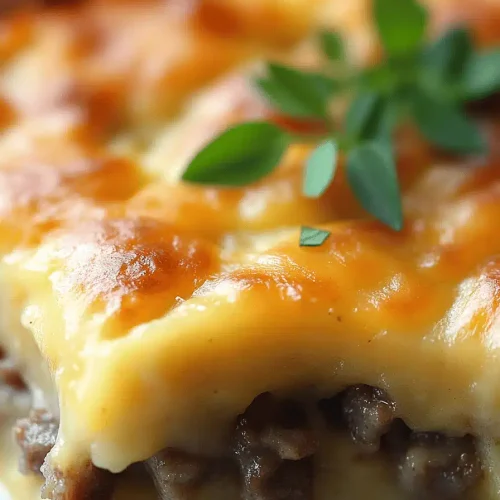
So, what exactly is this wondrous thing we call pancake casserole? At its heart, it’s exactly what it sounds like: your beloved pancake batter, poured into a baking dish and baked until golden and puffed up, often with delightful additions swirled in. It’s not just a giant pancake, though; it’s more like a baked pancake pie or a breakfast gratin. The beauty is that it takes all the fundamental elements of a classic pancake – the flour, eggs, milk, leavening – but instead of cooking individual rounds, you’re creating a single, cohesive, glorious cake-like structure. The name itself, pancake casserole, really says it all. It’s a comforting, hearty dish that’s perfect for feeding a crowd or just making a large family feel extra special without the usual morning rush. It’s essentially a simplified, oven-baked version of a breakfast favorite, making it accessible and frankly, a lifesaver.
Why you’ll love this recipe?
There are so many reasons why this pancake casserole has earned a permanent spot in my recipe binder, and I’m genuinely excited to share them with you! First off, the flavor is just… pure comfort. It’s got that warm, eggy, slightly sweet taste that instantly brings back childhood memories, but elevated. Imagine your favorite pancake, but with a slightly denser, more cake-like texture that’s utterly satisfying. And the simplicity? Oh my goodness, the simplicity is what makes it a game-changer. You mix up your batter like you normally would, maybe add some fun swirls, pour it into a pan, and let the oven do all the work. No standing over a hot griddle, no flipping anxiety, just pure, hands-off deliciousness while you sip your coffee. It’s incredibly cost-efficient too, using pantry staples that most of us already have on hand. Plus, the versatility is incredible! Serve it as a decadent breakfast, a delightful brunch centerpiece, or even a sweet treat for dessert. What I love most about this pancake casserole is how it feels both familiar and excitingly new. It’s the perfect answer to those mornings when you crave something deeply comforting and impressive, but you’re short on time or energy. It’s also a fantastic way to use up ingredients that might be nearing their end, like overripe bananas or a bit of leftover yogurt. It’s a recipe that truly delivers on flavor, ease, and sheer joy.
How do I make a
Quick Overview
The whole process for this pancake casserole is remarkably straightforward. You’ll mix your wet and dry ingredients for a classic pancake batter, pour it into a greased baking dish, perhaps swirl in some sweet fillings or fruit, and then bake it until it’s golden brown and puffed. The oven does the heavy lifting, transforming a simple batter into a delightful, shareable breakfast cake. It’s the perfect way to serve up a crowd-pleasing breakfast with minimal fuss and maximum flavor, making busy mornings or lazy weekend brunches feel extra special.
Ingredients
For the Main Batter:
This is where we lay the foundation for that classic pancake flavor you know and love. I always aim for good quality all-purpose flour; it makes a noticeable difference in texture. For the liquid, whole milk gives the richest flavor and creamiest texture, but I’ve had success with 2% milk or even almond milk when I’m out – it just makes it a touch less rich. The eggs are crucial for binding and lift, and I like to use large eggs. For sweetness, granulated sugar is standard, but you can certainly adjust this to your preference. Baking powder is our leavening agent, giving us that lovely lift, and a pinch of salt balances out the sweetness beautifully. And of course, melted butter adds that irresistible richness and helps prevent sticking. I always melt my butter just before using it so it’s nice and warm but not hot.
For the Filling:
This is where you can get creative and really make the pancake casserole your own! My absolute favorite is a simple swirl of mashed ripe bananas and a touch of cinnamon. It adds a wonderful sweetness and moisture. Another fantastic option is a berry compote – just gently simmer some fresh or frozen berries with a tablespoon of sugar until they break down. Chocolate chips are always a winner, especially with kids, or you could do a swirl of apple butter for a cozy fall flavor. Some people even love a Cream Cheese swirl, softened cream cheese mixed with a little sugar and vanilla. The key is to make sure your filling isn’t too watery, or it can make the pancake casserole soggy. For fruit fillings, I often give them a quick pulse in the food processor or mash them well so they spread easily.
For the Glaze:
A simple glaze takes this from delicious to divine. My go-to is a basic powdered sugar glaze – just powdered sugar whisked with a little milk or water until you reach your desired pouring consistency. A splash of vanilla extract or even a bit of lemon zest can add a lovely brightness. If you want something a little richer, you could do a maple glaze by whisking melted butter, maple syrup, and powdered sugar. The goal is a glaze that’s thin enough to drizzle but thick enough to coat nicely without running off entirely. I usually start with just a tablespoon or two of liquid and add more until it’s just right. It’s the perfect finishing touch!
Step-by-Step Instructions
Step 1: Preheat & Prep Pan
First things first, get your oven preheating to 375 degrees Fahrenheit (190 degrees Celsius). This is a pretty standard baking temperature, and it gives us a nice, even bake. While the oven is warming up, grab your baking dish. I usually use a 9×13 inch baking dish, but an 8×8 or a round pie dish works too, you’ll just need to adjust the baking time a bit. Generously grease your baking dish. You can use butter, cooking spray, or even a non-stick baking spray. A well-greased pan is your best friend here to ensure none of that glorious pancake goodness sticks to the bottom. Don’t skimp on this step!
Step 2: Mix Dry Ingredients
In a large mixing bowl, whisk together your all-purpose flour, granulated sugar, baking powder, and salt. Whisking these dry ingredients together first is a small but mighty step that ensures everything is evenly distributed. This means you won’t end up with pockets of baking powder or salty surprises in your finished pancake casserole. I like to whisk them until they look uniformly pale and there are no visible lumps. It’s just a quick, simple way to set yourself up for success.
Step 3: Mix Wet Ingredients
In a separate, medium-sized bowl, whisk together your milk, eggs, and melted butter. If you’re using vanilla extract, now’s the time to add it to the wet ingredients. Whisk everything together until it’s well combined and slightly frothy. I usually give it a good minute or so of whisking to make sure the eggs are fully incorporated and the mixture is smooth. The melted butter should be incorporated without leaving oily streaks. If your butter has cooled a bit, that’s perfectly fine; you just don’t want it piping hot, as that could scramble the eggs.
Step 4: Combine
Now for the magic! Pour the wet ingredients into the bowl with the dry ingredients. Using a whisk or a spatula, gently mix everything together until *just* combined. This is the most critical part for achieving tender pancakes: do NOT overmix! A few lumps are perfectly okay, and actually desirable. Overmixing develops the gluten in the flour too much, which can lead to tough, chewy pancakes. Stop mixing as soon as you don’t see any dry streaks of flour. It should look like a thick batter, thicker than typical pancake batter because it will spread out in the pan.
Step 5: Prepare Filling
While the batter is resting for a minute (which you don’t technically *have* to do, but it’s good practice!), get your chosen filling ready. If you’re using mashed bananas, just mash them in a small bowl with a fork until smooth and stir in a pinch of cinnamon. If you’re using berries, gently heat them in a small saucepan with a teaspoon of sugar for a few minutes until they soften and release their juices. For chocolate chips or other solid add-ins, just have them ready to go. The goal is for your filling to be spoonable or easily spreadable.
Step 6: Layer & Swirl
Pour about two-thirds of your pancake batter into the prepared baking dish and spread it out evenly with a spatula. Now, dollop spoonfuls of your prepared filling over the batter. Don’t worry about being too neat; this is where the swirling comes in! Pour the remaining one-third of the batter over the filling. Then, using a knife or a skewer, gently swirl the batter and filling together. You can make zig-zags, loops, or just gentle marbled patterns. The idea is to create pockets of flavor and visual interest. Don’t over-swirl, or your colors will blend too much; you want distinct ribbons of your filling. This step is pure fun and totally customizable!
Step 7: Bake
Carefully place the baking dish into your preheated oven. Bake for 20-30 minutes, or until the pancake casserole is golden brown around the edges and puffed up in the center. You can check for doneness by inserting a toothpick into the center; it should come out clean or with just a few moist crumbs attached. The baking time can vary depending on your oven and the size of your dish, so keep an eye on it. If the top is browning too quickly before the center is cooked, you can loosely tent it with foil.
Step 8: Cool & Glaze
Once it’s baked to perfection, carefully remove the pancake casserole from the oven. Let it cool in the pan for about 5-10 minutes. This is important because it allows the casserole to set up a bit and makes it much easier to slice. While it’s cooling, whisk together your glaze ingredients until smooth. Start with powdered sugar and just a tiny bit of liquid, adding more as needed until you get a drizzly consistency. Once the casserole has cooled slightly, drizzle the glaze all over the top. Watch it ooze down the sides – it’s so tempting!
Step 9: Slice & Serve
After the glaze has set for a few minutes, slice the pancake casserole into squares, just like you would a coffee cake or brownies. Serve warm, right out of the pan. It’s absolutely delicious on its own, but you can also top it with a dollop of Whipped Cream, a dusting of powdered sugar, or some fresh berries. The contrast of the warm, fluffy pancake base with the sweet glaze is just heavenly. Enjoy every single bite!
What to Serve It With
This pancake casserole is so wonderfully versatile, it truly shines in so many contexts! For a relaxed Breakfast, I love to serve it with a good pot of freshly brewed coffee. A simple dusting of powdered sugar or a light drizzle of maple syrup is usually all it needs. It’s hearty enough to be the star of the show. When we’re hosting a larger family gathering for Brunch, this casserole becomes the centerpiece. I’ll often serve it alongside a platter of crispy bacon, some fresh fruit salad, and maybe a couple of hard-boiled eggs to round things out. For beverages, mimosas or a pitcher of iced tea always go over well. If you’re looking for a sweet and comforting Dessert, especially after a lighter meal, this is perfect. Serve a smaller, richer portion, perhaps with a scoop of vanilla bean Ice Cream or a dollop of crème fraîche. A sprinkle of toasted nuts or a dusting of cocoa powder can also elevate it. And for those times when you just need a Cozy Snack during the afternoon or a late-night treat, a warm slice with a glass of milk is pure comfort food. My kids absolutely adore it as an after-school snack, and it feels so much more special than just a regular cookie. It’s the kind of dish that brings smiles and warm bellies, no matter the occasion.
Top Tips for Perfecting Your Pancake Casserole
Over the years of making this pancake casserole (and trust me, I’ve made it *a lot*), I’ve picked up a few tricks that really help ensure it turns out perfectly every single time. So, let’s dive into some of my favorite tips and lessons learned!
Zucchini Prep: Now, while this recipe doesn’t *require* zucchini, it’s a fantastic addition if you want to sneak in some extra veggies and moisture without anyone knowing! If you do add it, make sure to grate it finely and squeeze out as much moisture as possible. You can do this by wrapping the grated zucchini in a clean kitchen towel or cheesecloth and wringing it out over the sink. This prevents your casserole from becoming soggy. Freshly grated zucchini is best; it has a milder flavor and better texture.
Mixing Advice: I cannot stress this enough: do not overmix the batter! I learned this the hard way early on. Overmixing develops the gluten in the flour, resulting in a tough, rubbery pancake casserole. Stop mixing as soon as you no longer see streaks of dry flour. A few small lumps are perfectly fine and are actually a good sign. The batter should be thick but pourable; if it seems too thick, you can add a tablespoon or two more milk, but err on the side of slightly thicker rather than thinner.
Swirl Customization: Don’t be afraid to get creative with your swirls! For a beautiful marbling effect, I like to dollop my filling (whether it’s fruit, chocolate, or Cream Cheese) in random spots over the first layer of batter. Then, I pour the remaining batter over the top and use a butter knife or a skewer to gently swirl the two together. Make sweeping motions, but don’t overdo it – you want distinct ribbons of color and flavor, not a muddy mess. You can also try different patterns; a few zig-zags can look quite appealing!
Ingredient Swaps: I’ve experimented quite a bit! If you’re out of regular milk, buttermilk adds a lovely tang that complements fruit fillings beautifully. For a richer batter, you can substitute half-and-half for the milk. For a dairy-free option, any unsweetened plant-based milk (like almond, soy, or oat) works well, and you can use a neutral oil like canola or vegetable oil instead of butter. For the sweetener, you can use honey or maple syrup, but be aware that this might slightly alter the texture and color. Just remember to adjust liquids accordingly if you make significant substitutions.
Baking Tips: Ovens can be finicky! If your oven tends to run hot, you might want to reduce the temperature slightly or keep a closer eye on it. Always use the middle rack in your oven for the most even heat distribution. If the top of your pancake casserole starts browning too quickly before the center is cooked through, simply tent it loosely with aluminum foil. This traps steam and heat, allowing the inside to cook without burning the top. A good visual cue is when the edges are golden brown and the center looks set and slightly puffed.
Glaze Variations: The glaze is your canvas! For a brighter flavor, add a teaspoon of lemon or orange zest to your powdered sugar glaze. A touch of cinnamon or nutmeg can add warmth. If you’re feeling decadent, whisk in a tablespoon of melted chocolate or cocoa powder for a chocolate glaze. For a more rustic look, skip the glaze altogether and simply dust with powdered sugar or serve with a drizzle of honey. The consistency is key – you want it thick enough to coat but thin enough to drizzle easily. Start with less liquid and add more incrementally.
Storing and Reheating Tips
One of the best things about this pancake casserole is how well it stores, making leftovers a dream! If you happen to have any (which is rare in my house!), you can keep it fresh for a few days.
Room Temperature: If you have a small amount left and plan to finish it within a day, you can actually leave it covered loosely on the counter. However, for food safety and to maintain the best quality, I generally recommend refrigerating any leftovers. If you do leave it out, make sure it’s covered to prevent it from drying out or attracting any unwanted visitors!
Refrigerator Storage: This is my preferred method. Once the pancake casserole has cooled completely, cover it tightly with plastic wrap or transfer it to an airtight container. It will stay delicious in the refrigerator for about 3-4 days. The texture might change slightly, becoming a little denser, but it’s still wonderfully tasty. Covering it well is crucial to prevent it from absorbing any other odors in the fridge or drying out.
Freezer Instructions: For longer storage, this pancake casserole freezes beautifully. Let it cool completely, then either wrap individual slices tightly in plastic wrap and then in aluminum foil, or freeze the entire pan (if you have a freezer-safe dish) wrapped tightly. It can be stored in the freezer for up to 2-3 months. To thaw, I usually remove it from the freezer the night before and let it thaw in the refrigerator. If you’re in a hurry, you can reheat it directly from frozen, but it will take longer.
Glaze Timing Advice: If you’re planning to store or freeze the casserole, I highly recommend applying the glaze *after* reheating. If you glaze it before storing, especially in the fridge or freezer, the glaze can become sticky, gummy, or even melt and make the top of the casserole wet. So, bake it, let it cool, store it (glaze-free!), and then add a fresh drizzle of glaze or a dusting of powdered sugar once it’s heated through.
Frequently Asked Questions
Final Thoughts
Honestly, this pancake casserole recipe is one of those finds that just makes life a little bit easier and a whole lot more delicious. It’s the kind of dish that feels both special enough for a weekend treat and simple enough for a busy weekday morning when you need a little extra cheer. The way it bakes up so beautifully, filling your kitchen with that irresistible aroma of warm pancakes, is pure joy. I truly hope you give this a try, whether you’re a seasoned baker or just starting out in the kitchen. It’s forgiving, adaptable, and always, always a crowd-pleaser. If you love this recipe, you might also enjoy my fluffy blueberry muffins or my easy overnight oats recipe for more breakfast inspiration! I can’t wait to hear how yours turns out, so please leave a comment below and let me know your favorite filling or any fun variations you tried. Happy baking, and enjoy every delicious bite!
Pancake Casserole
Ingredients
Main Ingredients
- 12 pancakes Prepared Pancakes
- 2 cups Milk
- 4 large Eggs
- 0.25 cup Maple Syrup
- 1 teaspoon Vanilla Extract
- 0.5 cup Butter melted
- 1 cup Brown Sugar packed
- 0.5 cup Powdered Sugar
Instructions
Preparation Steps
- Preheat oven to 350°F (175°C). Grease a 9x13 inch baking dish.
- Cut pancakes into bite-sized pieces and place in the prepared baking dish.
- In a bowl, whisk together milk, eggs, maple syrup, and vanilla extract.
- Pour the milk mixture over the pancakes.
- In a separate bowl, combine melted butter and brown sugar. Sprinkle this mixture over the casserole.
- Bake for 30-35 minutes, or until the casserole is set and golden brown.
- Let cool slightly, then dust with powdered sugar before serving.


