Okay, so if there’s one dish that’s a permanent fixture in our family’s meal rotation, it’s this Parmesan Chicken. Seriously, it’s the kind of meal I can whip up on a Tuesday night without breaking a sweat, and it feels like a special occasion every single time. It’s got that perfect balance of crispy, cheesy goodness that makes everyone, from my picky eater kiddo to my husband who could eat pasta every day, absolutely rave. You know those nights when you’re staring into the fridge, wondering what on earth to make that’s both satisfying and doesn’t require a three-hour commitment? This Parmesan chicken is my absolute lifesaver for those moments. It’s leagues better than your average frozen dinner, and frankly, it’s even more satisfying than some restaurant versions I’ve tried. It’s the ultimate comfort food that’s surprisingly simple to pull off.
What is Parmesan Chicken?
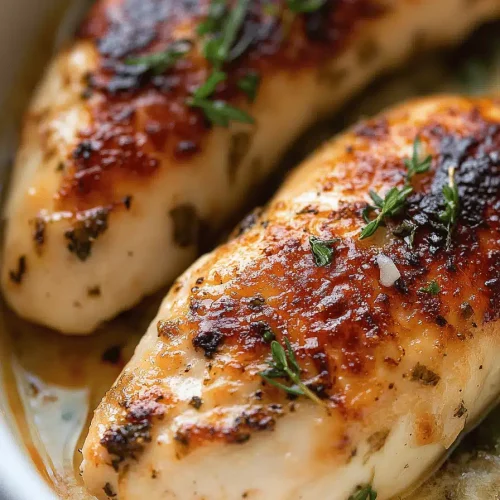
So, what exactly is this magical Parmesan Chicken I’m always talking about? Think of it as a culinary hug. It’s essentially tender chicken cutlets, lovingly coated in a mixture that’s heavy on the Parmesan cheese (because, let’s be honest, that’s the star of the show here!), sometimes with a little panko or breadcrumbs for extra crunch, and then pan-fried or baked until golden brown and irresistible. It’s not just about the chicken itself, though; it’s about that glorious, slightly salty, nutty flavor that Parmesan imparts. It’s a dish that’s been around in various forms for ages, a testament to how perfectly cheese and chicken just *work* together. It’s approachable, familiar, and yet, when done right, it can feel incredibly elegant. It’s one of those recipes that’s so forgiving, even if you’re new to cooking, you’ll nail it.
Why you’ll love this recipe?
I could honestly write a novel about why this Parmesan chicken recipe holds such a special place in my heart (and my kitchen!). First off, the flavor is just out of this world. That golden-brown crust, infused with sharp, salty Parmesan, is what dreams are made of. It’s not just a bland coating; it’s a flavor bomb that complements the tender chicken perfectly. And let’s talk about simplicity, because, as a busy mom, that’s HUGE. You don’t need a million fancy ingredients or complicated techniques. Most of what you need is probably already in your pantry! What I love most is how versatile it is. Serve it with a simple side salad for a light dinner, toss it with pasta for a more hearty meal, or even cut it into strips for a crowd-pleasing appetizer. It’s also surprisingly budget-friendly, especially when chicken breast is on sale. You get so much deliciousness for such a small investment. Plus, it’s a recipe that my kids actually *request*. They devour it every single time, and knowing they’re getting a meal packed with flavor and good protein makes me so happy. It’s a win-win-win!
How do I make Parmesan Chicken?
Quick Overview
Making this Parmesan Chicken is a straightforward process that really lets the ingredients shine. We’ll start by getting our chicken ready, then create a flavorful coating packed with Parmesan, give it a quick cook until it’s beautifully golden and crispy, and finish it off. It’s a method that guarantees a delicious, satisfying meal without demanding hours in the kitchen. You’ll be amazed at how quickly this comes together, making it perfect for weeknight dinners or even impromptu gatherings.
Ingredients
For the Main Batter:
1.5 pounds boneless, skinless chicken breasts or thighs, sliced into ½-inch thick cutlets
1 cup all-purpose flour (or gluten-free blend)
2 large eggs, lightly beaten
1 cup finely grated Parmesan cheese (the real stuff, please! It makes a difference)
½ cup panko breadcrumbs (for extra crispiness, optional but highly recommended)
1 teaspoon garlic powder
½ teaspoon onion powder
½ teaspoon dried Italian seasoning
Salt and freshly ground Black Pepper to taste
3-4 tablespoons olive oil or vegetable oil, for frying
For the Glaze:
½ cup melted butter
¼ cup finely grated Parmesan cheese
1 tablespoon fresh lemon juice (optional, but brightens it up!)
1 teaspoon fresh parsley, chopped (for garnish and freshness)
Step-by-Step Instructions
Step 1: Preheat & Prep Pan
First things first, let’s get our oven preheated to 375°F (190°C). If you’re going to bake this instead of pan-frying, this is when you get it ready. For pan-frying, grab a large skillet and pour in about 3-4 tablespoons of your chosen oil. You want enough to coat the bottom of the pan well. Get that heating over medium-high heat while you prep everything else. Having everything ready to go is key here so your chicken doesn’t sit too long in the coating.
Step 2: Mix Dry Ingredients
In a shallow dish or a pie plate, whisk together the flour, garlic powder, onion powder, Italian seasoning, salt, and pepper. Make sure it’s all well combined. This is where we build the base flavor for our coating. You want a nice, even distribution of these seasonings so every bite is delicious. If you’re using panko, add it to this mixture now and give it another good stir. The panko is going to give you that extra-crispy texture that we all love.
Step 3: Mix Wet Ingredients
In a second shallow dish, lightly beat your eggs. You don’t need to go crazy here; just break up the yolks and combine them with the whites. This is what will help our Parmesan and flour mixture stick to the chicken. I sometimes add a tiny splash of milk or water to the eggs if I want a slightly thinner batter, but it’s not usually necessary.
Step 4: Combine
Now it’s time to get our cheesy coating ready. In a third shallow dish, combine the finely grated Parmesan cheese with any extra panko you might be using if you didn’t add it to the flour. Give it a good mix. Now, take your chicken cutlets and dredge them first in the seasoned flour mixture, shaking off any excess. Then, dip them into the beaten eggs, letting any extra drip off, and finally, press them firmly into the Parmesan-cheese mixture, ensuring they’re well coated on all sides. I always give them a good press into the cheese – that’s how you get that beautiful, adhering crust.
Step 5: Prepare Filling
This step is for my “stuffed” Parmesan chicken variation, which is a whole other level of deliciousness! If you’re making the classic version, you can skip this. For the stuffed version, you’ll want to make a small slit in each chicken cutlet to create a pocket. Then, fill that pocket with a mixture of ricotta cheese, a little more Parmesan, some chopped spinach (if you like!), and a pinch of nutmeg. Make sure not to overstuff, or it’ll ooze out everywhere during cooking. This adds a creamy, decadent layer that takes this Parmesan chicken to the next level.
Step 6: Layer & Swirl
If you’re making the classic version, you’re ready to cook! If you’re doing the stuffed version, carefully place the stuffed cutlets onto a baking sheet. If you’re feeling fancy and want to add a beautiful visual element to your classic Parmesan chicken, you can gently swirl some pesto or marinara sauce over the top of the coated chicken before baking or frying. It’s not essential for flavor but adds a lovely touch. For the classic pan-fried version, place the coated chicken pieces into your hot skillet in a single layer, being careful not to overcrowd the pan. You might need to cook in batches. For baking, arrange the coated chicken cutlets on a parchment-lined baking sheet.
Step 7: Bake
If pan-frying: Cook the chicken for about 3-4 minutes per side, until golden brown and cooked through. You’re looking for a beautiful, crispy crust. If baking: Bake for 20-25 minutes, or until the chicken is cooked through and the coating is golden and crisp. The exact time will depend on the thickness of your chicken cutlets. I always use a meat thermometer to be sure – you want the internal temperature to reach 165°F (74°C).
Step 8: Cool & Glaze
Once the chicken is cooked, transfer it to a wire rack set over a baking sheet to cool slightly. This helps keep the bottom of the crust from getting soggy. While the chicken is still warm, gently brush or drizzle the melted butter mixture over the top. Sprinkle with the extra Parmesan cheese and the fresh parsley. The warmth of the chicken will help melt the cheese and create a luscious coating. If you added lemon juice to the butter, this is where it really sings!
Step 9: Slice & Serve
Let the chicken rest for a few minutes before slicing. This is important for keeping the juices locked in. Slice the chicken cutlets into strips or serve them whole. I love serving this with a sprinkle of fresh parsley for a pop of color and freshness. It looks beautiful and tastes even better. The aroma that fills the kitchen at this stage is just incredible – everyone knows what’s for dinner!
What to Serve It With
This Parmesan chicken is honestly so versatile, it’s practically begging to be paired with a variety of sides! For a quick and healthy breakfast (yes, breakfast!), I’ve found that serving leftover Parmesan chicken strips alongside some scrambled eggs and a slice of avocado is surprisingly delicious. The savory chicken is a nice change from bacon. For a more elegant brunch spread, I love plating it with a fresh Caprese salad – the juicy tomatoes and mozzarella are a perfect counterpoint to the crispy chicken. And as a dessert? Well, it’s not exactly a dessert, but for a cozy evening snack, I’ll sometimes just have a small piece with a drizzle of marinara sauce – it’s so satisfying! One of my favorite family traditions is serving it with a big bowl of spaghetti marinara; it’s a classic for a reason and always a hit with the kids. Another go-to is a simple lemon-herb roasted asparagus – the bright, fresh flavors cut through the richness of the chicken beautifully. And if you’re looking for something truly comforting, a creamy mashed potato or a simple side of steamed green beans always does the trick. Don’t be afraid to get creative; this chicken is a fantastic canvas for all sorts of pairings!
Top Tips for Perfecting Your Parmesan Chicken
Over the years, I’ve learned a few little tricks that make this Parmesan chicken recipe turn out perfectly every single time. For the chicken itself, I usually opt for chicken breasts because they’re leaner, but thighs work wonderfully too and can be even more forgiving. When you’re cutting them into cutlets, try to make them roughly the same thickness so they cook evenly. If you find your chicken breasts are super thick, I’ll often pound them a little between two pieces of plastic wrap to get an even thickness – this is a game-changer for quick and uniform cooking. For the coating, don’t skimp on the quality of your Parmesan cheese! Using freshly grated Parmigiano-Reggiano will give you a depth of flavor that pre-shredded stuff just can’t match. When you’re coating the chicken, make sure each piece is well-covered in the flour, then egg, then Parmesan mixture. Press the cheese coating on firmly – that’s what helps it stick and get that amazing crispy texture. Don’t overcrowd your pan when pan-frying; this is crucial! If you cram too many pieces in, they’ll steam instead of fry, and you won’t get that lovely golden-brown crispiness. Cook in batches if you have to; it’s worth the extra few minutes. If you’re baking, using a wire rack over the baking sheet allows air to circulate, creating a crispier bottom. For the glaze, don’t let it burn! Keep an eye on it, and brush it on during the last few minutes of cooking or right after it comes out of the oven. If you’re adding lemon juice to the glaze, just a little goes a long way to brighten the whole dish. And finally, a little personal note: I’ve experimented with adding a pinch of smoked paprika to the flour mixture, and it adds a subtle smoky depth that’s really lovely, especially if you’re serving this with something like roasted corn or barbecue-inspired sides.
Storing and Reheating Tips
This Parmesan chicken is so good, you’ll probably want to make extra so you have leftovers. Storing it properly is key to keeping that delicious crispiness. For storing at room temperature, I wouldn’t leave it out for more than a couple of hours, especially if it’s warm out. If you’ve got a few leftovers that you want to snack on later in the day, I usually just leave them on a plate loosely covered with foil. For refrigerator storage, which is my preferred method, let the chicken cool completely before wrapping it tightly. I usually use plastic wrap first, then an airtight container or a resealable bag. It should stay good in the fridge for about 3-4 days. When it comes to reheating, the microwave is the quickest, but it can make the chicken a bit soft. For the best results, I like to reheat it in a skillet over medium heat with a little bit of oil, or in a toaster oven or regular oven at around 350°F (175°C) until it’s heated through and crispy again. I’ve found that reheating it uncovered in the oven for about 10-15 minutes does the trick beautifully. If you’ve glazed your chicken, the glaze might not be as crisp after reheating, but the flavor will still be there. For freezer instructions, I’d recommend flash-freezing the individual pieces on a baking sheet until solid, then transferring them to a freezer-safe bag. It should keep well for about 2-3 months. To thaw, move it to the refrigerator overnight and then reheat using your preferred method.
Frequently Asked Questions
Final Thoughts
So there you have it – my beloved Parmesan chicken recipe! It’s truly one of those dishes that brings pure joy to the table, not just because it tastes incredible, but because it’s so achievable. It’s proof that you don’t need to be a Michelin-star chef to create something truly special and delicious for your family. The combination of that crispy, golden coating, infused with sharp Parmesan, and the tender chicken is just unbeatable. It’s a recipe that has earned its permanent spot in my recipe binder, and I have a feeling it will earn one in yours too. If you love this, you might also enjoy my Crispy Baked Lemon Herb Chicken or my One-Pan Sausage and Veggie Bake for more weeknight-friendly inspiration. I can’t wait to hear how yours turns out! Please leave a comment below and share your experience, or any delicious twists you’ve added. Happy cooking!
Parmesan Chicken
Ingredients
Main Ingredients
- 1.5 lb Chicken breasts
- 0.75 cup Grated Parmesan cheese
- 0.5 cup All-purpose flour
- 2 large Eggs
- 1 cup Breadcrumbs
- 0.5 cup Olive oil
- 1 tsp Salt
- 0.5 tsp Black pepper
Instructions
Preparation Steps
- Preheat oven to 400°F (200°C). Pound chicken breasts to 1/2-inch thickness.
- In a shallow dish, whisk eggs. In another, combine flour, salt, and pepper. In a third dish, combine breadcrumbs and parmesan cheese.
- Dredge each chicken breast in flour, then dip in egg, and finally coat with breadcrumb mixture.
- Heat olive oil in a large skillet over medium-high heat. Cook chicken for 3-4 minutes per side, or until golden brown.
- Transfer chicken to a baking sheet and bake for 8-10 minutes, or until cooked through.
- Serve immediately. Garnish with fresh parsley, if desired.


