What is the one dessert that instantly transports me back to carefree summer days and my Grandma’s? What is a poke cake? Is it a cake? What is a cake that’s ridiculously easy to whip up, yet tastes like you? spent hours in the kitchen painstakingly decorating it. When I made this, my kids inhaled it, and my husband, who usually just likes to eat it. Honestly, the first time I cooked it up, I ate it for a couple of hours. What is the best way to eat dessert? When I realized that this was a keeper, I knew it was one of the best products. What is a hug in cake form, and it’s so much simpler than trying to recreate that fancy layer cake? What do you see in magazines? What is a poke cake without the fuss? What is the best way to cure a sweet tooth by baking Ice Cream from scratch? I feel like it’s too much effort.

What is poke cake?
What is a Poke Cake? Think of it as a delightful surprise waiting to happen. What is the best way to start a cake? What is the best way to switch it up? Once it’s cooled, the fun begins! How do you take a poke-a-licious? ) and poke holes all over the top. These little holes are like tiny pathways, ready to soak up a glorious, often fruity, liquid. How do I top it off with a creamy whipped topping? Is it a cake that’s been designed to be extra moist and infused with more flavor? What is better than a regular cake? Is it the perfect canvas for all sorts of delicious additions, making it incredibly adaptable to your kitchen? What’s simple, it’ll be fun, and the result is always a moist, flavorful, utterly irresistible treat.
Why you’ll love this recipe?
Honestly, there are so many reasons this Poke Cake has become a staple in my recipe rotation, and I think you’ll fall in love with it just as quickly. First off, the flavor is just… incredible. We’re talking about a light, airy cake that’s been generously soaked in a bright, tangy fruit mixture, usually strawberry or pineapple, and then topped with a cloud of creamy whipped topping. It’s the perfect balance of sweet and tart, with a wonderfully moist texture that you just don’t get with a standard cake. It’s the kind of dessert that makes people close their eyes and savor every bite. And the simplicity? You have no idea! If you can bake a box cake mix (which, let’s be real, I often do when I’m in a pinch), you can absolutely make this poke cake. The poking and filling steps are so straightforward, and even the kids can get involved. It’s genuinely one of the easiest desserts to impress with. Plus, it’s incredibly budget-friendly. The ingredients are all pantry staples or easily found at any grocery store, making it a fantastic option when you want a showstopper dessert without breaking the bank. I also love how versatile it is. While I’m sharing my favorite strawberry version today, you can easily swap out the fruit filling for anything you like – pudding, caramel, chocolate, you name it! It’s a fantastic base for experimenting. What I love most about this is that it always feels special, even though it’s so simple. It’s the perfect dessert for potlucks, birthdays, or just a random Tuesday when you need a little pick-me-up. It’s so much more satisfying than a store-bought cake, and the personal touch really shines through.
How do you make a poke cake?
Quick Overview
How do you make a Poke Cake? You’ll bake a cake, poke holes in it, pour over it to soak in, and then finish it. What do you like about a dreamy topping? What’s a no-fuss dessert that promises incredible flavor and moisture? What is the beauty of this recipe lies in its adaptability and the way the simple steps come together to make a delicious meal. How do I create something truly special? Is it the kind of dessert that makes you feel like a baking pro without all the stress?
Ingredients
For the Main Batter:
1 box (15.25 oz) yellow Cake Mix (or your favorite vanilla cake mixes)
Ingredients called for on the cake mix box (usually eggs, oil, and water) – I always check the box first to make sure I have the right stuff!
For the Filling:
1 (3 oz) package strawberry gelatin powder (or any fruit flavor you love – raspberry, lime, etc) or any flavor. How do pineapples work?
1 cup boiling water, 1 teaspoon salt. 1 tablespoon
1/2 cup cold water. 1 cup ice water to
(Optional, but highly recommended!) 1/4 cup sweetened condensed milk for extra creaminess – this is a game-changer if you ask me.
For the Glaze:
1 (8 oz) container whipped topping (like Cool Whip), thawed, or homemade whipped cream
Fresh strawberries or other berries, for garnish (totally optional, but makes it look so pretty! ).
What are the steps to
Step 1: Preheat & Prep Pan
First things first, get that oven preheated to the temperature specified on your cake mix box, usually around 350°F (175°C). Then, grab a 9×13 inch baking pan. Give it a good grease and flour – I like to use baking spray, it’s just so much easier. Or, you can line it with parchment paper if you want extra insurance against sticking. Make sure the parchment overhangs a bit, that way you can easily lift the cake out later if you choose.
Step 2: Mix Dry Ingredients
In a large mixing bowl, combine the cake mix. That’s it! We’re not adding anything else to the dry mix at this stage. Just pour the powder into the bowl, ready for the wet ingredients.
Step 3: Mix Wet Ingredients
Now, follow the instructions on your cake mix box for the wet ingredients. Typically, you’ll add the eggs, oil, and water directly to the dry cake mix. I usually add the eggs first, then the water and oil. It’s important to use the amounts called for on the box for the best texture. Don’t be tempted to add extra liquid here; the magic happens in the next steps!
Step 4: Combine
Using an electric mixer (handheld or stand mixer works great), beat the ingredients together on low speed until just combined. Then, increase the speed to medium and beat for about 2 minutes. You’re looking for a smooth batter that’s not too thick or too thin. If it seems a bit too thick, add a tablespoon of water at a time. If it seems too thin, add a tablespoon of cake mix. My kids sometimes “help” with this, and I’ve learned that overmixing can make the cake tough, so I try to keep it to just those 2 minutes. Scrape down the sides of the bowl as needed to make sure everything is incorporated.
Step 5: Prepare Filling
While the cake is baking, let’s get that glorious filling ready. In a heatproof bowl, combine the gelatin powder with the boiling water. Stir it really well until the powder is completely dissolved. This is important! Undissolved gelatin can be a little… gritty. Once it’s dissolved, stir in the cold water. If you’re using the sweetened condensed milk for extra creaminess, now’s the time to whisk it in. It makes the filling even more luxurious and less tart, which my family really enjoys. You want the mixture to be smooth and well combined.
Step 6: Layer & Swirl
Once the cake is baked, take it out of the oven. Let it cool in the pan for about 10-15 minutes – this is crucial! If you try to poke it when it’s too hot, it might just fall apart. After that initial cooling, take a fork or a straw and poke holes all over the top of the cake. Get down into the cake as much as you can without going all the way through the bottom. I like to make them about an inch apart. Now, slowly and evenly pour the prepared gelatin mixture all over the poked cake. Make sure to get it into all those little holes! You might see some pooling on top, that’s perfectly fine; it will soak in. If you added the sweetened condensed milk, you’ll notice the liquid is a bit creamier and less translucent. Let the cake sit at room temperature for about 15-20 minutes to allow the filling to really soak in.
Step 7: Bake
Is it safe to bake a cake according to the box instructions? When a toothpick is inserted into the center of the tooth, it comes out clean. What do you want to achieve in an oven? Don’t overbake it, or it will not be as moist. Is it okay to bake a poke cake under the glaze? To set as it cools.
Step 8: Cool & Glaze
Now, this is where the real magic happens. Once the cake has finished baking, take it out of the oven. Let it cool in the pan for about 10-15 minutes. This is important! If you try to poke it when it’s too hot, it might just fall apart. After that initial cooling, take a fork or a skewer and poke holes all over the top of the cake. Get down into the cake as much as you can without going all the way through the bottom. I like to make them about an inch apart. Now, slowly and evenly pour the prepared gelatin mixture all over the poked cake. Make sure to get it into all those little holes! You might see some pooling on top, that’s perfectly fine; it will soak in. Let the cake sit at room temperature for about 15-20 minutes to allow the filling to really soak in. Then, gently spread the thawed whipped topping evenly over the entire surface of the cake. If you’re using fresh berries, arrange them on top now for a beautiful finish. Cover the cake loosely with plastic wrap and refrigerate for at least 2-4 hours, or preferably overnight, to let the flavors meld and the topping set.
Step 9: Slice & Serve
Once it’s nice and chilled, it’s time to slice and serve! Use a sharp knife and cut it into squares. The poke cake should be wonderfully moist and jiggly from the gelatin. It’s best served chilled. The contrast between the cool, creamy topping and the infused cake is just heavenly. A little sprinkle of fresh berries on top makes it look extra special for guests, but honestly, it’s just as good straight out of the pan with nothing extra. I find that using a slightly warmed knife can help get cleaner slices, especially with the whipped topping.
What should I serve it with?
This poke cake is so versatile, it fits in at almost any gathering! For a relaxed breakfast or brunch, I love serving a slice with a strong cup of coffee. It’s a little bit of indulgence to start the day, and it feels so special compared to just a regular pastry. The sweetness of the cake is a nice contrast to the bitterness of the coffee. If you’re hosting a more formal brunch, I’d dress it up with some beautifully arranged fresh berries and perhaps a dollop of extra whipped cream on the side. A glass of sparkling cider or even a mimosa pairs wonderfully. As a dessert, it’s a crowd-pleaser at any dinner party. It’s light enough that people won’t feel overly full after a big meal, but still satisfyingly sweet. For cozy snacks, it’s perfect with a glass of milk or a cup of herbal tea on a chilly afternoon. My personal family tradition is to make this for summer picnics; the fruity flavor just screams sunshine and fun. It travels well (just keep it chilled!) and is always a huge hit. It’s also delicious with a scoop of vanilla ice cream if you’re feeling extra decadent, though it’s usually moist enough on its own!
How do you make a poke cake?
I’ve made this poke cake more times than I can count, and I’ve picked up a few tricks along the way that I think you’ll find super helpful. When it comes to the cake itself, using a good quality cake mix really does make a difference, but don’t be afraid to experiment with flavors. I once tried a lemon cake mix and used lemon gelatin, and it was divine! For the poking step, really make sure you get those holes deep enough into the cake; that’s where all the flavor infusion happens. If your gelatin mixture seems a little too thick when you pour it, you can gently warm it for a few seconds in the microwave. And that sweetened condensed milk? Seriously, don’t skip it if you want that extra creamy, luscious texture. It really elevates the entire dessert. When it comes to swirling, there’s no wrong way to do it! Some people like neat rows, others prefer a more chaotic, random pattern. I tend to go for a bit of both. For ingredient swaps, if you can’t find strawberry gelatin, any fruit flavor works beautifully. Raspberry, cherry, or even lime can give it a fun twist. For the whipped topping, I usually opt for the store-bought kind because it holds its shape so well, but if you prefer homemade whipped cream, just make sure it’s stabilized with a bit of cornstarch or gelatin so it doesn’t get watery. Baking temperature can sometimes be tricky; if your oven tends to run hot, you might want to reduce the temperature by 25 degrees Fahrenheit and bake a few minutes longer. Always do the toothpick test, but remember that a few moist crumbs are perfectly fine for this cake – you don’t want it bone dry. For the glaze, if you decide to use something other than whipped topping, like a pudding or a cream cheese frosting, make sure the cake is completely cool before applying it. The key is patience when letting it chill; the longer it sits in the fridge, the better the flavors meld together!
Storing and Reheating Tips
Storing this poke cake is pretty straightforward, and it keeps well, which is another reason I love it. If you have any leftovers (which is rare in my house!), you can keep it covered at room temperature for a few hours, but it’s best to refrigerate it, especially if you used whipped topping. In the refrigerator, tightly covered with plastic wrap or in an airtight container, it will stay fresh and delicious for about 3-4 days. The whipped topping might get a little softer over time, but the cake itself remains wonderfully moist. I haven’t really had much success with freezing this poke cake, primarily because the whipped topping tends to get a bit watery and the texture changes significantly when thawed. It’s definitely best enjoyed fresh. If you do decide to freeze it, I’d recommend freezing it *before* adding the whipped topping, then thawing it in the fridge and adding the topping just before serving. For the glaze, it’s always best applied when the cake is completely cooled but before chilling. This allows the topping to set nicely.
What are the most frequently asked questions on
Final Thoughts
So there you have it – my absolute favorite poke cake recipe! It’s a dessert that consistently brings smiles to faces, and it’s proof that you don’t need fancy techniques or obscure ingredients to create something truly special. The combination of moist cake, bursting with fruity flavor, and topped with cool, creamy goodness is just unbeatable. It’s a recipe that’s become a cherished part of our family traditions, and I really hope it becomes one of yours too. If you enjoy this poke cake, you might also love my classic vanilla bean cupcakes or my super moist chocolate chip banana bread – they’re all in that easy-but-delicious category! Give this poke cake a try, and please, please let me know how it turns out for you in the comments below. I absolutely love hearing about your baking adventures and seeing your creations! Don’t forget to share your own variations or any tips you discover. Happy baking, everyone!

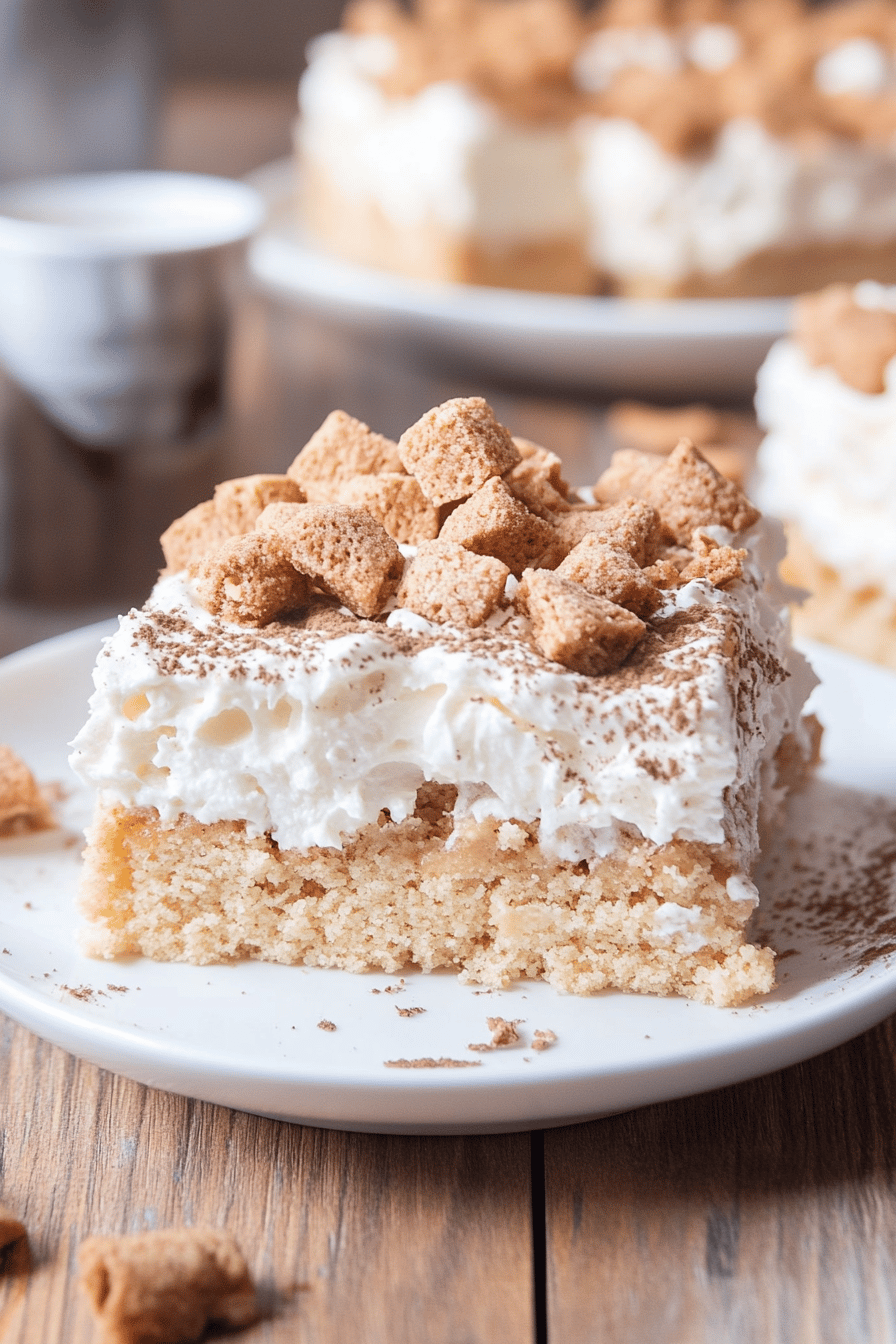
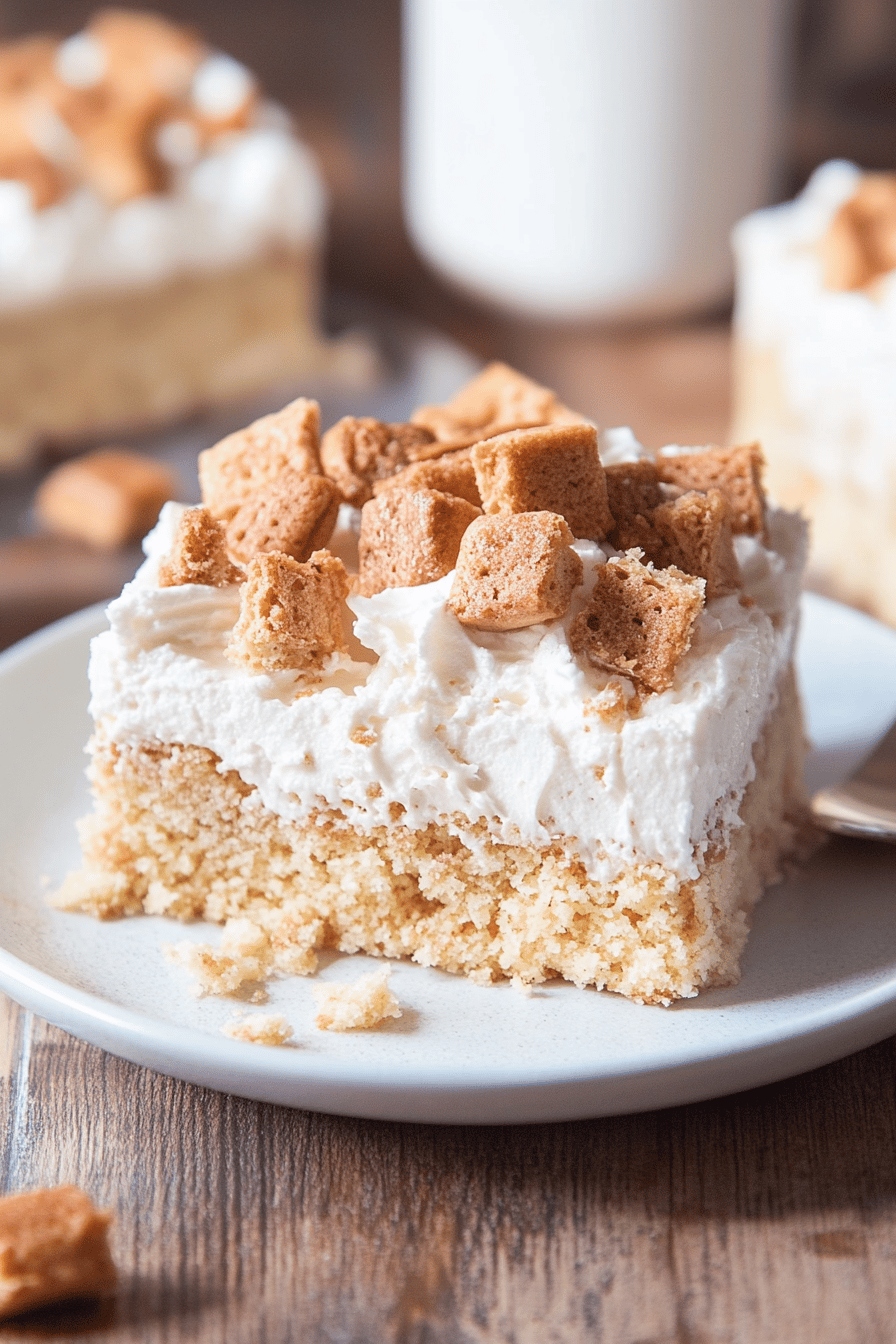
Cinnamon Toast Crunch Poke Cake
Ingredients
Cake Ingredients
- 1 box yellow cake mix
- 1 cup milk
- 0.33 cup vegetable oil
- 3 large eggs
Filling Ingredients
- 3.4 oz instant vanilla pudding mix
- 2 cups cold milk
- 1 cup heavy cream
Topping Ingredients
- 5 cups Cinnamon Toast Crunch cereal
- 0.5 cup melted butter
- 0.5 cup powdered sugar
Instructions
Make the Cake
- Preheat oven to 350°F (175°C). Grease and flour a 9x13 inch baking pan.
- In a large bowl, combine cake mix, milk, oil, and eggs. Beat until well combined.
- Pour batter into prepared pan and bake for 30-35 minutes, or until a toothpick inserted into the center comes out clean.
- Let the cake cool for 10 minutes before poking holes all over the top with a fork or the end of a wooden spoon.
Make the Filling
- In a large bowl, whisk together the pudding mix and cold milk until smooth. Let it set for 5 minutes.
- Gently fold in the heavy cream.
- Pour the pudding mixture over the poked cake, making sure to fill the holes.
Make the Topping
- In a bowl, mix Cinnamon Toast Crunch cereal, melted butter, and powdered sugar.
- Sprinkle the cereal mixture evenly over the cake.
- Refrigerate for at least 2 hours before serving.