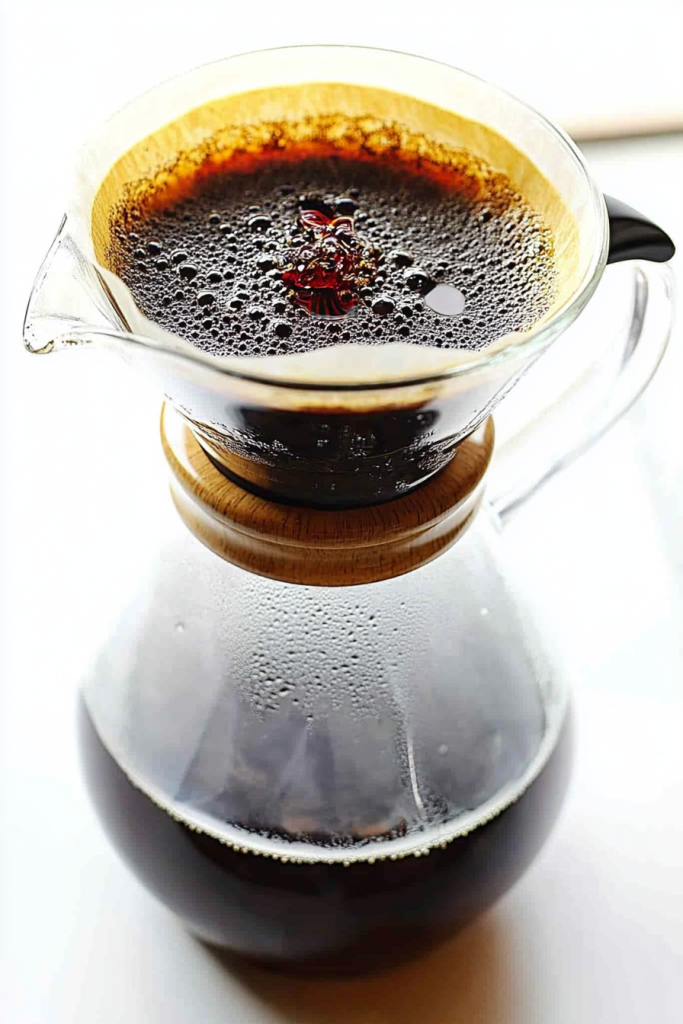
There are mornings, and then there are *those* mornings. You know the ones. The sun peeking through the blinds just right, a quiet house before the chaos begins, and the need for something truly comforting and perfectly crafted. For me, that ritual always involves a steaming mug of pour over coffee. It’s more than just a beverage; it’s a mindful moment, a little pocket of peace before the day’s demands kick in. I remember my first proper pour over experience at a tiny cafe tucked away in Seattle – the rich aroma, the nuanced flavors I’d never tasted before, it was a revelation. It felt so sophisticated, so… *special*. I honestly thought it would be incredibly difficult to replicate at home, something reserved for fancy baristas with their precise scales and intimidating gadgets. But oh, how wrong I was! This isn’t some unattainable art form. Making incredible pour over coffee at home is surprisingly accessible, and once you get the hang of it, it’s a game-changer. Forget those bitter, watery brews you might have had in the past. We’re talking about unlocking a depth of flavor you didn’t even know was hiding in your beans.
What is pour over coffee?
So, what exactly *is* pour over coffee? Think of it as a more intentional, hands-on way to brew your coffee. Instead of an automatic machine doing all the work, you’re actively involved in the process. It involves manually pouring hot water over coffee grounds that are resting in a filter, typically within a cone-shaped dripper that sits atop your mug or a carafe. The water slowly drips through the grounds, extracting all those wonderful oils and flavors. It’s a bit like a gentle extraction, allowing you to control variables like water temperature, pour speed, and saturation of the grounds. This level of control is what makes pour over coffee so special; it lets you highlight the unique characteristics of different coffee beans. It’s essentially a simplified, artisanal brewing method that brings out the very best in your coffee, giving you a cleaner, brighter, and often more complex cup than you’d get from other methods.
Why you’ll love this recipe?
Honestly, the list is practically endless! But if I had to pick a few standouts, it’s the sheer delight of tasting coffee made *your* way, with incredible depth and clarity. For starters, the **flavor**. This is where pour over truly shines. You can taste the difference immediately. The bright acidity, the subtle floral notes, the rich chocolatey undertones – they all come through so much more vibrantly. It’s like the coffee is singing to you! Then there’s the **simplicity** once you get the hang of it. While it looks fancy, the actual steps are quite straightforward. It doesn’t require a massive investment in equipment, and once you dial in your technique, it becomes a relaxing, almost meditative part of your morning. It’s also surprisingly **cost-efficient**. While a good grinder and kettle are worthwhile investments, you’ll save a ton of money compared to daily cafe runs. Plus, you’re maximizing every single bean, so you get more deliciousness for your buck. And the **versatility**! You can experiment endlessly. Different beans, different grind sizes, different pour speeds – each tweak can result in a subtly different, yet equally delightful, cup. This method makes me appreciate the craft of coffee roasting and brewing so much more, and I think you’ll feel the same way. What I love most is that it transforms a daily necessity into a moment of pure enjoyment and personal expression.
How do you make pour over coffee?
Quick Overview
The process is all about controlled extraction. You’ll start by heating your water to the perfect temperature, prepping your filter, blooming the coffee grounds to release gases, and then carefully pouring the rest of the water in stages. It’s a dance between water, coffee, and time, designed to pull out the most exquisite flavors without any bitterness. It sounds like a lot, but trust me, it’s incredibly rewarding and becomes second nature after just a few tries. You’ll end up with a cup that’s incredibly clean, aromatic, and packed with nuanced flavor.
Ingredients
For the Perfect Cup: What is the perfect cup?
Freshly Roasted Whole Coffee Beans: Choose beans you love! The quality of your beans is paramount. Look for a roast date within the last few weeks for optimal freshness. I’ve found that single-origin beans often shine the most with pour over, allowing their unique characteristics to really come through. My current favorite is a light-medium roast Ethiopian Yirgacheffe – it has these amazing berry and floral notes! Don’t be afraid to experiment with different origins and roast profiles.
Filtered Water: Good water makes good coffee. Tap water can contain minerals and chlorine that interfere with the coffee’s flavor. Use filtered or bottled water for the cleanest taste. The temperature should be just off the boil, around 195-205°F (90-96°C). Too hot, and you risk scorching the beans; too cool, and you won’t extract enough flavor.
Step-by-Step Instructions
Step 1: Heat Water & Prep Dripper
Start by heating your filtered water in a gooseneck kettle. This type of kettle gives you much better control over the pour. Aim for a temperature of around 195-205°F (90-96°C). While the water heats, place your paper filter into your pour over dripper (like a V60, Chemex, or Kalita Wave). Rinse the filter thoroughly with hot water. This is a crucial step! It removes any papery taste from the filter and also preheats your dripper and serving vessel, ensuring a stable brewing temperature. Discard the rinse water.
Step 2: Grind Your Beans
Grind your fresh coffee beans just before brewing. The grind size is super important for pour over; it should be medium-fine, similar to table salt. If it’s too fine, the water will struggle to flow through, leading to over-extraction and bitterness. If it’s too coarse, the water will rush through, resulting in weak, underdeveloped coffee. I always recommend a burr grinder for consistency. It makes a world of difference compared to blade grinders. For a standard 12-ounce mug, I usually grind about 20-25 grams of coffee.
Step 3: Add Grounds & Bloom
Add your freshly ground coffee to the rinsed filter in the dripper. Gently shake the dripper to level the coffee bed. Now for the “bloom.” Start pouring just enough hot water (about twice the weight of your coffee grounds) to saturate all the coffee. You’ll see the grounds puff up and release CO2 – this is called degassing. Let it bloom for about 30 seconds. This step is vital for an even extraction and a less bitter cup.
Step 4: The Pouring Technique
After the bloom, begin pouring the remaining hot water in slow, steady, circular motions, starting from the center and moving outwards, then back in. Try to avoid pouring directly down the sides of the filter. Aim to keep the water level consistent and don’t let the grounds become completely dry until the very end. A good water-to-coffee ratio is typically around 1:15 to 1:17 (e.g., 20g coffee to 300-340g water). You’ll want the total brew time to be around 2 to 3 minutes, depending on your dripper and grind size. If it’s too fast, grind finer; if it’s too slow, grind coarser.
Step 5: Finish and Enjoy
Once you’ve poured all the water, let the remaining liquid drip through the grounds. You should have a beautiful bed of spent coffee grounds that looks relatively flat. Remove the dripper, discard the filter and grounds, and give your freshly brewed coffee a gentle swirl. Now, breathe in that amazing aroma. This is the moment! Pour it into your favorite mug and savor every sip.
What to Serve It With
Oh, this is where the fun really begins! Pour over coffee is so versatile, it pairs beautifully with almost anything, but here are some of my favorite combinations:
For Breakfast: My go-to is a simple piece of toast with good butter and maybe a drizzle of honey. The clean coffee cuts through the richness beautifully. It’s also phenomenal with a flaky croissant or a light, airy pastry. The bright notes of the coffee really wake up your palate for the day. Imagine that first warm, buttery bite followed by a sip of your perfectly brewed coffee – pure bliss!
For Brunch: This is where pour over really steps into elegance. It’s fantastic with a classic Eggs Benedict, the coffee’s acidity balancing the creamy hollandaise and savory ham. It also pairs wonderfully with a light quiche or a frittata. For something sweeter, try it with fluffy pancakes or waffles, especially if they have a subtle fruit element. I love serving it in pretty teacups or small ceramic mugs for a sophisticated touch.
As Dessert: Don’t discount pour over as an after-dinner treat! A medium to dark roast pour over is incredible with a rich Chocolate Cake or a decadent brownie. The coffee’s complexity can actually enhance the chocolate flavors. It’s also surprisingly good with a slice of cheesecake or even a fruit tart. I find that a slightly bolder roast works best here to stand up to richer desserts.
For Cozy Snacks: On a chilly afternoon, there’s nothing better than a warm mug of pour over coffee and a good book. It pairs perfectly with a simple biscotti for dipping (the slightly harder texture holds up well!), or even a few squares of good quality dark chocolate. It’s also lovely with a slice of Banana Bread or a warm muffin. It’s that perfect little pick-me-up that feels like a hug in a mug.
Top Tips for Perfecting Your Pour Over Coffee
Over the years, I’ve learned a few tricks and encountered a few mishaps that have helped me nail the perfect pour over. Here are some of my best bits of wisdom:
Water Temperature is Key: Seriously, don’t skip the thermometer! If your water is too hot, you’ll get a bitter, burnt taste. Too cool, and your coffee will be weak and sour. The 195-205°F (90-96°C) range is your sweet spot. I’ve learned to trust my gooseneck kettle’s thermometer religiously.
Grind Size Consistency Matters Most: This is probably the biggest factor for consistent results. Invest in a good burr grinder. Blade grinders chop the beans unevenly, leading to both over- and under-extraction happening at the same time. My grind size is usually somewhere between granulated sugar and fine sand. If your coffee tastes too bitter, try a slightly coarser grind. If it’s too weak or sour, go a touch finer.
The Bloom is Non-Negotiable: I cannot stress this enough! That 30-second bloom allows the coffee to release trapped CO2. If you skip it, those gases will escape during your main pour, creating channels and leading to uneven extraction. You’ll literally see the coffee bloom and bubble – it’s a sign of freshness!
Pouring Patience Pays Off: Resist the urge to just dump all the water in at once. Slow, controlled, circular pours are what extract those beautiful flavors evenly. I like to think of it as gently coaxing the flavor out. If your pour is too fast, the water won’t have enough contact time with the grounds. If it’s too slow, it can lead to channeling. My personal technique involves pouring in pulses, allowing the water level to drop slightly before adding more.
Weigh Your Water and Coffee: While you can get by with scoops and guesswork, using a scale for both your coffee grounds and water will elevate your pour over game exponentially. It ensures consistency from one brew to the next. A 1:15 to 1:17 ratio is a great starting point, but don’t be afraid to play around with it to find your perfect strength.
Filter Rinsing is a Must: I’ve made the mistake of skipping this step before, and let me tell you, that papery taste is a serious buzzkill. Rinsing also preheats your brewing setup, which is crucial for maintaining a stable brewing temperature. Don’t skip it!
Storing and Reheating Tips
While the best way to enjoy coffee is fresh, sometimes life happens! Here’s how to keep your coffee tasting its best:
Room Temperature: Honestly, pour over coffee is best enjoyed immediately after brewing. If you have a little leftover and want to drink it within an hour or two, you can keep it in a pre-warmed insulated carafe. Avoid leaving it on a hot plate, as this will cook the coffee and make it taste bitter and stale very quickly. If you absolutely must reheat a small amount, do so gently in a microwave or on the stovetop over very low heat, being careful not to boil it.
Refrigerator Storage: I generally don’t recommend refrigerating brewed coffee. The cold can dull the delicate flavors, and the coffee can absorb odors from other foods in your fridge. However, if you have a significant amount of leftover coffee and want to save it for iced coffee the next day, let it cool completely, then store it in an airtight container in the refrigerator for no more than 24 hours. The flavor won’t be as vibrant, but it will be drinkable for iced beverages.
Freezer Instructions: For longer storage, coffee ice cubes are your best friend! Brewed coffee that you won’t drink within a day can be poured into ice cube trays and frozen. Once frozen, transfer the cubes to a freezer-safe bag. These coffee cubes are perfect for making iced coffee later without diluting your drink with plain ice. They’ll keep their flavor for up to a month. You can also freeze whole beans, but be sure to store them in a truly airtight, vacuum-sealed bag to prevent freezer burn and moisture absorption.
Glaze Timing Advice: (This is more relevant if you were baking something with a glaze, but for coffee, it’s all about brewing fresh!) The key is to brew your pour over just before you plan to drink it. The magic is in that immediate aromatic burst and nuanced flavor.
Frequently Asked Questions
Final Thoughts
There you have it – the magic of making incredible pour over coffee right in your own kitchen! I truly believe that this method transforms your daily cup from a simple caffeine fix into a moment of mindful enjoyment. It’s a small act of self-care that pays off in spades with every aromatic sip. The ability to unlock such nuanced flavors from humble coffee beans is something that never ceases to amaze me, and I’m so excited for you to experience it. Don’t be discouraged if your first few attempts aren’t absolutely perfect; like any craft, it takes a little practice. But I promise you, the journey is just as rewarding as the destination. If you’re looking for more ways to elevate your coffee game, I highly recommend exploring different brewing methods like AeroPress or French press, and definitely dive into the wonderful world of single-origin beans! I can’t wait to hear about your pour over adventures. Let me know in the comments how yours turns out, or if you have any tips of your own to share!
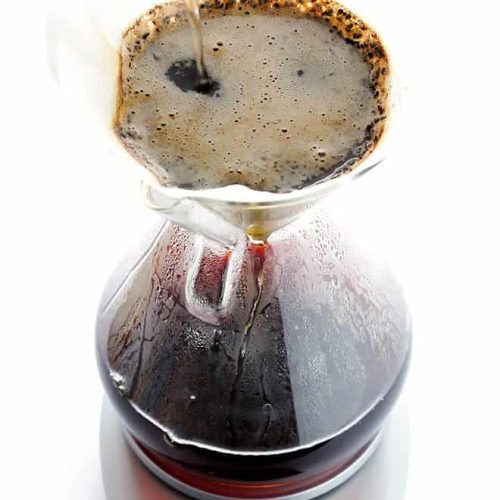
Pour Over Coffee
Ingredients
Main Ingredients
- 20 grams Coffee beans Freshly ground
- 300 grams Water Filtered, near boiling (200°F)
Instructions
Preparation Steps
- Grind the coffee beans to a medium-fine consistency.
- Place a filter in your pour over device (Chemex, Hario V60, etc.) and rinse with hot water to remove any paper taste and preheat the device. Discard the rinse water.
- Add the ground coffee to the filter and gently tap to level the grounds.
- Slowly pour a small amount of hot water over the grounds, just enough to saturate them (about twice the weight of the coffee). Let it bloom for 30 seconds.
- Slowly pour the remaining water over the grounds in a circular motion, ensuring all the grounds are evenly saturated. Aim for a total brew time of 3-4 minutes.
- Once the water has filtered through, remove the filter and grounds. Serve and enjoy!


