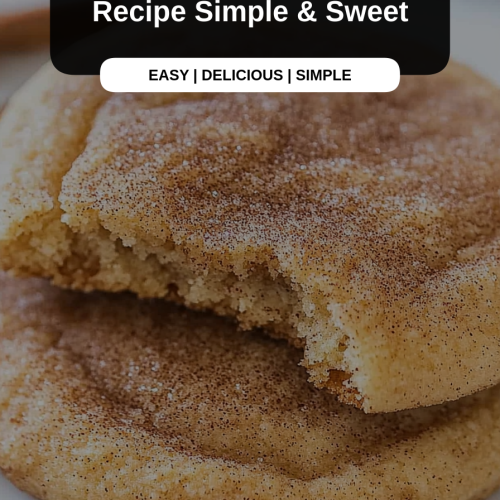
Oh, snickerdoodles. Just saying the name makes me feel all warm and fuzzy inside. They’re like a cozy hug in cookie form, you know? This recipe is my absolute go-to whenever I need a little bit of sweetness in my life, or when unexpected guests pop by. I remember my Grandma Elsie making these for me when I was just a little thing, and the scent of cinnamon and sugar baking would fill our whole house. It’s funny, isn’t it? How a simple cookie can hold so many memories. These snickerdoodles are just so wonderfully chewy on the inside with that slightly crisp edge, and that signature cinnamon-sugar coating? Perfection. They’re not as fussy as some other fancy cookies, but they have this amazing, comforting flavor that just can’t be beat. Honestly, if you’ve ever wondered what makes a truly classic snickerdoodle so special, you’re in for a treat.
What is a snickerdoodle?
So, what exactly *is* a snickerdoodle? At its heart, it’s a Sugar Cookie that’s rolled in a mixture of cinnamon and sugar before it’s baked. The “doodle” part of the name is a bit of a mystery, with some folks saying it comes from a German word, while others think it’s just a fun, whimsical name that stuck. Whatever the origin, the result is pure magic. Think of it as a sugar cookie’s slightly more adventurous cousin, one who’s dipped in cinnamon spice and everything nice. It’s essentially a simple butter cookie dough that gets its signature tang and chewy texture from cream of tartar, which is a real lifesaver when you want that perfect soft-baked quality. Unlike a regular sugar cookie, you don’t typically roll these out into shapes; they’re usually dropped and then rolled, giving them that beautiful, slightly craggy look and that irresistible cinnamon-sugar crust. It’s the kind of cookie that’s universally loved, from little kids to grown-ups who remember them from their own childhoods.
Why you’ll love this recipe?
There are so many reasons why I keep coming back to this particular snickerdoodle recipe, and I have a feeling you’ll fall in love with it too. First off, the flavor profile is just divine. You get that sweet, buttery base from the cookie, but it’s the cinnamon and sugar coating that really makes these sing. It’s warm, comforting, and has just the right amount of spice to keep things interesting. And the texture? Oh, the texture! They’re perfectly chewy in the center with just a hint of crispiness around the edges. It’s that delightful contrast that makes every bite so satisfying. Beyond the taste, though, is the sheer simplicity of it all. I can whip up a batch of these even on a busy weeknight, and they always turn out beautifully. The ingredients are all pretty standard pantry staples, so you probably won’t even need to make a special trip to the store. What I love most about this recipe is how forgiving it is. Even if you’re a beginner baker, you can totally nail these. Plus, they’re incredibly cost-efficient! Unlike some elaborate desserts, these rely on simple, affordable ingredients that deliver maximum flavor. They’re also surprisingly versatile. While they’re fantastic on their own, they also pair wonderfully with a glass of milk or a cup of hot coffee. If you’re looking for a tried-and-true cookie that’s guaranteed to impress without a lot of fuss, this is it. It’s definitely a step up from a basic Sugar Cookie, offering a more complex flavor and a wonderfully soft texture that I personally crave.
How do I make snickerdoodles?
Quick Overview
Making these classic snickerdoodles is a straightforward process that’s all about getting that perfect balance of chewy and crisp. We’ll start by creaming butter and sugar, then incorporate eggs and vanilla, followed by our dry ingredients. The magic really happens when we roll the dough balls in that glorious cinnamon-sugar mixture before baking them to golden perfection. It’s a simple technique that yields incredible results, and it’s so satisfying to see those cookies puff up in the oven, smelling absolutely amazing. Don’t worry if they don’t look perfectly round; that’s part of their charm!
Ingredients
For the Main Batter:
We’re going to need some unsalted butter, softened. Make sure it’s not melted, just soft enough to easily press your finger into. This is key for getting that light and airy texture. You’ll also need granulated sugar, of course, for sweetness, and then a good dollop of vanilla extract – don’t skimp on the good stuff! For the richness, we’ll use a couple of large eggs, and the secret to that lovely tang and chewy texture is cream of tartar. It’s a dry acid that reacts with baking soda to give our cookies their signature lift and tender crumb. Baking soda is also essential for leavening. And of course, all-purpose flour. I always opt for unbleached all-purpose flour if I can find it, as I feel it gives a slightly better texture. A pinch of salt helps balance out all the sweetness.
For the Filling:
This is where the signature snickerdoodle flavor really shines! We need more granulated sugar, but this time, we’re mixing it with plenty of ground cinnamon. I like to use a good amount of cinnamon here, as it’s what gives these cookies their unmistakable aroma and taste. Don’t be afraid to be generous with it!
Step-by-Step Instructions
Step 1: Preheat & Prep Pan
First things first, let’s get our oven preheated to 375 degrees Fahrenheit (190 degrees Celsius). It’s important to have the oven nice and hot before your cookies go in so they bake evenly. While that’s heating up, grab a couple of baking sheets and line them with parchment paper. This is a lifesaver for easy cleanup and ensures your cookies won’t stick. If you don’t have parchment paper, you can lightly grease your baking sheets, but parchment is my absolute favorite for this.
Step 2: Mix Dry Ingredients
In a medium-sized bowl, whisk together your all-purpose flour, baking soda, cream of tartar, and salt. Give it a good whisking to make sure everything is evenly distributed. This is important because you don’t want pockets of baking soda or cream of tartar in your dough. A well-mixed dry ingredient blend ensures consistent leavening and texture throughout every single cookie.
Step 3: Mix Wet Ingredients
In a large bowl, cream together the softened unsalted butter and granulated sugar. You want to beat them together until the mixture is light and fluffy. This usually takes a good 2-3 minutes with an electric mixer. Then, beat in the eggs one at a time, making sure each one is fully incorporated before adding the next. Stir in the vanilla extract. The batter should look smooth and creamy at this point.
Step 4: Combine
Gradually add the dry ingredients to the wet ingredients, mixing on low speed until just combined. Be careful not to overmix! Overmixing can develop the gluten in the flour too much, leading to tough cookies. Stop mixing as soon as you no longer see streaks of dry flour. The dough will be soft and a little sticky, and that’s perfectly normal.
Step 5: Prepare Filling
In a small, shallow bowl, combine the remaining granulated sugar and the ground cinnamon. Stir them together until they’re well blended. This is the magical coating that makes our snickerdoodles so special! Make sure you have a good amount of cinnamon in there; it’s what gives them that classic flavor and aroma.
Step 6: Layer & Swirl
Now for the fun part! Roll the Cookie Dough into balls, about 1 to 1.5 inches in diameter. I like to use a cookie scoop for uniform size. Once you have your dough balls, roll each one generously in the cinnamon-sugar mixture, making sure it’s evenly coated. Place the coated dough balls about 2 inches apart on your prepared baking sheets. Don’t overcrowd the pan, as they will spread a bit.
Step 7: Bake
Bake for 9 to 11 minutes, or until the edges are set and lightly golden, but the centers still look slightly soft. I always err on the side of slightly underbaking for that perfect chewy center. Ovens can vary, so keep an eye on them! They’ll continue to bake a little on the hot baking sheet after you take them out of the oven.
Step 8: Cool & Glaze
Let the cookies cool on the baking sheets for 5 minutes before transferring them to a wire rack to cool completely. This is important because they are quite delicate when they first come out of the oven. Once they are completely cool, you can enjoy them as is, or if you’re feeling fancy, you can whip up a simple glaze (though traditionally, snickerdoodles don’t have a glaze, it’s a nice touch if you like things a bit sweeter!).
Step 9: Slice & Serve
Once cooled, these snickerdoodles are ready to be devoured! They’re best enjoyed within a few days of baking. Arrange them on a pretty platter, or just grab a few straight from the cooling rack. They’re perfect for sharing, or for keeping all to yourself!
What to Serve It With
These snickerdoodles are so versatile, they fit in perfectly at almost any gathering or quiet moment. For breakfast, imagine a couple of these alongside a steaming mug of freshly brewed coffee or a creamy latte. They add just the right amount of sweetness to start your day without being overpowering. For a more elegant brunch spread, they make a delightful little treat alongside some fresh fruit salad and perhaps some mini muffins. You can even dust them with a little extra powdered sugar for a touch of sophistication. As a dessert, they’re a fantastic finale to a meal. Serve them warm with a scoop of vanilla Ice Cream for a truly decadent experience, or alongside a rich chocolate cake for a delightful contrast. And for those cozy snack times? They are simply divine with a tall glass of cold milk. My kids always ask for seconds when we have these with milk after school. I’ve even found that they pair surprisingly well with a warm apple cider on a chilly autumn afternoon. It’s the comforting flavors that really tie everything together.
Top Tips for Perfecting Your Snickerdoodles
I’ve made more snickerdoodles than I can count over the years, and I’ve picked up a few tricks that I think really make a difference. When you’re measuring your flour, it’s so important to spoon it into your measuring cup and level it off with a straight edge, rather than scooping directly from the bag. Scooping can pack too much flour in, leading to dry, crumbly cookies. I learned this the hard way after a few batches that were just too stiff! For the creaming of butter and sugar, really take your time here. Beat them until they’re noticeably lighter in color and fluffy. This incorporates air, which is crucial for a tender cookie. Don’t rush this step! When you’re mixing the dry ingredients into the wet, stop as soon as they’re combined. A few tiny streaks of flour are okay; they’ll disappear during baking. Overmixing is the enemy of tender cookies, so trust your instincts and stop when things just come together. For the cinnamon-sugar coating, don’t be shy! I like a really robust coating. If you want to get fancy with the swirl effect (though traditionally, they aren’t swirled like Cinnamon Rolls), you can gently press two dough balls together and then roll them in the cinnamon sugar – but I usually just stick to the classic single ball roll for simplicity and that lovely crackly exterior. For baking, I always recommend rotating your baking sheets halfway through. This helps ensure even baking, especially if your oven has hot spots. And remember, the cookies will continue to set up as they cool on the baking sheet, so pull them out when the centers still look a little soft. For ingredient swaps, if you can’t find cream of tartar, you can use twice the amount of baking powder, but it won’t give you quite the same tangy flavor and chewy texture, so it’s worth trying to find it. Some people like to add a touch of nutmeg to their cinnamon sugar mix for a little extra warmth, which is lovely, but I usually keep mine classic. If you want a slightly less sweet cookie, you can reduce the sugar in the dough by about a quarter cup, but don’t reduce the sugar in the cinnamon-sugar coating, as that’s where the flavor really comes from.
Storing and Reheating Tips
Keeping your snickerdoodles tasting fresh is easy, but there are a few things to keep in mind. At room temperature, these cookies are best enjoyed within about 3-4 days. I like to store them in an airtight container or a cookie tin. If you put them in a container with a slice of bread, it can help keep them soft, which is a neat little trick! If you find they’re getting a little too hard, the bread trick works wonders. For refrigerator storage, they can last up to a week, but they might lose some of their chewiness and can become a bit harder. If you do store them in the fridge, make sure they’re in an airtight container or wrapped well to prevent them from drying out or picking up other fridge odors. For longer storage, freezing is your best bet. You can freeze baked cookies for up to 2-3 months. Wrap them individually in plastic wrap, then place them in a freezer-safe bag or container. When you’re ready to enjoy them, just let them thaw at room temperature for a couple of hours. If you want them warm and gooey again, you can pop them in a 300-degree oven for about 5-7 minutes. For the glaze, it’s always best to apply it right before serving if you’ve stored cookies for a few days, as glaze can get sticky and messy if stored for too long. If you plan to freeze them unglazed, just add the glaze after thawing and warming.
Frequently Asked Questions
Final Thoughts
So there you have it – my absolute favorite snickerdoodle recipe! I really hope you give these a try. They’re more than just cookies; they’re a little bit of comfort, a sprinkle of nostalgia, and a whole lot of deliciousness. The way they bake up, with that wonderfully chewy texture and that perfect cinnamon-sugar crunch, is just so satisfying. They’re the kind of cookie that makes everyone who tries them smile, and honestly, that’s what cooking is all about for me. If you love these, you might also enjoy my classic chocolate chip cookies or my chewy oatmeal raisin cookies – they’re in a similar vein of comforting, crowd-pleasing treats. I can’t wait to hear what you think of these snickerdoodles! Please leave a comment below with your thoughts, any variations you tried, or how quickly they disappeared at your house. Happy baking, and enjoy every delicious bite!
Snickerdoodles
Ingredients
Main Ingredients
- 2.75 cups all-purpose flour
- 1 teaspoon baking soda
- 0.5 teaspoon salt
- 1 cup unsalted butter softened
- 1.75 cups granulated sugar
- 2 teaspoons ground cinnamon
- 2 large eggs
- 1 teaspoon vanilla extract
- 2 tablespoons granulated sugar for coating
- 2 teaspoons ground cinnamon for coating
Instructions
Preparation Steps
- Preheat oven to 375°F (190°C).
- In a medium bowl, whisk together flour, baking soda, and salt.
- In a large bowl, cream together butter and 1.5 cups granulated sugar until light and fluffy. Beat in eggs one at a time, then stir in vanilla.
- Gradually add the dry ingredients to the wet ingredients, mixing until just combined.
- In a small bowl, combine the remaining 2 tablespoons granulated sugar and 2 teaspoons cinnamon.
- Roll dough into 1-inch balls and coat in the cinnamon-sugar mixture.
- Place cookies on ungreased baking sheets.
- Bake for 8-10 minutes, or until edges are set.
- Let cookies cool on baking sheets for a few minutes before transferring to a wire rack to cool completely.