
You know those nights, right? The ones where the clock is ticking, everyone’s hungry, and the idea of actually *cooking* feels like climbing Mount Everest in flip-flops. I have a secret weapon for those evenings, a dish that not only saves my sanity but also makes everyone at my table beam with happiness. It’s my Sticky Chicken Rice Bowls, and trust me, they’re an absolute game-changer. Forget complicated stir-fries or fussy marinades; this recipe is all about maximum flavor with minimum fuss. If you’ve ever loved a good sweet and savory chicken dish, this is right up your alley, but even better because it’s all served over fluffy rice, ready to soak up every last drop of that glorious sauce. It’s the kind of meal that feels like a hug in a bowl, and the aroma that fills the house when it’s cooking? Pure comfort.
What are Sticky Chicken Rice Bowls?
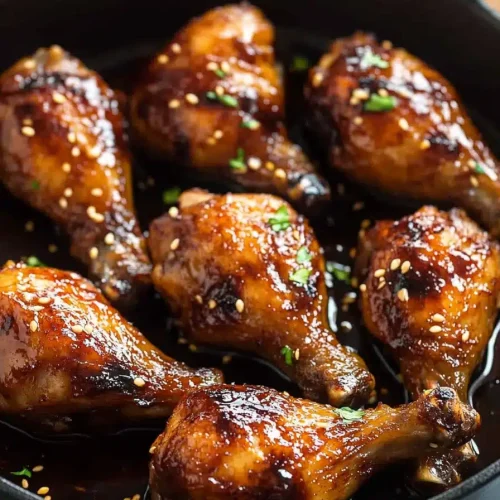
So, what exactly *are* sticky Chicken Rice bowls? Think of them as your ultimate weeknight savior. At its heart, it’s tender, juicy chicken coated in a luscious, glossy, undeniably sticky sauce, all piled high on a bed of perfectly cooked rice. The “sticky” comes from a magical combination of ingredients that caramelize beautifully, creating this incredible sweet, savory, and slightly tangy glaze that clings to every piece of chicken. It’s not overly complicated; it’s more about achieving that perfect balance of flavors and textures. The name itself just sounds inviting, doesn’t it? It hints at that delightful chewy, slightly sweet coating that makes you want to go back for just one more bite. It’s essentially comfort food elevated, a simple concept that delivers a profoundly satisfying meal.
Why you’ll love this recipe?
There are so many reasons why this recipe has earned a permanent spot in my weekly rotation, and I’m so excited to share them with you. First off, the FLAVOR explosion is just incredible. We’re talking a symphony of sweet, savory, a little bit tangy, and that irresistible umami kick that makes your taste buds sing. It’s balanced perfectly, so it’s never too sweet or too salty. Then there’s the SIMPLICITY. I’m not kidding when I say this is a lifesaver on those rushed evenings. Most of the magic happens in One Pan (or pot, depending on how you look at it!), and the ingredient list is surprisingly manageable. You probably have most of it in your pantry already! And let’s talk about COST-EFFICIENCY. Chicken thighs are generally budget-friendly, and the other components are pantry staples, making this a meal that’s kind to your wallet without sacrificing taste. The VERSATILITY is another huge plus. While it’s fantastic on its own, you can easily customize it by adding your favorite veggies or serving it with different sides. It’s a base that you can play with, making it your own. Honestly, what I love most about this is that it feels special enough for company but is so easy to whip up for a regular Tuesday night dinner. It’s a little bit like my famous lemon herb roasted chicken, but with a completely different flavor profile and a quicker cooking time. It truly hits all the right notes.
How do I make sticky chicken rice bowls?
Quick Overview
This recipe is all about building layers of flavor quickly and efficiently. We’ll start by getting our chicken ready, then whip up a simple yet powerful glaze, and let it all come together in a glorious, sticky finish. The key is to let the sauce reduce and thicken just right, coating the chicken in that irresistible sheen. It’s a straightforward process that yields restaurant-quality results, proving that amazing meals don’t need hours in the kitchen. You’ll be amazed at how quickly this comes together from start to finish!
Ingredients
For the Chicken:
1.5 lbs boneless, skinless chicken thighs, cut into 1-inch pieces (I prefer thighs because they stay so juicy and tender, but chicken breast works too if you trim the fat!)
1 tablespoon cornstarch (this helps create that lovely coating and thickens the sauce slightly)
1/2 teaspoon salt
1/4 teaspoon Black Pepper
For the Sticky Glaze:
1/2 cup low-sodium soy sauce (or tamari for gluten-free)
1/4 cup honey (maple syrup is a great alternative if you don’t have honey, it gives a slightly different but equally delicious flavor!)
2 tablespoons rice vinegar (this adds a lovely tanginess to balance the sweetness)
1 tablespoon grated Fresh Ginger (don’t skip this! It adds so much zing)
2 cloves garlic, minced (freshly minced garlic is key for that pungent aroma)
1 teaspoon sesame oil (for that nutty, toasty finish)
For Serving:
Cooked rice (jasmine or basmati are my favorites)
Optional garnishes: toasted sesame seeds, thinly sliced green onions, a sprinkle of red pepper flakes for a little heat.
Step-by-Step Instructions
Step 1: Preheat & Prep Pan
First things first, get your rice going if you haven’t already. You want it ready to go when the chicken is done. Now, grab a large skillet or wok. You’ll want to heat about 1 tablespoon of neutral oil (like vegetable or canola) over medium-high heat. Let it get nice and hot – you’ll know it’s ready when it shimmers slightly.
Step 2: Mix Dry Ingredients
While the pan heats up, take your cut chicken pieces and place them in a medium bowl. Sprinkle the cornstarch, salt, and pepper over the chicken. Toss everything gently until the chicken is evenly coated. This little step might seem minor, but it really helps create a nice texture on the chicken and aids in thickening our glorious glaze.
Step 3: Mix Wet Ingredients
In a separate small bowl, whisk together the soy sauce, honey, rice vinegar, grated ginger, minced garlic, and sesame oil. Give it a good mix until everything is well combined. This is where all that incredible flavor is going to come from!
Step 4: Combine
Carefully add the coated chicken to the hot skillet. Try to spread it out in a single layer so it can brown properly. Let it cook for about 5-7 minutes, stirring occasionally, until the chicken is browned on all sides and mostly cooked through. Don’t worry if it’s not completely done, it will finish cooking in the sauce.
Step 5: Prepare Filling
This step is actually the glaze preparation! Once the chicken is nicely browned, pour the whisked glaze mixture over the chicken in the skillet. Stir everything to coat the chicken evenly.
Step 6: Layer & Swirl
Now for the magic! Bring the sauce to a simmer. Let it cook for another 5-10 minutes, stirring frequently. You’ll see the sauce start to thicken and become wonderfully sticky, coating every piece of chicken. Keep an eye on it, you want it nice and glossy, but not burnt!
Step 7: Bake
There’s no baking required for this recipe! It’s all done right there on the stovetop.
Step 8: Cool & Glaze
The glaze *is* the final step for the chicken! Once the sauce has thickened to your liking and is beautifully coating the chicken, it’s ready to serve. You don’t need to cool it down extensively before serving.
Step 9: Slice & Serve
To serve, spoon generous portions of fluffy rice into bowls. Top with the sticky chicken and plenty of that luscious sauce. Garnish with toasted sesame seeds, thinly sliced green onions, and a pinch of red pepper flakes if you like a little heat. Serve immediately and watch it disappear!
What to Serve It With
The beauty of these sticky chicken rice bowls is that they’re practically a meal in themselves, but they pair wonderfully with a few thoughtful additions. For BREAKFAST, believe it or not, a small portion can be amazing with a perfectly fried egg on top. The yolk mixing into the rice and sauce is pure decadence! For BRUNCH, I like to elevate it a bit. Serve it alongside some lightly steamed or stir-fried bok choy or gai lan for a pop of green and a refreshing crunch. A simple cucumber salad with a rice vinegar dressing is also a lovely contrast. As DESSERT is a bit of a stretch for this dish, but if you wanted something sweet afterwards, a light, fruity sorbet or some mochi would be a delightful palate cleanser. For COZY SNACKS, it’s perfect on its own, but if you’re feeling adventurous, a small side of pickled daikon and carrots adds a bright, tangy counterpoint that’s incredibly addictive. My kids absolutely love it with a side of edamame – it’s fun for them to pop and balances out the richness.
Top Tips for Perfecting Your Sticky Chicken Rice Bowls
I’ve made this recipe more times than I can count, and along the way, I’ve picked up a few tricks that really make a difference. When it comes to the chicken, don’t be afraid to trim off any excess fat before cutting it into pieces; it helps ensure a cleaner flavor. And for the cornstarch coating, make sure the chicken is relatively dry before you toss it; this helps the cornstarch cling better. For the ginger and garlic, I always opt for fresh. Pre-minced stuff just doesn’t have the same punch, and in a dish where the sauce is so prominent, you want all the fresh flavor you can get. If you’re grating ginger, use the small holes on your grater – you want that fine pulp, not big fibrous chunks. When it comes to the glaze, the key is patience. Don’t rush the simmering process. Let it bubble gently and reduce. Stirring frequently is crucial to prevent scorching, especially as it thickens. If you notice it’s getting too thick too quickly, you can always add a tablespoon or two of water or chicken broth to loosen it up. I learned that lesson the hard way when I had a glaze that was more like candy! For ingredient swaps, if you’re out of honey, maple syrup is a fantastic substitute. Brown sugar is also an option, but it will give a slightly different flavor profile. If you’re looking for a spicier kick, definitely add more red pepper flakes to the glaze, or even a dash of Sriracha. Don’t be afraid to experiment! My son likes his extra spicy, so I’ll often add a generous pinch of chili flakes to his portion before serving. And for those who prefer a lighter sauce, you can always cook it for a shorter amount of time, or use less honey. The goal is a sauce that coats, not drowns. Lastly, always taste and adjust! Your palate is your best guide. If it needs a touch more salt, add a splash of soy sauce. If it’s not tangy enough, a tiny splash more vinegar works wonders.
Storing and Reheating Tips
This sticky chicken is so good, you might actually have leftovers – though I’m usually surprised when we do! If you need to store it, let it cool down completely first. For ROOM TEMPERATURE storage, it’s best to eat it within two hours, especially if it’s warm out. For refrigerator storage, transfer the chicken and rice (or just the chicken if you prefer to serve it over fresh rice later) into an airtight container. It will keep well in the fridge for about 3-4 days. The sauce might congeal a bit when chilled, but that’s perfectly normal. If you plan to FREEZER, it’s best to store the chicken and sauce separately from the rice. Wrap the chicken and sauce tightly in a layer of plastic wrap and then a layer of foil, or place it in a freezer-safe container. It should last in the freezer for up to 2-3 months. Thaw overnight in the refrigerator before reheating. When it comes to reheating, the microwave is your friend for speed. Reheat the chicken and sauce gently, stirring halfway through, until heated through. You might want to add a splash of water or broth to loosen the sauce if it has thickened too much. If you’re reheating the rice, do that separately. For the GLADE timing advice, I always recommend storing the sauce with the chicken. If you’re freezing, it’s better to have it all together. When reheating, if the sauce seems too thick, a little liquid will bring it back to life. It’s always better to add liquid gradually until you get your desired consistency.
Frequently Asked Questions
Final Thoughts
I really hope you give these sticky chicken rice bowls a try. They’re more than just a recipe to me; they’re a symbol of those relaxed, happy evenings spent with family, where good food brings everyone together. The balance of sweet and savory, the tender chicken, and that addictive sticky sauce over fluffy rice – it’s just pure magic. It’s the kind of meal that makes you feel like a kitchen hero without breaking a sweat. If you love this recipe, you might also enjoy my Honey Garlic Salmon or my General Tso’s Chicken – they have that same fantastic sweet and savory profile! Don’t forget to let me know in the comments below how yours turned out, or if you’ve found any fun variations! I’m always eager to hear your cooking adventures. Happy cooking, and enjoy every delicious bite!
Sticky Chicken Rice Bowls
Ingredients
Main Ingredients
- 1.5 pounds boneless, skinless chicken thighs
- 2 tablespoons soy sauce
- 1 tablespoon honey
- 1 tablespoon rice vinegar
- 1 teaspoon sesame oil
- 0.5 cup cooked rice
- 0.25 cup chopped green onions
Instructions
Preparation Steps
- In a bowl, whisk together soy sauce, honey, rice vinegar, and sesame oil.
- Add chicken thighs to the bowl and coat with the sauce. Marinate for at least 15 minutes.
- Heat a skillet over medium-high heat. Add chicken and cook for 5-7 minutes per side, or until cooked through.
- Serve chicken over rice and top with green onions.


