You know those moments? You’re halfway through sautéing onions, the pan is sizzling, your stomach is rumbling, and you reach for the garlic… only to find sad, shriveled, or even sprouted cloves staring back at you. Ugh. It’s the worst, right? I’ve been there more times than I care to admit, and it always throws my whole cooking rhythm off. For years, I’d just buy garlic as I needed it, but then I discovered the magic of properly preserving garlic, and let me tell you, it’s been a total game-changer in my kitchen. It’s like having a little jar of pure flavor ready at a moment’s notice, saving me from those last-minute grocery store dashes. This isn’t just about keeping garlic fresh; it’s about unlocking its potential and making your cooking life so much easier, especially on those weeknights when inspiration strikes but the pantry is bare. It reminds me of my grandma’s pantry, always stocked with essentials that made every meal feel special, no matter how simple. Preserving garlic this way is her legacy, really, just in a much more modern form!
What is preserved garlic?
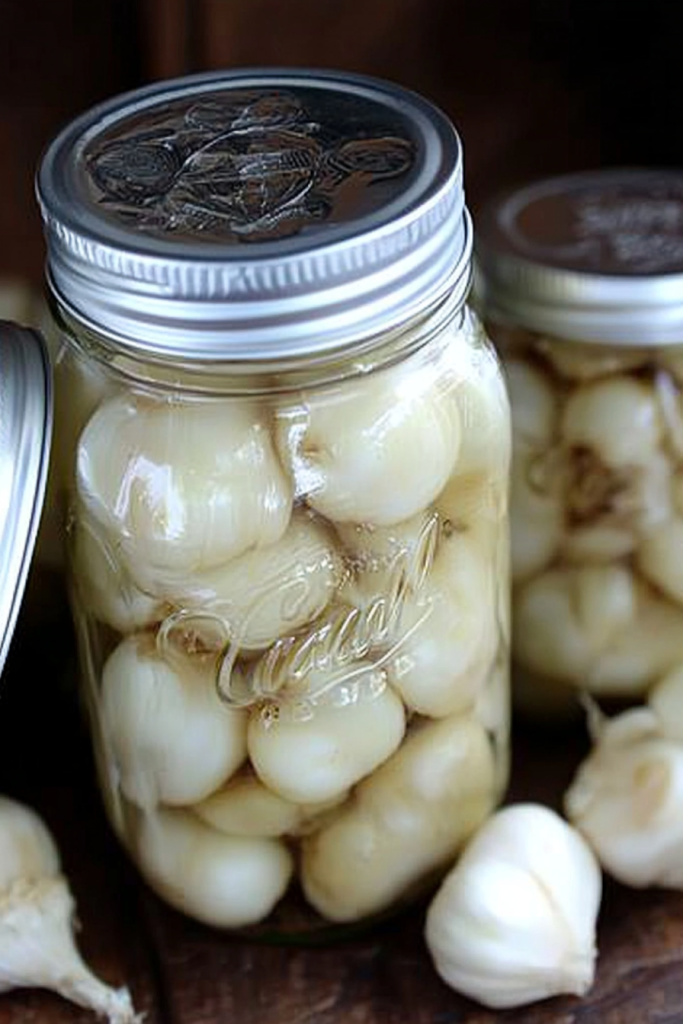
So, what exactly are we talking about when we say “preserved garlic”? Think of it as garlic that’s been treated in a way that significantly extends its shelf life beyond the usual few weeks you might get from fresh bulbs sitting on your counter. My favorite method involves infusing garlic cloves in oil, sometimes with a little extra flavor boost from herbs or spices. It’s essentially creating a potent garlic-infused oil that holds onto that pungent, delicious flavor. It’s not quite like dried garlic, which can lose some of its oomph, and it’s definitely not like pickled garlic, which has a distinct tang. Preserved garlic, in my book, is about capturing the pure, vibrant essence of raw garlic in a way that’s ready to be used instantly, whether you’re whipping up a quick stir-fry or adding a secret ingredient to a salad dressing. It’s pure garlic goodness, ready to go!
Why you’ll love this recipe?
Honestly, the reasons I adore this method of preserving garlic are piling up faster than I can count! Firstly, the flavor is absolutely incredible. When garlic is preserved this way, it mellows out just enough to become incredibly smooth and rich, without losing that signature garlicky punch. It’s like the best of raw garlic and cooked garlic had a delicious baby. Secondly, and this is a big one for me, it’s ridiculously simple to make. Once you have your garlic prepped, the rest is just a waiting game. It requires minimal effort for maximum reward, which is my kind of cooking. It’s also surprisingly cost-effective. Buying garlic in bulk when it’s on sale and then preserving it means you’re always stocked up and saving money in the long run, avoiding those impulse buys of pre-minced garlic that can be pricey and often lack freshness. And the versatility? Oh, you won’t believe it! This preserved garlic can be used in a million ways. Need to add depth to a pasta sauce? Done. Want to elevate roasted vegetables? Easy. Secret weapon for a quick marinade? Absolutely. What I love most about this is that it’s a foundational ingredient that makes almost *anything* taste better, and it takes so little effort to have it on hand. It’s far superior to store-bought minced garlic in a jar, which often tastes metallic or bland. This is the real deal, straight from your own kitchen!
How do I make Garlic Pastry?
Quick Overview
The process is beautifully straightforward: peel your garlic, chop it up (or leave it whole if you prefer), and then submerge it in a good quality oil, usually with a few herbs for extra flair. The key is to ensure the garlic is completely covered by the oil, and then to store it properly in the refrigerator. This method takes just a few minutes of active prep time, and then you let time and refrigeration do the rest. It’s a low-fuss way to guarantee you always have that essential garlic flavor ready to go, no more last-minute runs to the store or settling for wilted cloves!
Ingredients
For the Garlic Base: For the Garlic Base: For the Garlic Base: For the Garlic Base: For the Garlic Base: For
Here’s what you’ll need. I always try to buy garlic when it’s in season and on sale. You’ll need about 2-3 heads of garlic per jar, depending on the size of your jar. Look for firm bulbs with dry skins – these will be the easiest to peel and the freshest. Avoid anything that feels soft or has green shoots emerging from the cloves.
For the Infusion:
This is where you can get a little creative! My go-to is a really good quality olive oil. Extra virgin olive oil is fantastic because it has a lovely flavor that complements the garlic beautifully. You’ll need enough oil to completely cover the garlic in your jar, so it’s hard to give an exact measurement, but start with about a cup or two. I also love to add a few sprigs of fresh rosemary or thyme – their earthy notes pair wonderfully with garlic. A few dried chili flakes can also add a subtle warmth if you like a little heat.
Step-by-Step Instructions
Step 1: Prepare Your Garlic
Start by separating the garlic bulbs into individual cloves. Now, the peeling. This can be the most tedious part, but I have a little trick. If you give the garlic bulbs a good whack on the counter with the flat side of your knife, it loosens the skins, making them much easier to remove. Once peeled, you can decide if you want to leave the cloves whole, or roughly chop them. Chopping releases more flavor into the oil faster, but whole cloves look pretty and are easy to grab. For this recipe, I usually like to give them a quick rough chop.
Step 2: Sterilize Your Jar
This is super important for safety and to ensure your preserved garlic lasts. Take a clean glass jar (a mason jar with a tight-fitting lid is perfect) and wash it thoroughly with hot, soapy water. Then, rinse it well and pop it into a preheated oven at around 250°F (120°C) for about 10-15 minutes to sterilize it. Let it cool slightly before handling.
Step 3: Add Garlic and Aromatics
Once your jar is cool enough to handle, carefully place your prepared garlic cloves into the sterilized jar. If you’re using fresh herbs or chili flakes, add them in now too. I usually pack them in fairly snugly, but don’t cram them so tight that you can’t pour the oil in.
Step 4: Pour in the Oil
Now, slowly pour your good quality olive oil over the garlic and herbs. Make sure the garlic is completely submerged. You want to ensure there’s at least an inch of oil above the garlic to create a proper seal and prevent spoilage. If you don’t have enough oil to cover it, you can top it up with a neutral oil like grapeseed or a light vegetable oil, but I really prefer the flavor of just olive oil if possible.
Step 5: Seal and Refrigerate
Wipe any excess oil from the rim of the jar, screw on the lid tightly, and give the jar a gentle swirl to help distribute everything. Immediately place the jar in the refrigerator. This is crucial for food safety. Garlic preserved in oil at room temperature can be a breeding ground for botulism, so refrigeration is non-negotiable for this method.
Step 6: Let the Flavors Meld
Now for the patient part! Let the jar sit in the refrigerator for at least 24-48 hours before you start using it. This allows the flavors to really meld together and for the oil to become beautifully infused with that garlicky goodness. The longer it sits, the more intense the flavor will become.
Step 7: Use and Replenish
When you need garlic for a recipe, simply scoop out the cloves you need. The infused oil is liquid gold, too! Don’t discard it. You can use it for sautéing, in salad dressings, or drizzled over roasted vegetables. As you use the cloves, you can replenish the jar with fresh, peeled garlic cloves and top up the oil to keep it submerged. Just remember to always keep the jar refrigerated.
What to Serve It With
Oh, the possibilities are endless once you have this jar of preserved garlic goodness in your fridge! For a quick and simple breakfast, I love to use a clove or two in a scrambled egg or omelet. It adds an instant savory depth that’s just divine, especially with a side of toast. For a more leisurely weekend brunch, imagine using that garlicky oil to sauté some mushrooms or spinach as a topping for avocado toast or to add a kick to a breakfast hash. It really elevates the whole meal. As a dessert ingredient? Well, it might sound a little unusual, but a tiny bit of that infused oil can be surprisingly good in some baked goods, like a savory scone or even a slightly unexpected twist in a chocolate cake for a grown-up flavor. But where it truly shines is in casual, cozy snacks. Think about tossing some popcorn with a bit of the garlic oil and a sprinkle of Parmesan, or using it to quickly sauté some crusty bread for bruschetta. My family also loves it when I use the oil to make garlic bread – it’s so much faster than mincing fresh garlic, and the flavor is incredible. It’s also my secret weapon for quick pasta dishes; a few cloves and a swirl of the oil into some spaghetti with a sprinkle of red pepper flakes is pure comfort food!
Top Tips for Perfecting Your Preserved Garlic
Over the years, I’ve learned a few things that make this process even smoother and more foolproof. For starters, the garlic itself matters. Always start with good quality, fresh garlic. If you try to preserve garlic that’s already starting to go soft or sprout, you’re setting yourself up for disappointment. You want firm bulbs that are easy to peel. Speaking of peeling, if you struggle with getting those papery skins off, try the knife-whack trick I mentioned earlier. It’s a lifesaver! Another crucial tip is about the oil. While you *can* use any cooking oil, I find that a good quality extra virgin olive oil really makes a difference in the final flavor. Its fruity notes complement the garlic perfectly. If you’re using a milder oil, you might want to be a bit more generous with the herbs you add. When it comes to the herbs and spices, don’t go overboard. A sprig or two of rosemary or thyme is usually enough. Too many herbs can sometimes overpower the delicate garlic flavor. And if you’re adding chili flakes, start with just a pinch; you can always add more later or use them as a garnish. The most critical piece of advice, and I can’t stress this enough, is about food safety. Always, always, always store your preserved garlic in the refrigerator. Garlic in oil at room temperature is a serious risk for botulism. By keeping it chilled, you’re ensuring it stays safe and delicious for weeks on end. I also like to make sure the garlic is completely submerged in the oil at all times. If the oil level drops below the garlic, it can start to degrade. Just top it up with more oil. Lastly, don’t be afraid to experiment with the aromatics. While rosemary and thyme are my favorites, a bay leaf, a few peppercorns, or even a sliver of lemon peel can add interesting layers of flavor to your preserved garlic. Just remember to remove them after a week or two if you prefer a cleaner garlic flavor.
Storing and Reheating Tips
Proper storage is absolutely key to keeping your preserved garlic safe and delicious for as long as possible. Once you’ve made your jar, it’s paramount to get it into the refrigerator right away. It needs to stay consistently cold to prevent any unwanted bacterial growth. In the fridge, my preserved garlic usually stays wonderfully fresh for about 3-4 weeks. Sometimes, if I’ve been particularly good about keeping it submerged and haven’t introduced any water, it can last even longer, but I prefer to err on the side of caution and aim for that timeframe. When it comes to using it, just reach in with a clean spoon or fork and take out the cloves you need. The oil left behind is just as valuable! You can use it for cooking, as I mentioned, or even to make a quick garlic-infused vinaigrette. If you find that the oil has solidified slightly in the fridge (this is normal for olive oil), just let the jar sit on the counter for about 15-20 minutes before using the oil – it will liquefy beautifully. I haven’t personally tried freezing preserved garlic, as refrigeration works so well for me and it’s used frequently enough that it doesn’t last long enough to warrant freezing. Plus, freezing oil-based products can sometimes alter the texture. So, my main advice is consistent refrigeration and using it within that 3-4 week window. For reheating, well, you don’t really “reheat” preserved garlic itself, you use it in your cooking! The oil is ready to go straight into a hot pan, and the cloves can be added to whatever dish you’re preparing. It’s already softened and bursting with flavor, so it integrates beautifully into hot dishes.
Frequently Asked Questions
Final Thoughts
There you have it – my tried-and-true method for preserving garlic that ensures you’ll never be caught without this essential ingredient again. It’s such a simple thing, but it truly transforms how I cook, making weeknight meals so much more flavorful and enjoyable. It’s that little bit of kitchen magic that makes you feel like a culinary superhero, even when you’re just making a quick weeknight dinner. If you love the intense flavor that garlic brings to your dishes, and you’re tired of that disappointing moment when you realize your garlic has seen better days, then I really encourage you to give this a try. It’s so satisfying to open your fridge and see that little jar of golden, infused goodness, knowing you made it yourself. It’s also a fantastic way to use up garlic when you’ve bought too much, which I seem to do more often than not! For those of you who enjoy this kind of kitchen prep, you might also love my guide to making your own infused oils or my tips for freezing fresh herbs. Both are great ways to keep your pantry stocked with flavor. I can’t wait to hear how your preserved garlic turns out! Please leave a comment below and let me know your thoughts, or if you have any other fantastic ways you like to preserve garlic. Happy preserving!
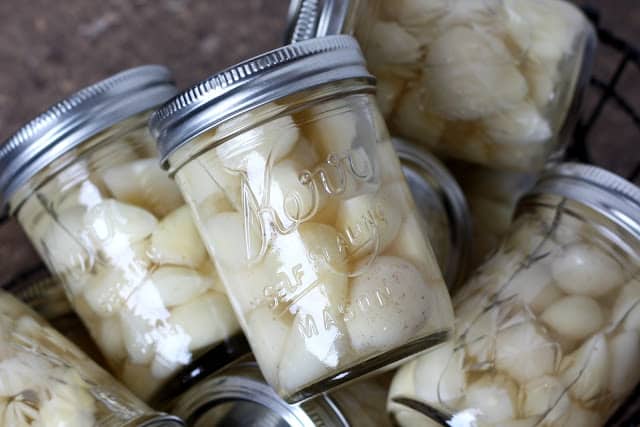
Preserving Garlic
Ingredients
Main Ingredients
- 2 lbs Garlic cloves Peeled
- 8 cups Distilled White Vinegar
Instructions
Preparation Steps
- Rinse the peeled garlic cloves in a large bowl of water, scrubbing gently to remove any dirt. Rinse again in a strainer.
- Trim any brown spots or imperfections from the garlic cloves.
- Bring the vinegar to a boil in a large pot.
- Pack the garlic cloves into clean jars. Pour the boiling vinegar over the garlic, leaving about 0.5 inch headspace. Seal the jars with lids.
- Let the jars cool to room temperature. Store in the refrigerator for up to a year.


