You know those recipes? The ones that sound a little… well, silly when you say them out loud? This is one of those for me. I call it “Stupid Pie,” not because it’s dumb (far from it!), but because it’s so ridiculously easy and incredibly delicious that it feels almost… stupidly good. I remember the first time I made this, I was so stressed about a dinner party. My usual go-to dessert felt too complicated, and I just needed something that wouldn’t add to the chaos. I stumbled across a variation of this “Stupid Pie” and thought, “Okay, this looks too simple to be good.” Oh, how wrong I was! It was the first thing to disappear, and everyone, *everyone*, was asking for the recipe. It’s that kind of dessert that makes you look like a culinary genius without breaking a sweat. It’s honestly in a league of its own, way beyond your average Chocolate Chip Cookie or even a basic apple crumble. This is the showstopper that requires minimal effort, and that’s precisely why I adore it.
What is a stupid pie?
So, what exactly is this “Stupid Pie“? Think of it as a delightful mashup of the moistest, most tender cake you can imagine, swirled with a rich, decadent filling, and topped with a sweet, shiny glaze. It’s not a traditional pie with a crust, nor is it a dense cake. It sits in this wonderful in-between space that’s utterly unique. The name “Stupid Pie” is my own little inside joke because the ingredients are so common, and the process is so straightforward, it feels like you’re pulling a fast one on everyone. It’s essentially a super-moist, slightly sweet cake base that gets elevated by pockets of intensely flavored filling. It’s the kind of dessert that makes you wonder how something so simple can taste so amazing. It’s the perfect antidote to those nights when you crave something sweet and impressive but just don’t have the energy for a multi-step baking project. Trust me, the name is the only “stupid” thing about it.
Why you’ll love this recipe?
There are so many reasons why this “Stupid Pie” has become a staple in my kitchen, and I just know you’re going to fall in love with it too. First off, the flavor is out of this world. The cake itself is incredibly tender and moist, with a subtle sweetness that perfectly complements the rich filling. Whether you go for the classic chocolate swirl or a fruitier version, the combination is just divine. It’s got that comforting homemade taste that’s hard to beat. Then there’s the simplicity – and this is where the “stupid” part really shines. You can whip up the batter in minutes, and the filling is just as easy. No complicated techniques, no fancy equipment needed. It’s honestly a lifesaver on busy weeknights when you need a quick dessert that still feels special. And let’s talk about cost-efficiency! All the ingredients are pantry staples, meaning you can whip this up without a special grocery run, saving you money and time. What I love most about this recipe is its versatility. It’s perfect for breakfast (yes, really!), brunch, a comforting afternoon snack, or an elegant dessert after dinner. It’s also incredibly forgiving. Even if you’re new to baking, you’ll nail this. It’s one of those recipes that consistently delivers perfection, making you feel like a baking rockstar. It’s just one of those recipes that proves you don’t need to be a gourmet chef to create something truly memorable and delicious.
How do I make a Stupid Pie?
Quick Overview
This “Stupid Pie” comes together in a flash, making it one of my absolute favorites for unexpected guests or last-minute cravings. You’ll basically mix up a simple, tender cake batter, prepare a luscious filling, swirl them together in your pan, and bake until golden and fragrant. The whole process, from start to finish, takes about an hour, with most of that being hands-off baking time. It’s so straightforward; you can even get the kids involved in swirling the filling! What makes this method so great is how it guarantees a moist cake with ribbons of flavor woven throughout, creating a stunning visual and an even better taste experience. It’s the perfect blend of ease and impressive results.
Ingredients
For the Main Batter:
You’ll need all-purpose flour – about 2 cups. I always use unbleached, as I find it gives a slightly better texture, but any all-purpose will do just fine. Then, granulated sugar, around 1 ½ cups, to get that perfect sweetness. Two large eggs are essential for binding and richness. You’ll also want some milk; I usually use whole milk for the best richness, about 1 cup, but I’ve tested this with almond milk and it actually made it even creamier! Unsalted butter, softened, about ½ cup (that’s one stick), brings so much moisture and flavor. A good tablespoon of vanilla extract is key for that comforting aroma and taste. And of course, baking powder for leavening (2 teaspoons), a pinch of salt (½ teaspoon) to balance the sweetness, and sometimes I add a dash of cinnamon for an extra layer of warmth.
For the Filling:
This is where you can really play! For the classic, my absolute go-to is about ½ cup of unsweetened cocoa powder, mixed with ½ cup of granulated sugar. A couple of tablespoons of melted butter or oil help create that fudgy consistency. Sometimes, I’ll add a little extra vanilla or even a shot of espresso powder to intensify the chocolate flavor. For a fruity version, you can use about 1 cup of your favorite fruit puree (raspberry or blueberry are amazing!) or jam, sometimes thickened with a tablespoon of cornstarch if it’s a bit runny.
For the Glaze:
Keep it simple! A basic glaze is usually powdered sugar (about 1 cup) whisked with a few tablespoons of milk or water until it’s pourable but still has some body. A splash of vanilla extract here is lovely too. For a chocolate glaze, you’ll just add a tablespoon or two of cocoa powder to that mix. You want it to be drizzly, not watery, so you can see those pretty swirls on top.
Step-by-Step Instructions
Step 1: Preheat & Prep Pan
First things first, preheat your oven to 350°F (175°C). Grab a 9×13 inch baking pan. I like to lightly grease it with butter or cooking spray and then dust it with a little flour, or even better, a bit of cocoa powder if you’re doing a chocolate filling – it prevents sticking and gives a nice finish. This ensures your beautiful “stupid pie” comes out in one piece!
Step 2: Mix Dry Ingredients
In a large bowl, whisk together your all-purpose flour, granulated sugar, baking powder, and salt. Make sure they’re well combined. This ensures that the leavening and seasoning are evenly distributed throughout the batter, so you don’t get any surprise pockets of salty or flat bites. I usually whisk them for a good 30 seconds to really aerate them.
Step 3: Mix Wet Ingredients
In a separate medium bowl, beat the eggs lightly. Then, whisk in the milk, melted butter (make sure it’s not too hot or it will cook the eggs!), and vanilla extract. You just want everything to be nicely combined and smooth. No need to go crazy here, just a gentle whisking.
Step 4: Combine
Now, pour the wet ingredients into the bowl with the dry ingredients. Using a spatula or a wooden spoon, gently mix them together until *just* combined. Seriously, stop mixing as soon as you don’t see any dry streaks of flour. Overmixing is the enemy of tender cakes, and we want this to be super moist and tender! A few small lumps are totally fine; they’ll bake out.
Step 5: Prepare Filling
If you’re going with the classic chocolate, in a small bowl, combine your cocoa powder, sugar, and melted butter/oil. Stir until it forms a thick paste. If it seems too dry, add a tiny splash of milk or water. If it’s too wet, a little more cocoa powder. For fruit fillings, just make sure your puree or jam is ready to go.
Step 6: Layer & Swirl
Pour about half of your cake batter into the prepared pan, spreading it evenly. Dollop spoonfuls of your filling mixture over the batter. Then, carefully spoon the remaining batter over the filling, trying to cover as much as possible. Now comes the fun part! Take a knife or a skewer and gently swirl the filling into the batter. Don’t over-swirl; you want distinct ribbons, not a muddy mess. You can go back and forth, or make little figure-eights. It’s all about creating pretty patterns!
Step 7: Bake
Pop that pan into your preheated oven. Bake for about 30-40 minutes. The exact time can vary depending on your oven, so keep an eye on it. You’ll know it’s done when the top is golden brown, and a toothpick inserted into the cake part (avoiding the filling) comes out clean. The filling might still be a little gooey, and that’s perfectly okay; it adds to the lusciousness!
Step 8: Cool & Glaze
Once it’s out of the oven, let the “Stupid Pie” cool in the pan on a wire rack for at least 20-30 minutes. This is important for it to set up properly. While it’s cooling, whisk up your glaze. Once the pie has cooled slightly, drizzle the glaze over the top, letting it drip down the sides. This adds that extra touch of sweetness and visual appeal.
Step 9: Slice & Serve
After the glaze has set a bit, carefully slice it into squares. You can serve it warm or at room temperature. It’s absolutely divine on its own, but a dollop of whipped cream or a scoop of vanilla ice cream takes it to another level. Enjoy the magic!
What to Serve It With
This “Stupid Pie” is so versatile, it genuinely fits into any part of your day. For breakfast, I often slice it while it’s still a little warm and serve it with a strong cup of coffee. The subtle sweetness is just enough to wake you up without being cloying. It’s like a decadent muffin but so much easier. For a leisurely brunch, I’ll plate it a bit more elegantly, maybe with some fresh berries scattered around and a sprig of mint. It pairs wonderfully with mimosas or a good cup of tea. As a dessert, it’s a crowd-pleaser. I love serving it with a dollop of lightly sweetened whipped cream or, my personal favorite, a scoop of high-quality vanilla bean ice cream. The contrast of warm pie and cold ice cream is just heavenly. On cozy evenings when I’m just craving something sweet, it’s perfect cut into smaller squares. Sometimes, I’ll even heat a slice gently in the microwave for about 15 seconds and serve it with a glass of milk. My kids ask for this all the time, usually as an after-school treat, and I happily oblige because it’s so simple and uses up those ripe bananas or any leftover jam I might have. It’s also fantastic alongside a cup of hot chocolate on a chilly afternoon.
Top Tips for Perfecting Your “Stupid Pie”
Over the years, I’ve learned a few tricks to make this “Stupid Pie” absolutely foolproof and even more delicious. For the filling, especially if you’re using fruit puree, make sure it’s not too watery. If it seems a bit thin, a quick stir with a tablespoon of cornstarch before adding it to the batter can prevent a soggy bottom. When you’re combining the wet and dry ingredients, remember the golden rule: do NOT overmix. Just stir until you don’t see any dry flour. A few lumps are a sign of a tender cake! If you accidentally overmix, you’ll end up with a tougher texture, and that’s a crying shame for this recipe. For the swirling, less is often more. You want those distinct beautiful ribbons of filling, not a uniformly colored batter. A few gentle passes with a knife or skewer are all you need. If you want to get creative with swirls, try alternating dollops of batter and filling before swirling. I’ve also experimented with different flavors – a swirl of raspberry jam with a hint of lemon zest is absolutely divine, or even a spiced apple filling for a fall twist. When it comes to baking, every oven is a little different. My advice is to start checking for doneness around the 30-minute mark. A toothpick should come out clean from the cakey parts. If the top is browning too quickly, you can loosely tent it with foil. For the glaze, consistency is key. If it’s too thick, add a tiny splash of liquid; if it’s too thin, whisk in a bit more powdered sugar. I’ve found that letting the pie cool for at least 20-30 minutes before glazing ensures the glaze sets nicely without melting away. And if you’re feeling fancy, a sprinkle of sea salt flakes over a chocolate glaze is an absolute game-changer, adding a lovely sweet-and-salty contrast.
Storing and Reheating Tips
This “Stupid Pie” is wonderful because it keeps well, which is a huge bonus for busy households like mine. If you’ve got leftovers (which is rare at my house!), you can store it at room temperature for up to 2 days, as long as it’s covered tightly with plastic wrap or foil. This is perfect for those little bits that disappear throughout the day. For longer storage, I highly recommend the refrigerator. Wrap the pan tightly or transfer individual slices to an airtight container. It will stay delicious for about 4-5 days in the fridge. The texture remains incredibly moist. If you plan on freezing it, I’d suggest either freezing the whole un-glazed pie or individual slices wrapped very well in plastic wrap and then a layer of aluminum foil. It can last for up to 2 months in the freezer. To reheat, you can gently warm a slice in the microwave for about 15-30 seconds, just enough to take the chill off and make it wonderfully gooey again. Or, if you prefer, you can warm it in a low oven (around 300°F or 150°C) for about 10-15 minutes until heated through. If you’ve frozen the pie un-glazed, thaw it completely in the refrigerator overnight, then add the glaze just before serving for the freshest finish. I usually wait to glaze until I know I’ll be eating it within a day or two if it’s going to be at room temperature.
Frequently Asked Questions
Final Thoughts
So there you have it – my beloved “Stupid Pie”! It’s one of those recipes that has earned its permanent spot in my recipe binder because it’s just so darn reliable and always brings smiles. It’s the perfect example of how simple ingredients and a straightforward approach can lead to something truly spectacular. Whether you’re a seasoned baker or just starting out, I promise you can make this delicious pie. It’s the kind of treat that makes you feel like you’ve accomplished something amazing, with minimal fuss. If you enjoy this recipe, I think you might also love my Easy Lemon Blueberry Cobbler or my No-Bake Chocolate Raspberry Tart – they’re all about big flavor with less effort! Give this “Stupid Pie” a try; I’m genuinely excited for you to experience how incredibly good it is. I can’t wait to hear how yours turns out and what amazing swirls you create! Happy baking, my friends!
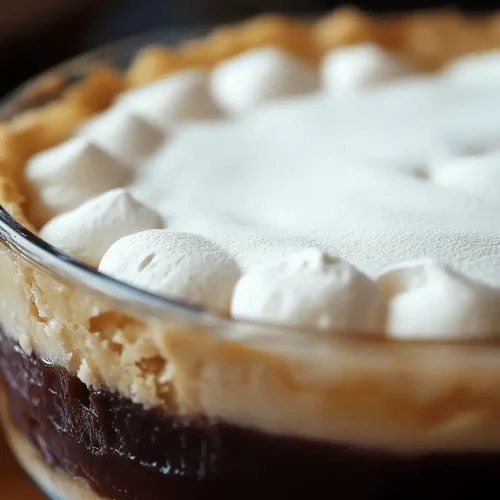
Stupid Pie
Ingredients
Crust
- 1.25 cup All-purpose flour
- 0.5 teaspoon Salt
- 0.5 cup Cold unsalted butter Cut into cubes
- 0.25 cup Ice water
Filling
- 6 cups Apples Peeled and sliced
- 0.75 cup Granulated sugar
- 0.25 cup All-purpose flour
- 1 teaspoon Cinnamon
- 0.25 teaspoon Nutmeg
- 2 tablespoons Butter Cut into small pieces
Instructions
Prepare the Crust
- In a bowl, whisk together the flour and salt.
- Cut in the cold butter using a pastry blender or your fingers until the mixture resembles coarse crumbs.
- Gradually add ice water, mixing until the dough just comes together. Do not overmix.
- Form the dough into a disc, wrap in plastic wrap, and refrigerate for at least 30 minutes.
Prepare the Filling
- In a large bowl, combine the sliced apples, sugar, flour, cinnamon, and nutmeg.
- Toss to combine.
Assemble and Bake the Pie
- Preheat oven to 375°F (190°C).
- On a lightly floured surface, roll out the dough to fit a 9-inch pie plate.
- Transfer the dough to the pie plate and trim the edges.
- Pour the apple filling into the pie crust.
- Dot the top with butter.
- Bake for 45-50 minutes, or until the crust is golden brown and the filling is bubbly.
- Let cool completely before serving.