There are certain meals that just stick with you, aren’t there? For me, one of those meals is a truly spectacular cod fish sandwich. Not just any sandwich, mind you, but the kind that has that perfect crisp, a flaky interior, and all the fixings that just sing. I remember my dad making these for us on rare beach trips when I was a kid. The salty air, the sound of the waves, and then – *bam* – this glorious, golden-brown sandwich that tasted like sunshine and the ocean all at once. It was simple, sure, but the memory of that crunch and that melt-in-your-mouth fish is etched in my mind forever. For years, I’ve been chasing that feeling, tweaking my own versions, and I’m so excited to finally share this cod fish sandwich recipe with you. It’s like a hug in a bun, and honestly, it’s so much better than anything you’d pick up on the go. Forget those soggy, sad excuses for fish sandwiches; this one is the real deal, and it’s surprisingly doable for a weeknight dinner, too.
What is the ultimate Crispy Cod Sandwich?
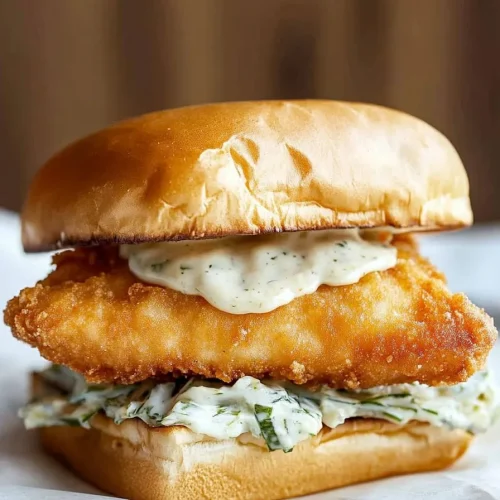
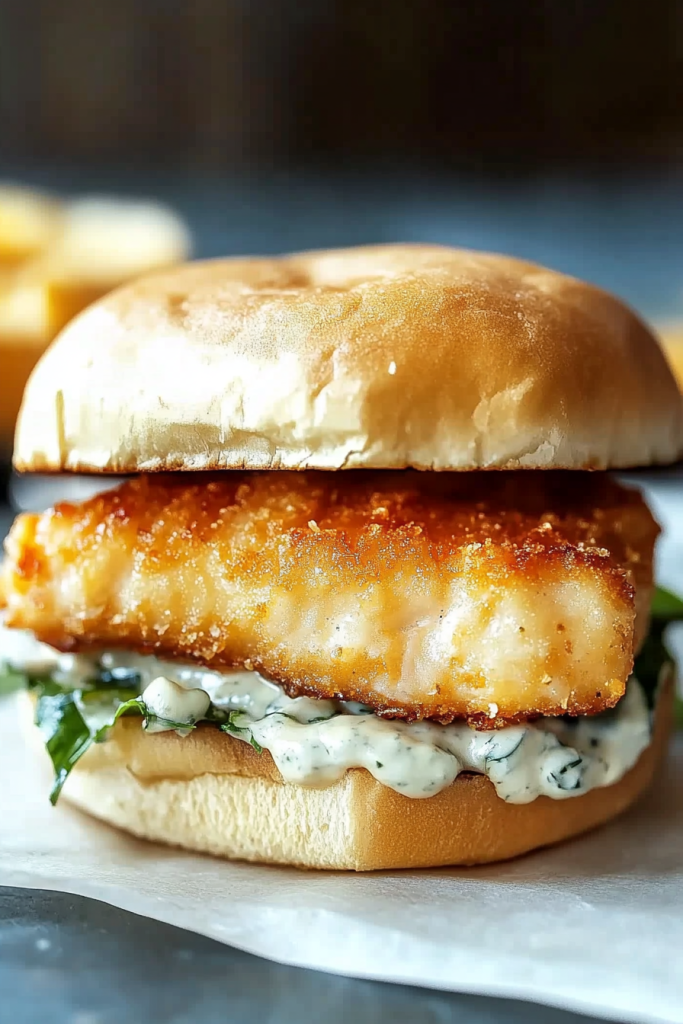
So, what exactly makes this cod fish sandwich so special? Think of it as the superstar of casual dining. At its heart, it’s a beautiful piece of cod, coated in a super-crispy batter and fried to golden perfection, then nestled into a soft bun with all your favorite toppings. It’s that classic fish and chips vibe, but conveniently packaged into a sandwich format. The “ultimate” part comes from the careful balance of textures and flavors. We’re talking about a batter that’s light and airy, not heavy or greasy, that gives you that satisfying crunch with every single bite. The cod itself needs to be moist and flaky, so it practically melts in your mouth. It’s essentially the comfort food equivalent of a perfectly sunny day, designed to bring a smile to your face and a happy sigh to your lips. It’s more than just fish on bread; it’s an experience!
Why you’ll love this recipe?
Honestly, there are so many reasons why this cod fish sandwich has become a staple in my kitchen. First and foremost, the FLAVOR is just out of this world. That perfectly seasoned, crispy coating on the flaky cod? It’s addictive. It hits all the right notes – savory, a little bit briny from the fish, and that irresistible crunch. Then there’s the SIMPLICITY. I know what you might be thinking, “frying fish sounds complicated.” But trust me, I’ve streamlined this so it’s incredibly manageable, even for a weeknight. You don’t need a deep fryer, and the batter comes together in minutes. What I also absolutely adore about this recipe is how COST-EFFECTIVE it is. Cod can be an affordable fish, and the other ingredients are pantry staples. It’s a fantastic way to enjoy a restaurant-quality meal without breaking the bank. And let’s not forget about VERSATILITY! While I’ll share my favorite way to serve it, this sandwich is a chameleon. You can dress it up or down, swap out toppings, and it’s always a winner. It’s a bit like my no-bake cheesecake; it looks impressive but is surprisingly simple to pull off. This cod fish sandwich is perfect when you’re craving something substantial and delicious but don’t want to spend hours in the kitchen. It’s that reliable recipe that always delivers.
How do I make a Crispy Cod Sandwich?
Quick Overview
Making this incredible cod fish sandwich is a straightforward process that boils down to a few key steps. We’ll start by preparing our cod fillets, ensuring they’re ready for their crispy coating. Then, we’ll whip up a simple, yet spectacular, batter that guarantees that signature crunch. The fish will get a quick dip and then into the hot oil it goes for a few minutes until it’s perfectly golden. While it’s draining, we’ll toast our buns and get our favorite toppings ready. Assembly is the final, glorious step. It’s all about achieving that ideal balance of crispy fish, soft bun, and fresh toppings.
Ingredients
For Crispy Cod: For the Crispy Cod: For the Crispy Cod: For the Crispy Cod: For the Crispy Cod: For the
– 1.5 lbs cod fillets, skinless and boneless (look for thicker pieces if possible, about 1-inch thick)
– 1 cup all-purpose flour
– 1/2 cup cornstarch (this is my secret for extra crispiness!)
– 1 teaspoon baking powder (for lightness)
– 1 teaspoon salt
– 1/2 teaspoon Black Pepper
– 1/4 teaspoon paprika (for a hint of color and warmth)
– 1/4 teaspoon garlic powder
– 1/2 cup ice-cold beer or club soda (the colder, the better! This makes for a crispier batter)
– 1 large egg, lightly beaten
– Vegetable oil or canola oil, for frying (enough to come about 2 inches up in your pot)
For the Sandwich Assembly:
– 4-6 sturdy hamburger buns or brioche buns
– Tartar sauce (store-bought or homemade is fine!)
– Shredded lettuce
– Sliced tomatoes
– Pickles (dill or bread and butter, your choice!)
– Lemon wedges, for serving
Step-by-Step Instructions
Step 1: Preheat & Prep Pan
First things first, let’s get our frying station ready. Pour your chosen oil into a heavy-bottomed pot or Dutch oven – you want at least 2 inches of oil. Heat it over medium-high heat until it reaches about 350°F (175°C). If you don’t have a thermometer, don’t worry! You can test the oil by dropping a tiny bit of batter into it. If it sizzles immediately and floats, it’s ready. While the oil heats up, pat your cod fillets very dry with paper towels. This is crucial for getting that batter to stick and for a good crisp. Cut the cod into portions if they are very large, aiming for pieces that will fit nicely in your buns. Season the fish lightly with a pinch of salt and pepper.
Step 2: Mix Dry Ingredients
In a medium bowl, whisk together the flour, cornstarch, baking powder, salt, pepper, paprika, and garlic powder. Make sure everything is well combined. This blend is key to that light, shatteringly crisp coating. I always give it a good whisk to break up any lumps and ensure the spices are evenly distributed. Getting this step right means you won’t have pockets of unseasoned flour on your delicious fish.
Step 3: Mix Wet Ingredients
In a separate, smaller bowl, whisk together the ice-cold beer (or club soda) and the lightly beaten egg. The colder your liquid, the more tender and crisp your batter will be. I’ve tried room temperature liquids before, and trust me, it makes a noticeable difference. You want it to be super cold, almost frosty if you can manage it.
Step 4: Combine
Now, pour the wet ingredients into the dry ingredients. Whisk gently until just combined. It’s okay if there are a few small lumps; you don’t want to overmix this batter. Overmixing develops the gluten in the flour, which can make your coating tough instead of light and crispy. You’re looking for a thick, pancake-like consistency. If it seems too thick, you can add a tiny splash more beer or club soda, a tablespoon at a time. If it’s too thin, a little more flour and cornstarch.
Step 5: Prepare Filling
While the oil is heating, gather and prepare all your sandwich fixings. Toast your buns lightly – I love to do this on a dry skillet or under the broiler for just a minute until they’re golden and slightly crisp. Spread a generous amount of tartar sauce on the bottom half of each bun. Pile on your shredded lettuce, then the sliced tomatoes. Have your pickles ready to go. The fresher these toppings are, the better your sandwich will be!
Step 6: Layer & Swirl
This step is about getting the fish ready to fry. Working one piece at a time, dip a cod fillet into the batter, ensuring it’s fully coated. Let any excess batter drip off for a second. Carefully place the battered cod into the hot oil. Don’t overcrowd the pot; fry in batches if necessary. Overcrowding will lower the oil temperature and result in greasy fish. You’ll see the edges start to bubble and crisp up almost immediately.
Step 7: Bake
Fry the cod for about 4-6 minutes per side, or until it’s a deep golden brown and cooked through. The exact time will depend on the thickness of your fillets. You want the fish to flake easily with a fork. Use a slotted spoon or spider strainer to gently remove the fish from the oil and place it on a wire rack set over a baking sheet. This allows the excess oil to drip away, keeping it crispy. Sprinkle with a little extra salt while it’s still hot – it really makes a difference!
Step 8: Cool & Glaze
While the fish is draining and cooling slightly, make sure your buns are ready and toppings are within reach. You don’t want that perfectly fried cod sitting around too long; it’s best enjoyed fresh and hot! If you were making a glaze, this would be the time to prepare it, but for this sandwich, the delicious tartar sauce is our “glaze” of sorts, adding that creamy, tangy component.
Step 9: Slice & Serve
Now for the moment of truth! Place a piece of the crispy cod on top of the prepared bottom bun. Add a few extra pickles or a slice of tomato if you like. Crown it with the top bun. Serve immediately with lemon wedges on the side for a bright, zesty squeeze. The aroma alone will have everyone at the table excited!
What to Serve It With
This cod fish sandwich is a meal in itself, truly, but if you’re looking to round out the meal or serve it as part of a bigger spread, I have a few go-to pairings that just work wonders. For a casual Breakfast, I love it alongside a simple cup of strong coffee and maybe some crispy home fries. It’s surprisingly satisfying to start the day with. When it’s time for Brunch, this sandwich shines. Imagine it as part of a relaxed brunch spread with a fresh, vibrant coleslaw, maybe some Sweet Potato fries, and a light, crisp beverage like iced tea or a sparkling lemonade. For a simple Dessert, or perhaps as a late-night treat, while this sandwich isn’t a dessert itself, it’s often the savory counterpoint to something sweet I might have made earlier, like a fruit crumble. And for those Cozy Snacks, this cod fish sandwich is pure comfort. I often serve it with a side of baked beans or some seasoned sweet potato wedges. My family loves when I make these on a Friday night; it feels like a special occasion without any fuss, and it’s always a crowd-pleaser. It’s become our unofficial “end-of-the-week” treat!
Top Tips for Perfecting Your Cod Fish Sandwich
Over the years of making countless cod fish sandwiches, I’ve picked up a few tricks that really elevate it from good to downright unforgettable. When it comes to the cod itself, Zucchini Prep isn’t really applicable here, but for the fish, make sure it’s completely dry. I can’t stress this enough! Any moisture will fight with the batter and prevent that glorious crisp. If you’re buying a whole fillet, cut it into manageable portions *before* battering, making sure each piece is roughly the same thickness for even cooking. For the batter, the key is not to overmix. You want a few lumps; that’s what gives you those delightful nooks and crannies that get super crispy. Think of it like making pancakes – you don’t want a completely smooth batter. And always, always use ice-cold liquid. I’ve learned the hard way that room temperature liquids just don’t yield the same crispy results. My Swirl Customization comes in with the serving; I love adding a touch of sriracha to my tartar sauce for a little kick, or maybe some finely chopped capers for extra zing. It’s all about personalizing that finishing touch. For Ingredient Swaps, if you can’t find cod, haddock or even tilapia can work, though cod has that perfect flaky texture. I’ve also successfully used a gluten-free flour blend in the batter with a 1:1 ratio, though sometimes it needs a touch more liquid. Baking Tips are mostly about frying technique: maintain that oil temperature around 350-360°F. If it gets too hot, the outside will burn before the inside is cooked. Too cool, and it’ll be greasy. A good thermometer is your friend here, but the “drop of batter” test works too. Lastly, Glaze Variations aren’t a big part of this specific sandwich, but if you were to add one, a lemon-dill aioli would be heavenly. For this recipe, though, the tartar sauce is perfection. I once forgot to add the cornstarch and the batter just wasn’t as crunchy, so I learned to never skip that little bit of magic!
Storing and Reheating Tips
Now, if by some miracle you have leftovers of this amazing cod fish sandwich, knowing how to store and reheat it properly is key to enjoying it again. For Room Temperature storage, it’s best to eat this sandwich fresh. If you absolutely must leave it out for a short while, wrap it tightly in foil, but try to consume within an hour or two at most. The bun can get soggy, and the crispiness will fade. For Refrigerator Storage, this is your best bet for leftovers. Store the fried cod fillets separately from the buns and toppings. Wrap the cod tightly in plastic wrap, then place it in an airtight container. It should stay good for about 2-3 days. Keep your toppings and tartar sauce in separate containers. When you’re ready to reheat, do NOT microwave the cod. It will steam the fish and make it mushy. Instead, the best method is in the oven or an Air Fryer. For the oven, preheat it to around 375°F (190°C). Place the cod on a baking sheet lined with parchment paper and bake for about 8-10 minutes, or until heated through and crispy again. In an air fryer, set it to 350°F (175°C) for about 5-7 minutes, checking to ensure it’s hot and crisp. Reheat buns separately by toasting them lightly. For Freezer Instructions, I don’t typically freeze the assembled sandwich, but you can freeze the fried cod fillets. Let them cool completely, then wrap them individually in plastic wrap, followed by a layer of foil, and place them in a freezer-safe bag or container. They can last for up to 2-3 months. Thaw overnight in the refrigerator before reheating using the oven or air fryer method. Glaze Timing Advice: if you were to use a separate glaze, I’d apply it *after* reheating the fish and just before serving, to maintain its texture and flavor.
Frequently Asked Questions
Final Thoughts
I really hope you give this Ultimate Crispy Cod Fish Sandwich a try. It’s more than just a recipe to me; it’s a taste of nostalgia, a reminder of simple joys, and proof that you can create something truly spectacular right in your own kitchen. The way the crispy batter gives way to the tender, flaky cod, all nestled in a soft bun with those classic toppings – it’s just pure happiness on a plate. It’s the perfect answer when you’re craving something incredibly satisfying without all the fuss. If you love this, you might also enjoy my Crispy Fried Shrimp Po’ Boy recipe for another seafood sandwich delight, or my Classic Fish and Chips for that traditional take. I can’t wait to hear how your cod fish sandwich turns out! Please leave a comment below and let me know your favorite toppings or any variations you tried. And if you share a photo on social media, be sure to tag me – I’d love to see it!

Cod Fish Sandwich
Ingredients
Main Ingredients
- 2 6-oz Cod fillets
- 0.5 cup All-purpose flour
- 0.5 teaspoon Salt
- 0.25 teaspoon Black pepper
- 1 cup Vegetable oil For frying
- 2 burger buns Burger buns
- 0.25 cup Tartar sauce
- 2 leaves Lettuce
Instructions
Preparation Steps
- In a shallow dish, combine flour, salt, and pepper.
- Dredge the cod fillets in the flour mixture, ensuring they are fully coated.
- Heat vegetable oil in a large skillet over medium-high heat.
- Carefully place the floured cod fillets into the hot oil and fry for 3-4 minutes per side, or until golden brown and cooked through.
- Remove the cod from the skillet and place on a plate lined with paper towels to drain excess oil.
- Toast the burger buns.
- Spread tartar sauce on the bottom bun, top with lettuce, then the fried cod, and finally the top bun.


